washi tape

PINKFRESH STUDIO HOLIDAY RELEASE

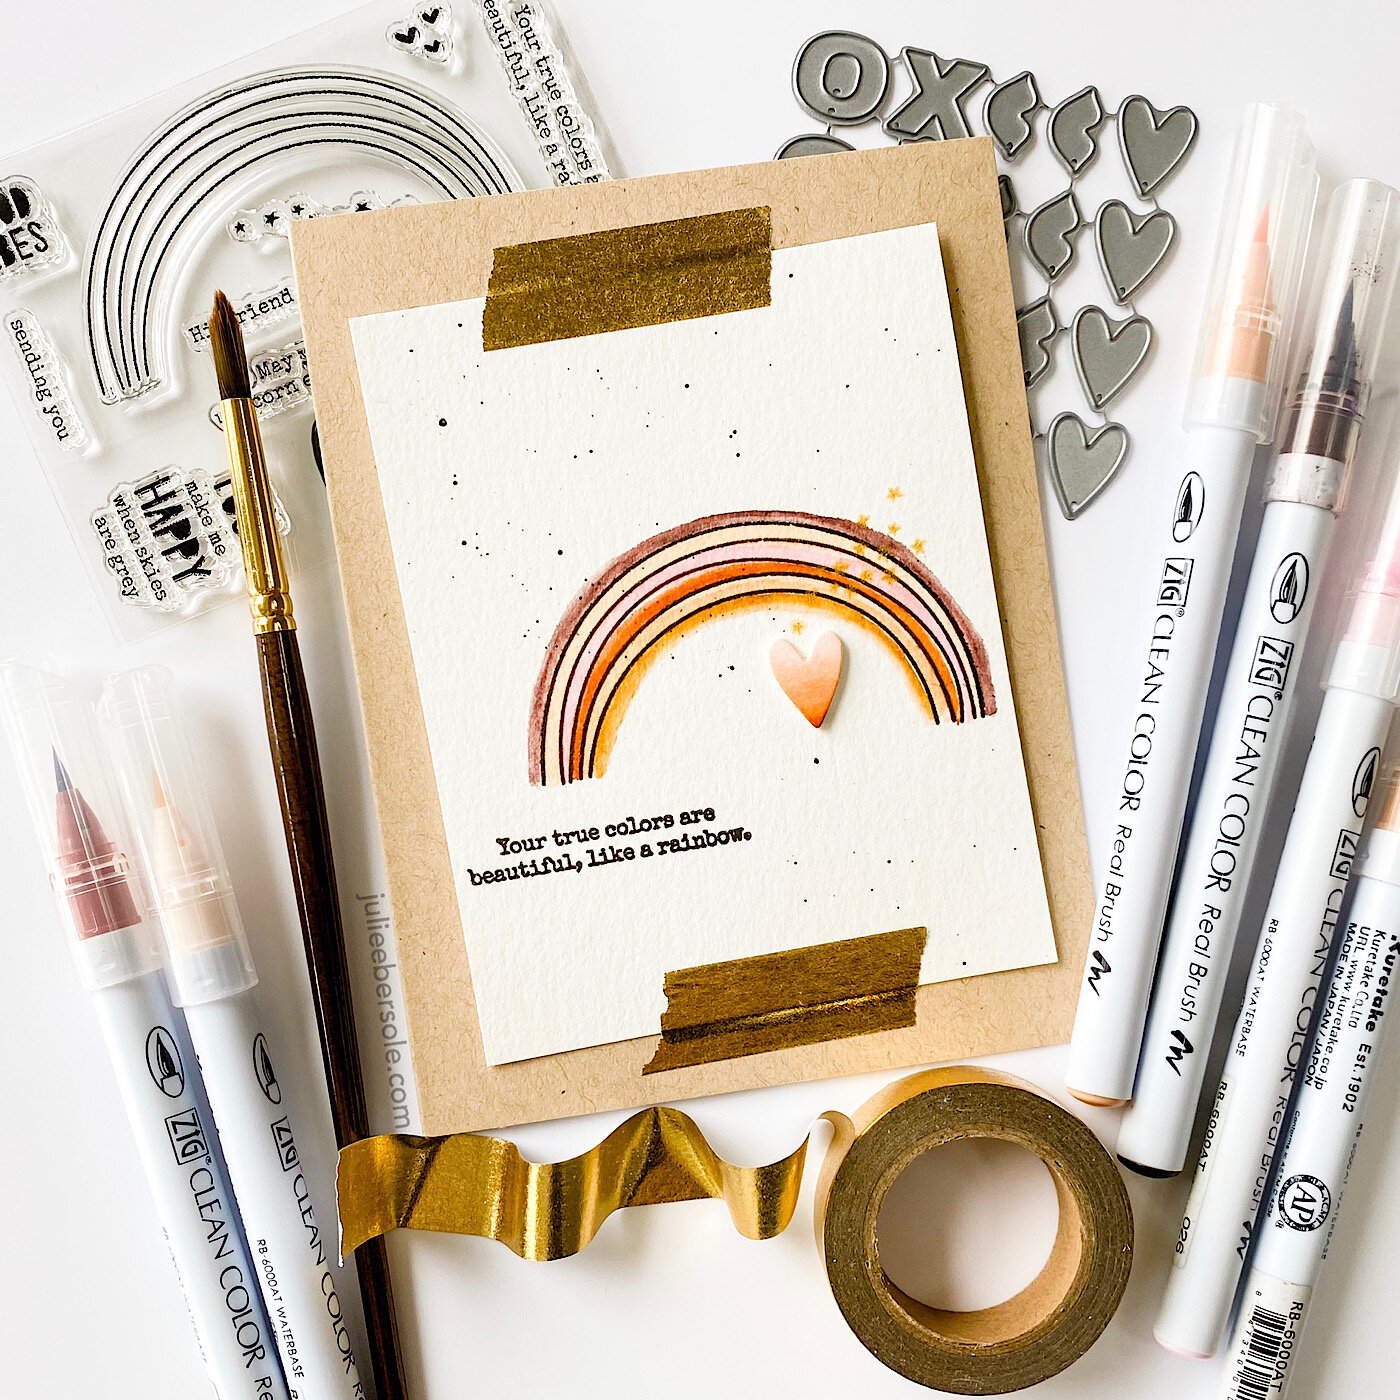
Pinkfresh Studio has a new holiday release and I’m playing along on their Instagram Hop! There’s prizes and GOBS of eye candy, so if you’d like to check it out—which I highly recommend you do—you can hit my Instagram HERE and check out all the details.

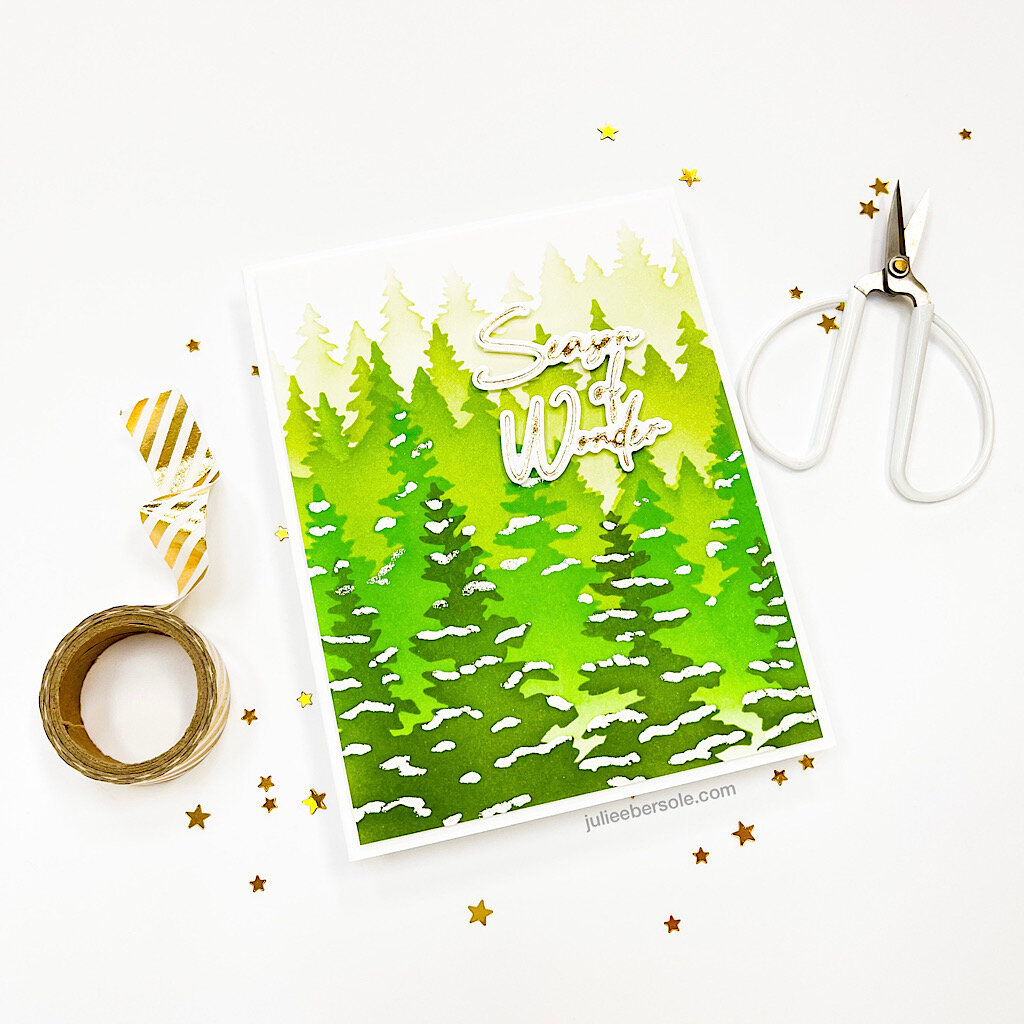
Being a girl from the Pacific Northwest, this Wintry Forest Stencil really got me—love! If you haven’t worked with Pinkfresh Studio’s stencils before, they are numbered so you know exactly in which order to proceed. BUT, do you see the white “snow” detail on my trees? That’s stencil #6 in the set; technically, it would be the last, right? But to create the illusion of snow on the branches, I actually STARTED with #6, using a Versamark PEN to hit all those spots. Then I removed the stencil and applied white detail embossing powder and heat embossed. Afterwards, I grabbed a range of green inks and went back to #1 and started with the softest hue of green ink, and used a subsequently darker color with each stencil layer. I used a dry cloth to buff off any remaining ink that was sitting on top of the embossing lines.

Trimmed down to create a nice layer on a simple white base card.

After hot foiling the sentiment, it was die cut and popped up on the card front. Super simple, but I love ow striking it is! I personally LOVE hot toil stamping and am thrilled to see more companies adding this to their product lines.

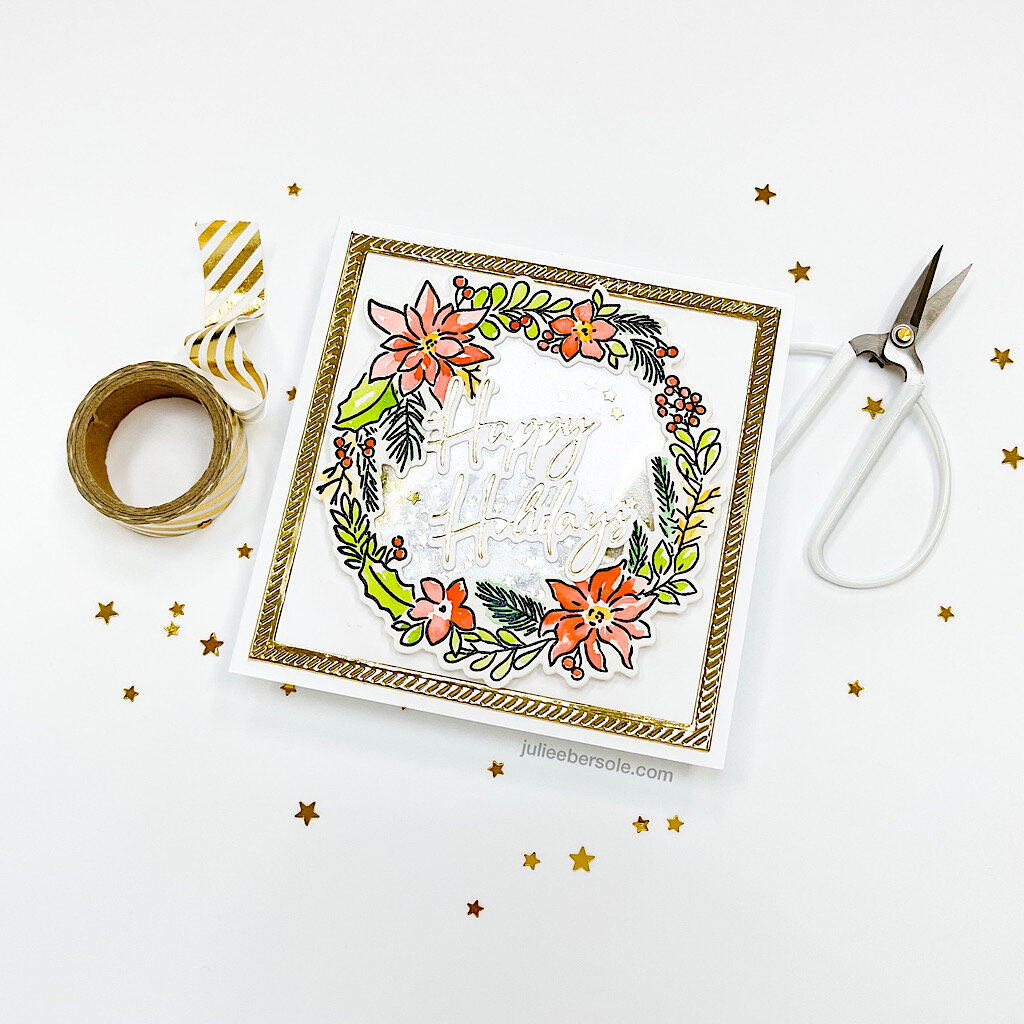
Here, I used the wreath stamp image to create a shaker on a square card; the image was stamped with black pigment ink and heat embossed with clear embossing powder, then watercolored. The gold frame compliments the hot foiled sentiment quite nicely here without being over-bearing. I had a heckuva time shooting this—foil and acetate are so reflective; this card has a lot of sparkle and glimmer in real life that I just couldn’t pick up with the camera.

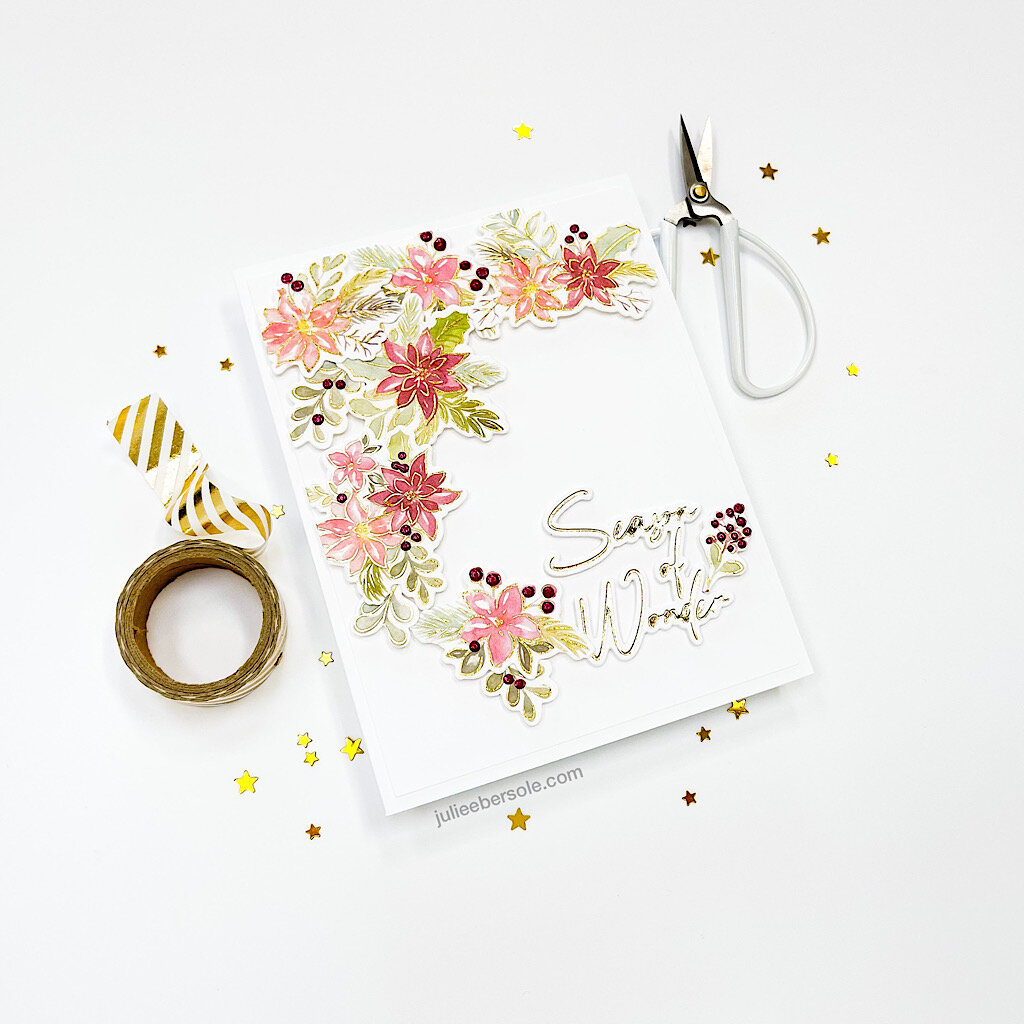
The Poinsettia Washi Tape and coordinating die make cards like this a cinch because you can skip the coloring; it’s all done for you! The tape is gorgeous and features gold foiling details. I just spread the tape smoothly along a piece of card stock measuring 4.25 x 11”, die cut everything and positioned them in a pleasing way. I used some NUVO drops to accent the berries. FYI, you CAN cut apart some of the die cuts to create your arrangements—the Crafty Po-Po will not come after you. Truth.

Here is another variation of this beautiful washi tape, using the wreath. Again, sooooooo very simple! I’m honestly not much of a colorist (if I have to color, I usually reach for watercolors because it’s the fastest) so the idea of being able to skip the process of hand coloring when mass producing holiday cards is tremendously appealing to me—the time-savings is HUGE!!!

Hope you found these ideas inspiring and thanks for stopping by!


The Pinkfresh Studio Holiday release is LIVE; please click HERE to view them all.

Disclosure: Yup, those are affiliate links to the products used in my projects and I make a small commission when you purchase via those links, at no extra cost to you. Thank you for buying all the things!

HUMAN RAINBOW

human-rainbow-001.JPG

Making a card, or art, is an expression of so many things—in this case, I was feeling this (among many other things) and the card just kinda happened. The world is in need of a lot of love right now . . .

human-rainbow-002.JPG

I’ve been asked about what kind of paper to use with the Zig Clean Color Markers. I’ve tried this and that, but I seem to get the best results when I use Canson XL 140#. I cut most of the sheets down to 4.25 x 5.5” for card making. The above panel was initially cut to 3.75 x 5”, and later 3.5 x 4.34” to achieve better visual balance.

I hope you are all staying safe and healthy.


WITHOUT COFFEE

Black and a natural white + hints of copper . . . I’ve been on a neutral kick lately, not sure why, really—just that I keep gravitating towards it.

Clear embossed the cups and coffee makers/pots from A Breve Note all over black card stock and then filled in any gaps with the coffee beans to make this background—LOVE!!! —it’s such a chic look! This black card stock is quite loverly—a nice rich black and 100# weight.

The copper embossing powder I happened to have for the sentiment and the cup looks so good with that Rose-Gold Washi Tape •heart palps•

To-Go Cup was heat embossed onto watercolor paper and watercolored with Clean Color Real Brush Markers + a Pentel Aquash. By the way, if you haven’t seen it, my favorite way to use these markers is demonstrated in the video on this blog post: Neon Watercolor

The Clean Color Markers come in sets (there’s a nice variety of different sized sets), but you can also get the colors individually from Ellen’s, which I love because then I can easily replace the colors I use the most frequently, without having to buy a whole new set.

I know, I know—another messy thread nest. What can I say? When I like something, I use it until I’m sick of it . . . Even tho it’s been a number of years, I am still not sick of messy thread nests, thank you very much. •hair flip•

Such a clean, simple and satisfying card to make . . . •happy sigh•

Cheers!


START WITH A SONG

I just love the watercolor look on this rainbow-esque washi tape.  The little cupped flower sequins remind me of blown glass . . . *swoon*

It didn't take much to pull this all together--just a little colored pencil shading on the stamped images!


I put a little puddle of Multi-Medium on scrap paper and grasped the sequins with my tweezers (super easy when they are cupped like these) and swiped them through the glue and plunked 'em onto the card.

Everyone needs a 5MQ like this in their card-makin' aresenal.

Side note:  5MQ stands for five minute (card-makin') quickie.


RIGHT UP THERE

It's hard to tell in the shot, but there's a lotta glittery sparkles on this window card--it's all over the rainbow, Unicorn's mane and tail, the bottom of those poufy clouds.  I wish it were easier to capture sparkle on camera.

Used the •uber• cool Infinity Cloud dies by Hero Arts to make my window, which was then lined with a piece of tulle (instead of acetate) to float the elements on.  


Any time I see a fab basic shape like this in a nested set, it has to come live at my house.  I can't resist the potential.  I love the saying on this card (from the Pure Magic set); makes me smile--how could you not, if a friend sent you a card that said this??? I mean, come on...