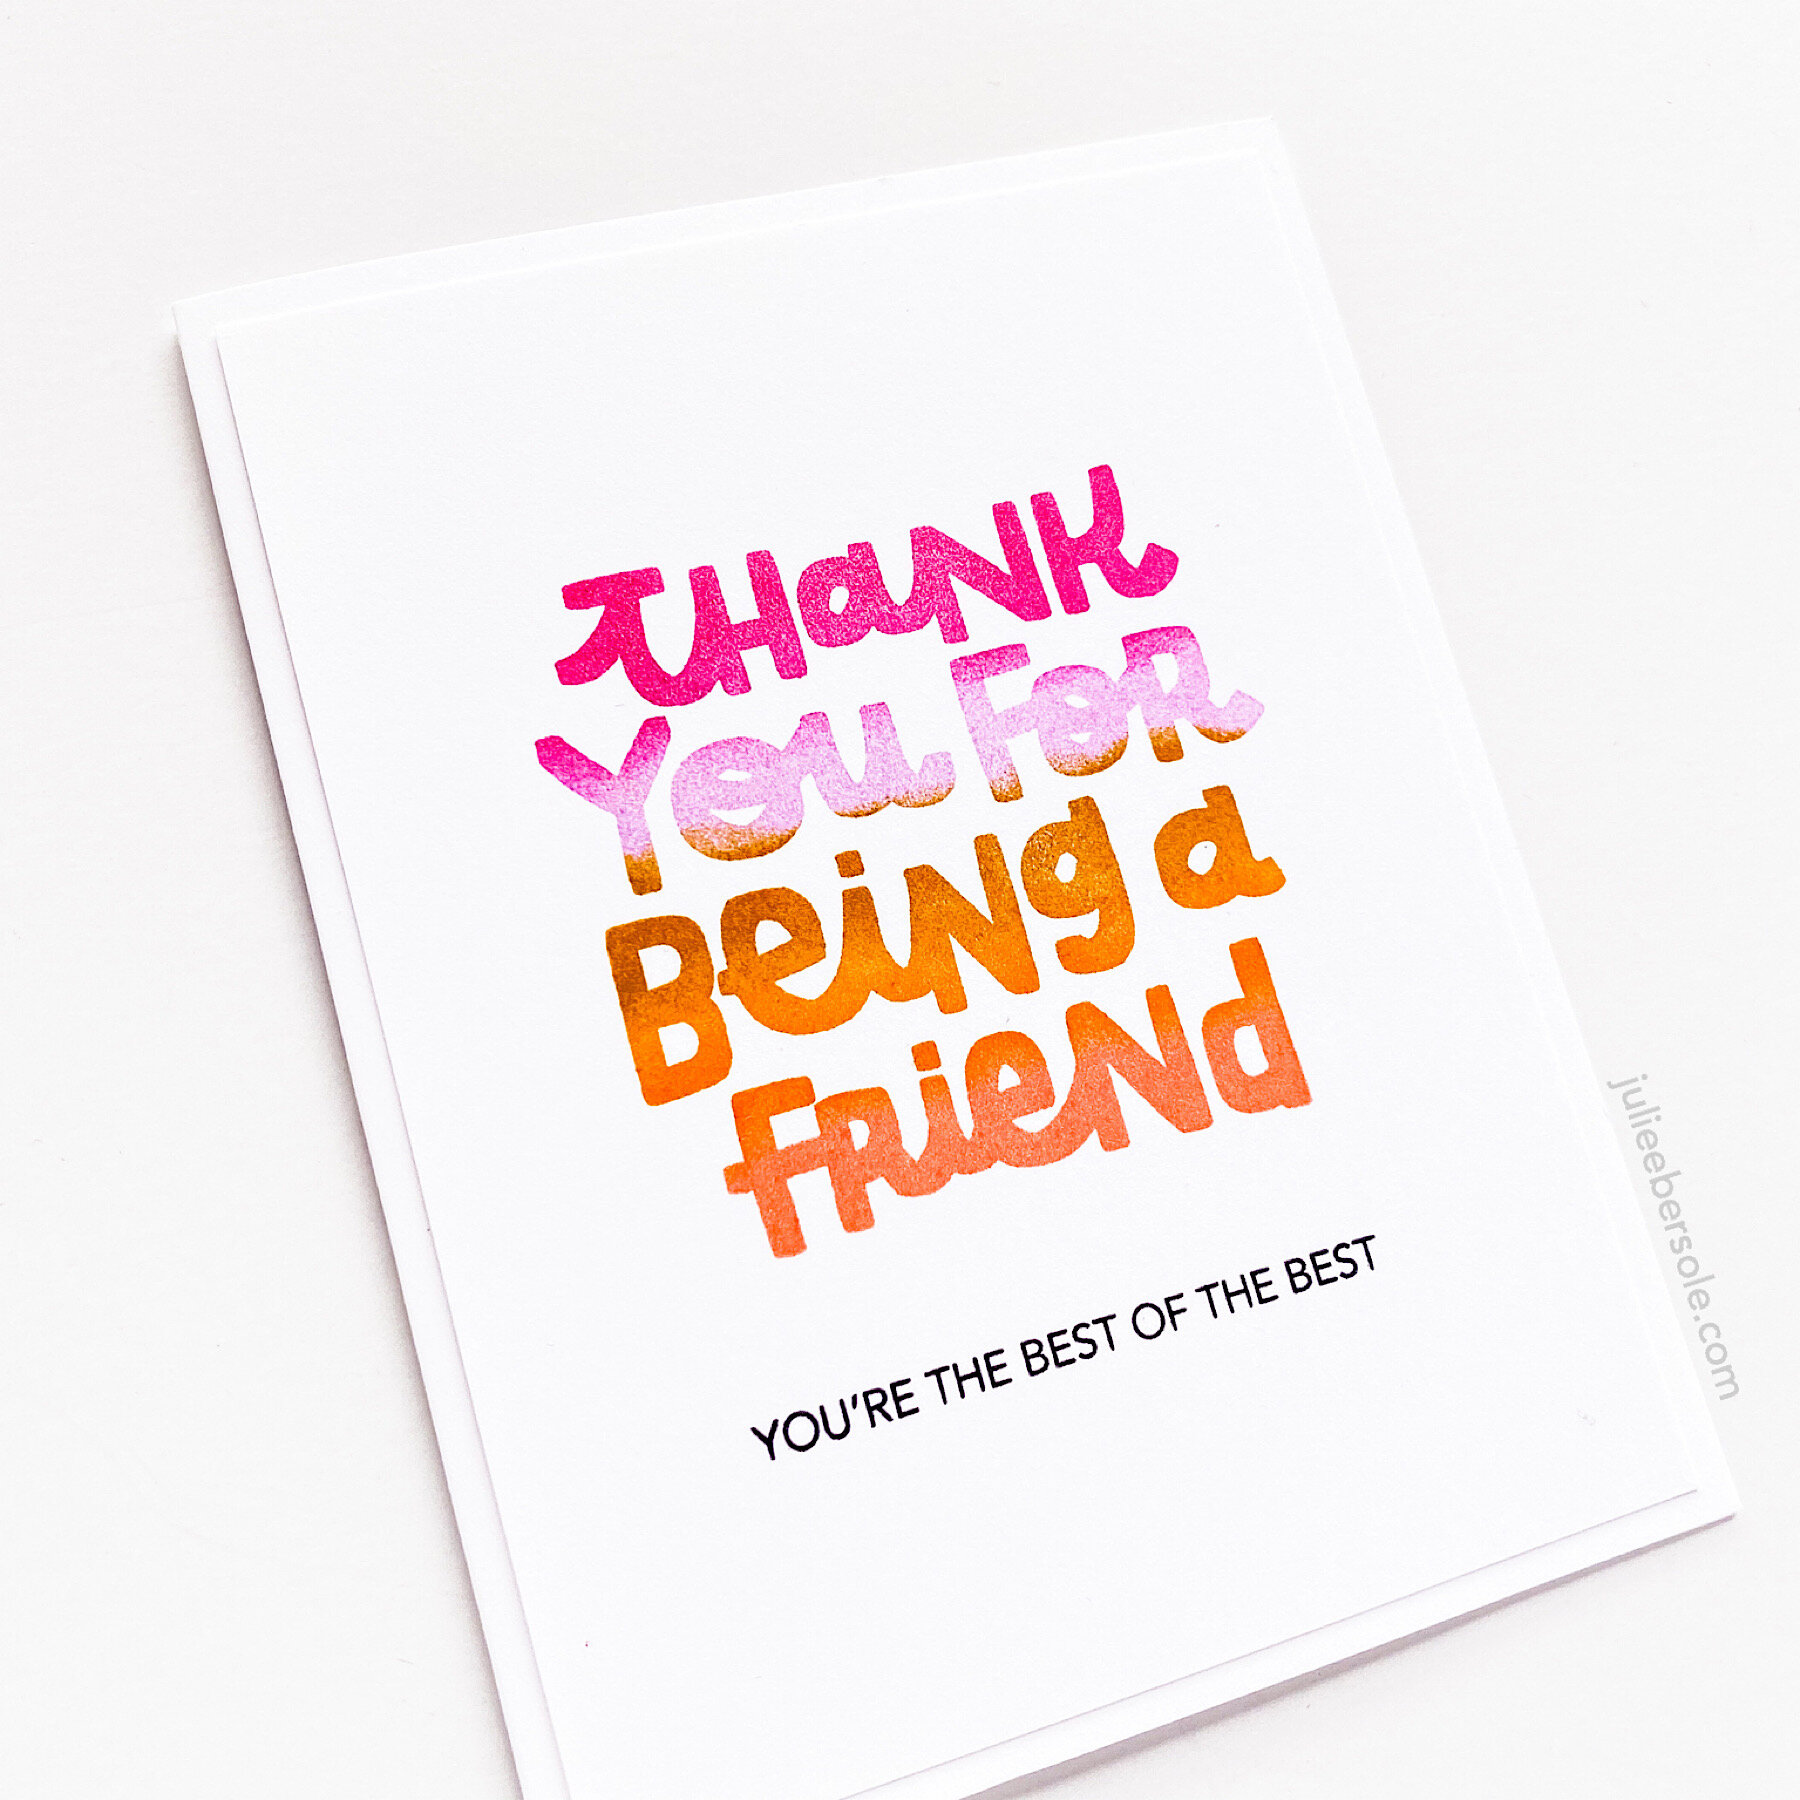
feat. THANK YOU FOR BEING A FRIEND by Brandi Kincaid for Ellen Hutson LLC
That hand-lettering, tho . . . (happy sigh)
More, please!!!
The secret to pulling off the rainbow inking is using a MISTI and blending the edges of the ink where they will transition to the next color by using blending sponges. Note: Even tho the sponges will inevitably become stained, you can wash them with a little “fairy liquid” (dish soap), rinse and squeeze them out and let them air-dry. Or, if you’re like me, you want one for every color of ink so you never have to do that. Just sayin’ . . . Anyhoo, I find these sponges are the best for blending out water-based dye inks directly on the stamp.
Towards the bottom of my post, I have details on a fab deal—a ridiculously cute and FREE Rainbow Stamp set you can get with purchase at Ellen Hutson LLC now through July 19, while supplies last. And trust me, you wantsessss it, Preciousssssss!!!

Click on the photo to see more info at ellenhutson.com
Be sure to read the fine print! And, cute or what?! (all the heart eyes) #givemeallthesolidstamps

SUPPLIES:
Thank You For Being A Friend by Brandi Kincaid, Summer of Stamping Clear Stamps
Smoothies Minis, Creative Expressions / Tonic Nuvo Blending Sponges
Black Mini MISTI Laser Etched Stamping Tool (6-1/8 X 7), Hero Arts / Pink Mini MISTI Laser Etched Stamping Tool (6-1/8 X 7), My Sweet Petunia
Black MISTI Laser Etched Stamping Tool (8-1/8 X 10-1/2), Hero Arts / Pink MISTI Laser Etched Stamping Tool (8-1/8 X 10-1/2), My Sweet Petunia
Disclosure: This post contains affiliate links; if you see something you like, want or need, and purchase via my links, I receive a small commission, at no extra cost to you, which I use to buy coffee, which fuels my creativity and provides energy to make more card ideas. And, pay the rent.