masculine cards

EBE SUMMER OF STAMPING IT'S A JUNGLE

Jungle-2.jpg

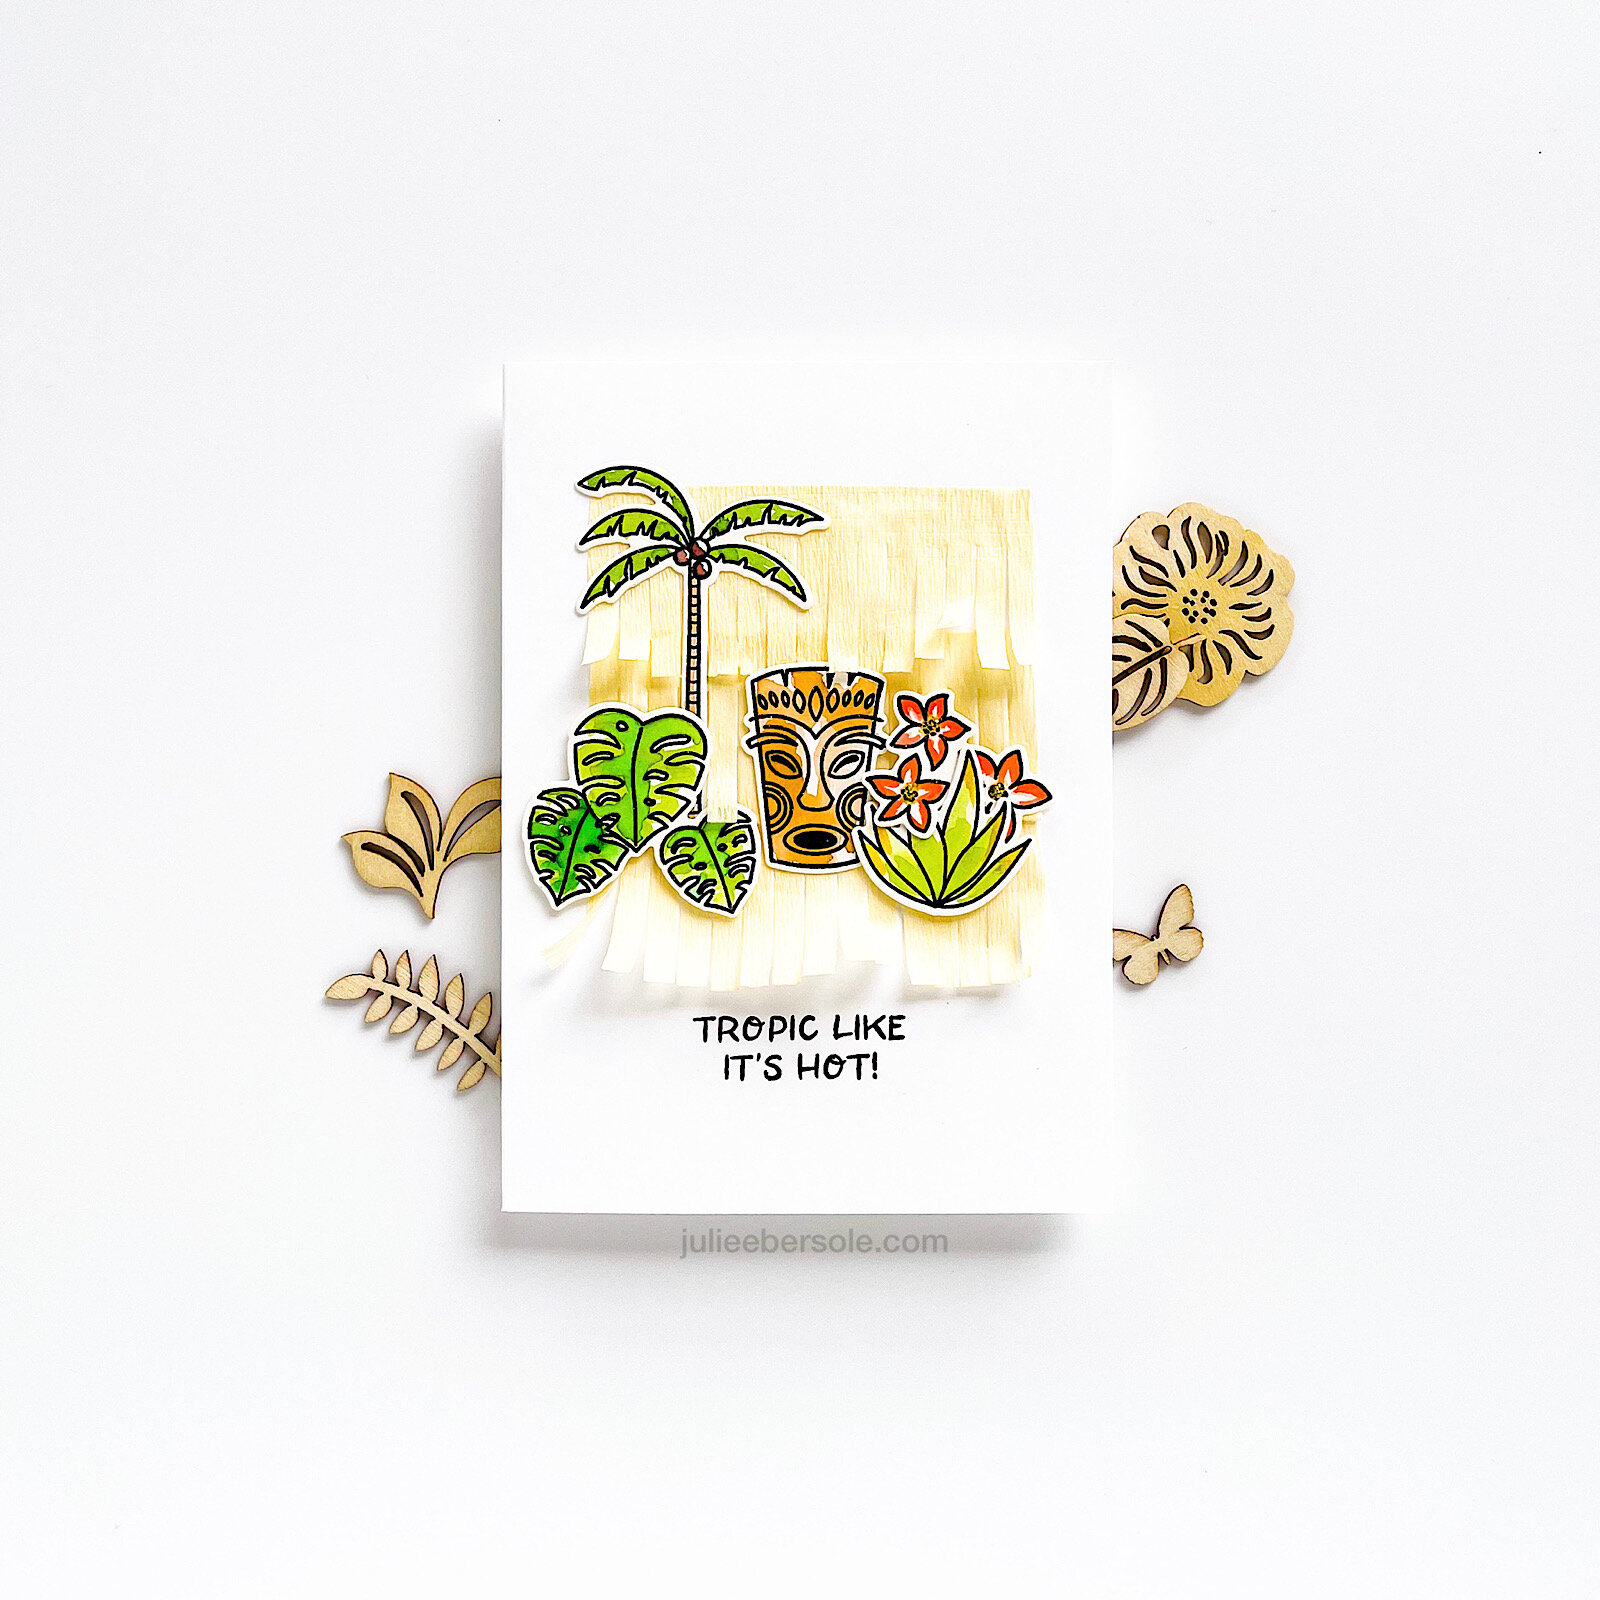
This one features a “grass hut” background using the Never-ending Fringe die and some of that glorious Lia Griffith Crepe Paper! I LOVE how it compliments the whole idea!

Jungle-3.jpg

These tiki guys just CRACK ME!!! And, even tho I’m not an avid fan of the Survivor show, I thought it was HILARIOUS to have the tikis telling you like it is; the inside of the card reads: “Have a wild and wonderful birthday!” The dudes look like they were tie-dyed. LOVE THAT.

Palm fronds borrowed from Aloha Stamps & Dies.

Palm fronds borrowed from Aloha Stamps & Dies.

Here I just cut a circle into my top panel and popped it up on the base card so I could layer all these images—it’s nothing fancy, right?! But it just draws your eye in to all these little details by clustering them together.

Yes, that’s my sloppy watercolor on all these samples; keepin’ it loose and keepin’ it real, my friends! (chortle)

Hope you’ve been enjoying all the eye candy here on the blog with these latest sets! If you haven’t yet, you can subscribe to email updates (scroll down to the bottom of the page, on the right) so you’ll know when I blog the next release’s samples. And, man, it’s a really cute one, too!


If you’d like more info on products that coordinate well with the It’s A Jungle, please visit the release page HERE.

Disclosure: Yup, those are affiliate links to the products used in my projects and I make a small commission when you purchase via those links, at no extra cost to you. Thank you for buying all the things!

MASKED SPOTLIGHT EFFECT

Superduper-bat-signal-001-1.jpg

This is a really fun masking effect that works particularly well for a design like this—I thought this made for a fun birthday card for the guys!

It does take a little bit of forethought and pre-planning, tho.

Did a quick video tutorial on how to do this effect:

 
DESIGN NOTE: Shimmer Pen was brushed over the Big City die cut after it was mounted to the card front.

DESIGN NOTE: Shimmer Pen was brushed over the Big City die cut after it was mounted to the card front.

Whaddya think? If you’ve never done it before, would you give it a try?

And, heads’ up! It’s National Splurge Day! HAH! Anyhoo, if ya’ feel like treatin’ yo’self, here’s a coupon code for ellenhutson.com

Happy masking—and happy splurging!


WITHOUT COFFEE

Black and a natural white + hints of copper . . . I’ve been on a neutral kick lately, not sure why, really—just that I keep gravitating towards it.

Clear embossed the cups and coffee makers/pots from A Breve Note all over black card stock and then filled in any gaps with the coffee beans to make this background—LOVE!!! —it’s such a chic look! This black card stock is quite loverly—a nice rich black and 100# weight.

The copper embossing powder I happened to have for the sentiment and the cup looks so good with that Rose-Gold Washi Tape •heart palps•

To-Go Cup was heat embossed onto watercolor paper and watercolored with Clean Color Real Brush Markers + a Pentel Aquash. By the way, if you haven’t seen it, my favorite way to use these markers is demonstrated in the video on this blog post: Neon Watercolor

The Clean Color Markers come in sets (there’s a nice variety of different sized sets), but you can also get the colors individually from Ellen’s, which I love because then I can easily replace the colors I use the most frequently, without having to buy a whole new set.

I know, I know—another messy thread nest. What can I say? When I like something, I use it until I’m sick of it . . . Even tho it’s been a number of years, I am still not sick of messy thread nests, thank you very much. •hair flip•

Such a clean, simple and satisfying card to make . . . •happy sigh•

Cheers!


BEAR GRILLS

Bear is from All Inside and has two previous accessory sets prior to this one called Bear Ware and Bear Ware 2

Truly, I had no idea of the phenomenon that dressing up Bear would become. My original intention was for him to convey the visual concept of a “hug”, especially holding the heart in that set—the set that started it all. That was all. Umm, that was supposed to be all.

And then, somehow, the idea to give him a few more treasures to hold crept in (Bear Ware). Then, it seemed Bear needed to be outfitted for fall and winter, as well… (Bear Ware 2)

And, now we’ve come around to spring and summer, in Bear Ware 3. I must admit the Weber is due to my Mister’s fondness for BBQing anything and everything that can possibly be grilled… Many of you may already be aware of my secret dinner weapon: Keep the fridge stocked with meats at all times and he will do the cookin’! Heh, heh, heh…! •fist pump•

Bear and his accoutrements were stamped with bleed-proof black ink onto watercolor paper, watercolored with Clean Color Real Brush Markers and a waterbrush, before die cutting, trimming the Weber lid and then subsequently mounting everything to a white card base I’d already prepped with a sentiment and a hand-drawn horizon line.

Smoke is actually steam borrowed from a Breve Note. It’s hard to see in the photos, but the grill, the hot dog and Bear’s nose were given a high gloss sheen using Glossy Accents.

Thanks for stopping by today! Cheers!