video

WAFFLE FLOWER SNEAK PEEK + A GIVEAWAY


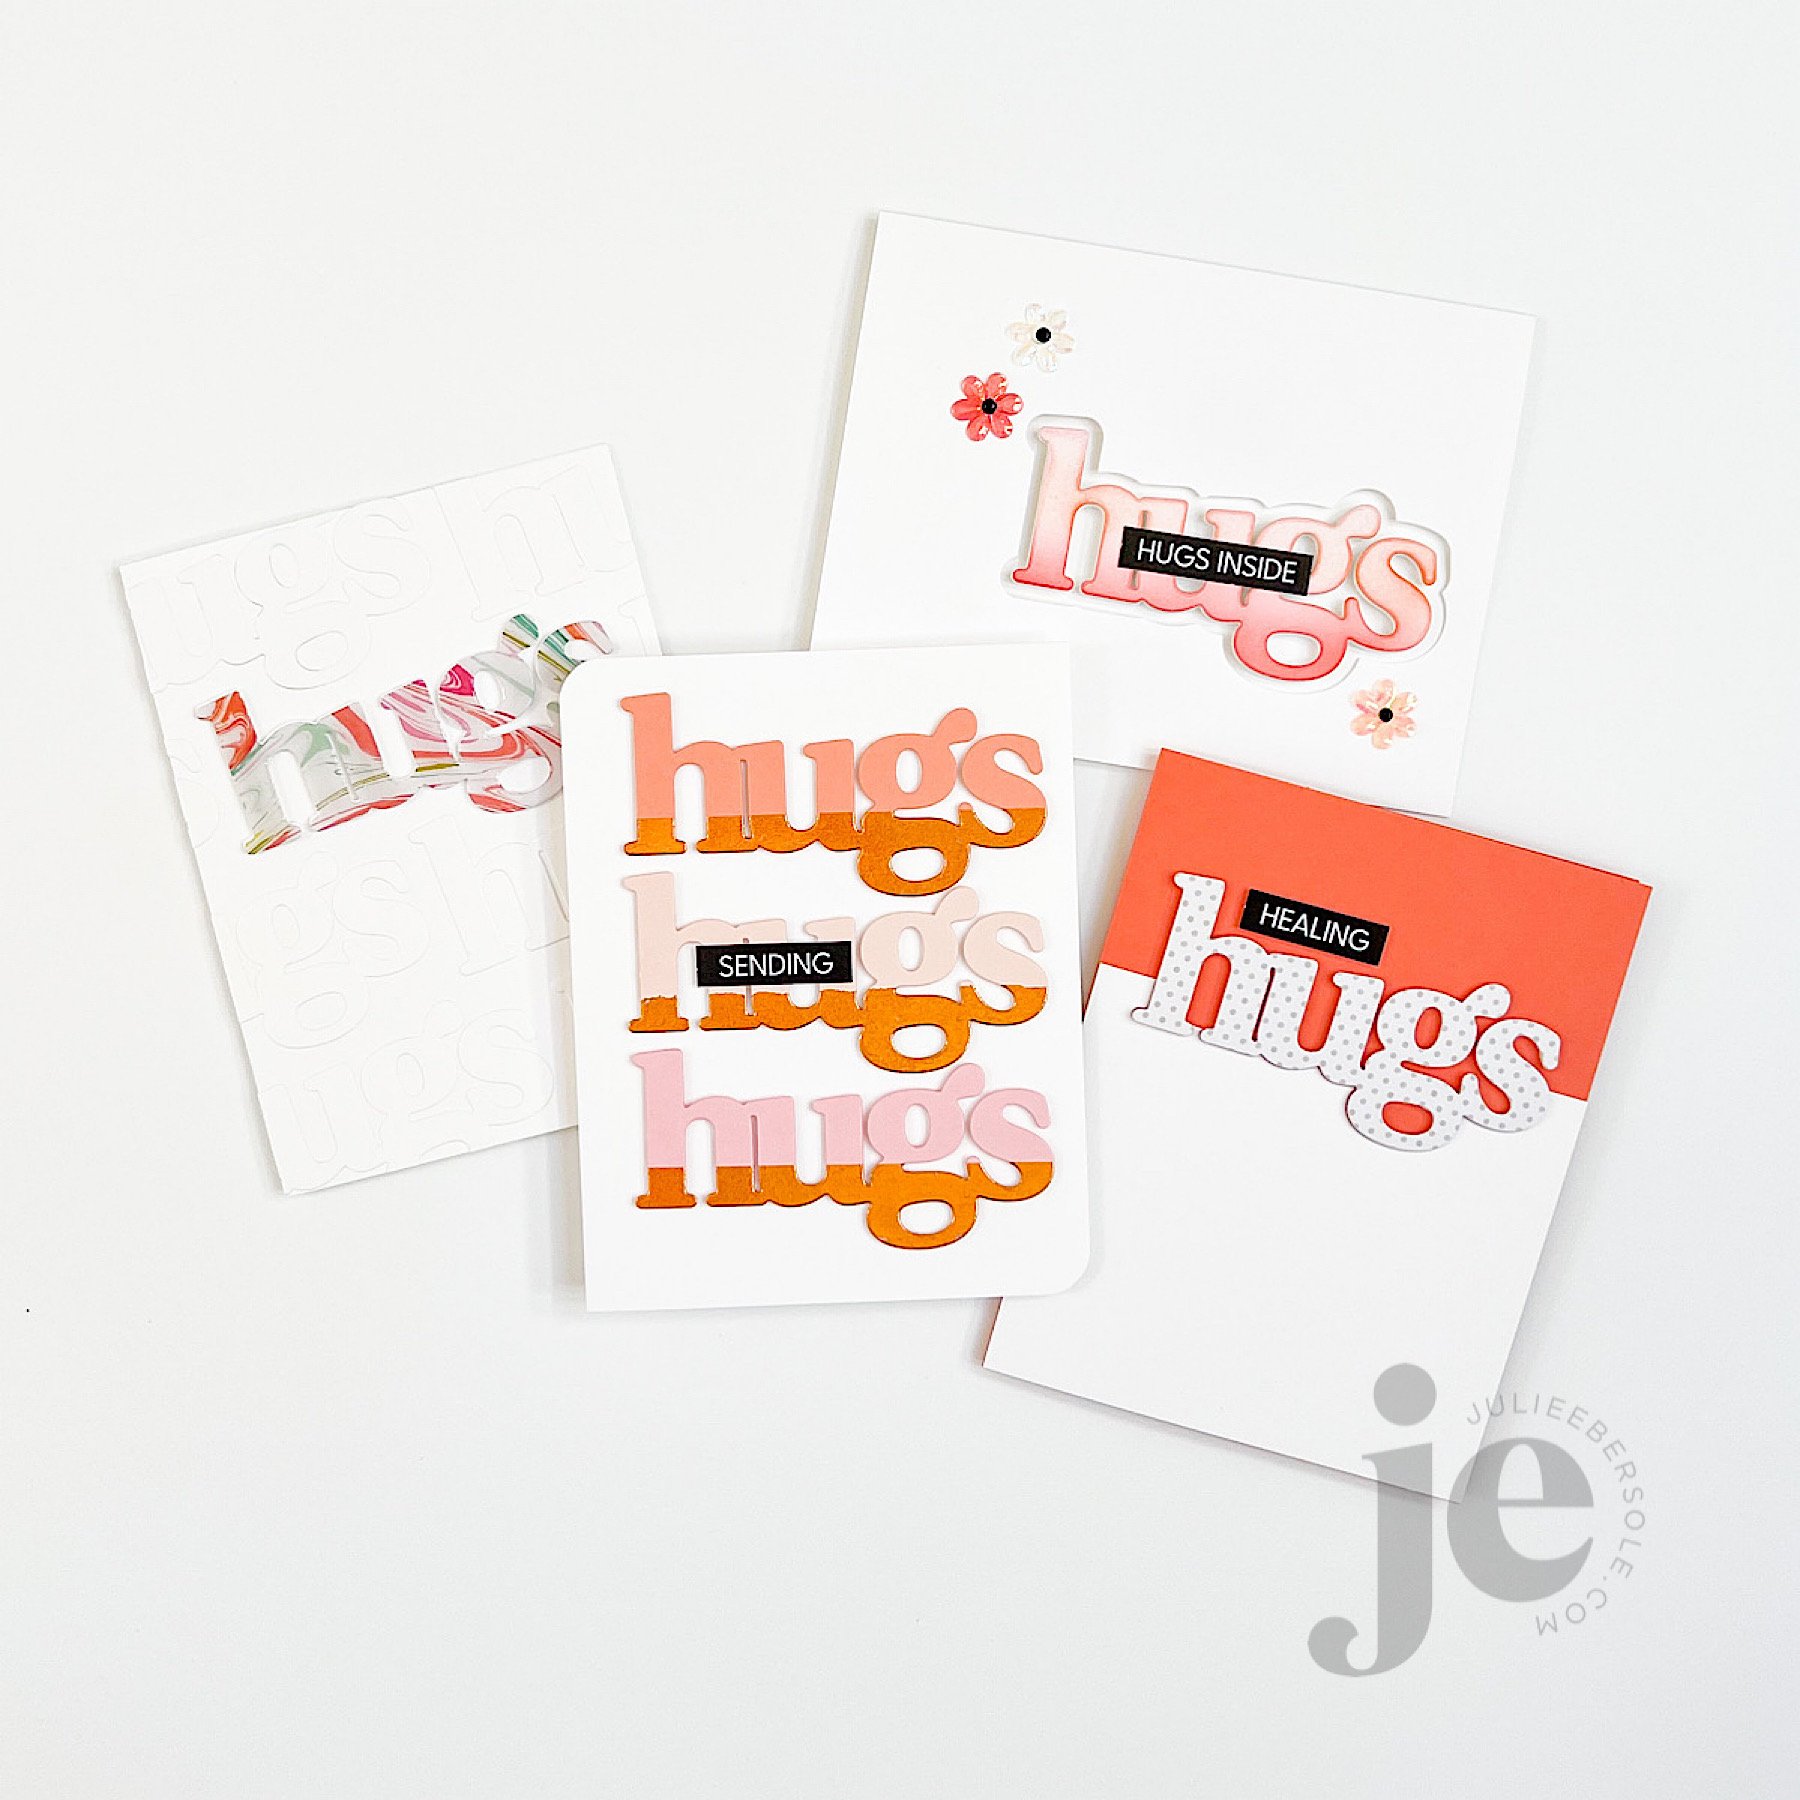
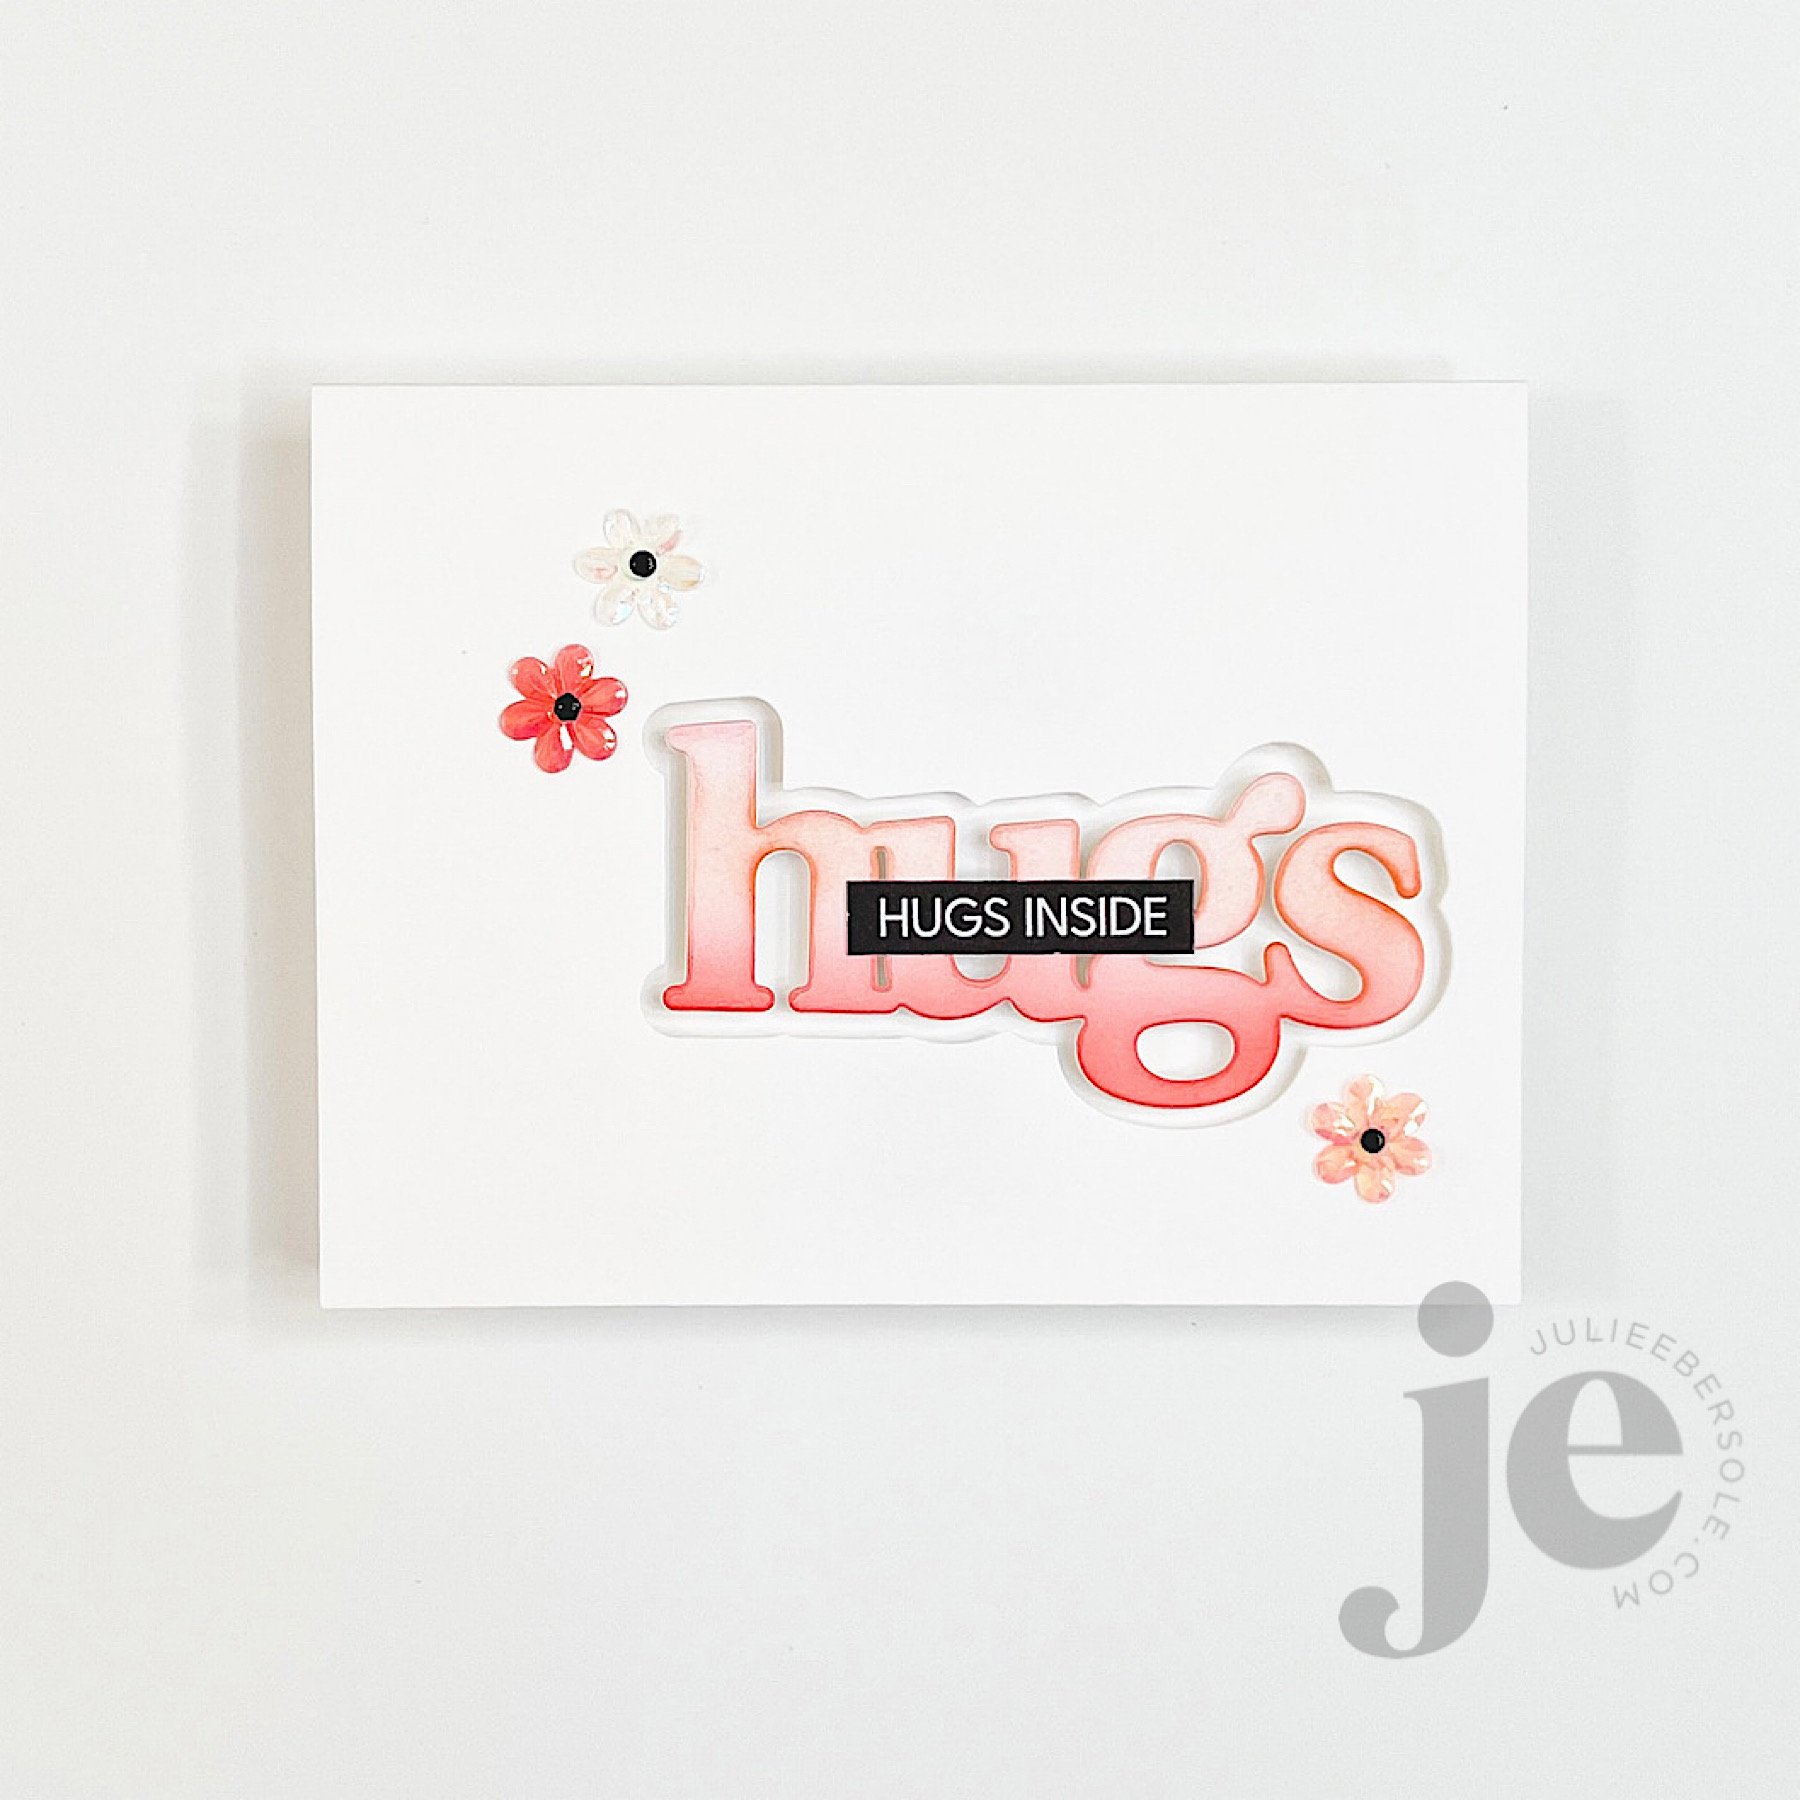
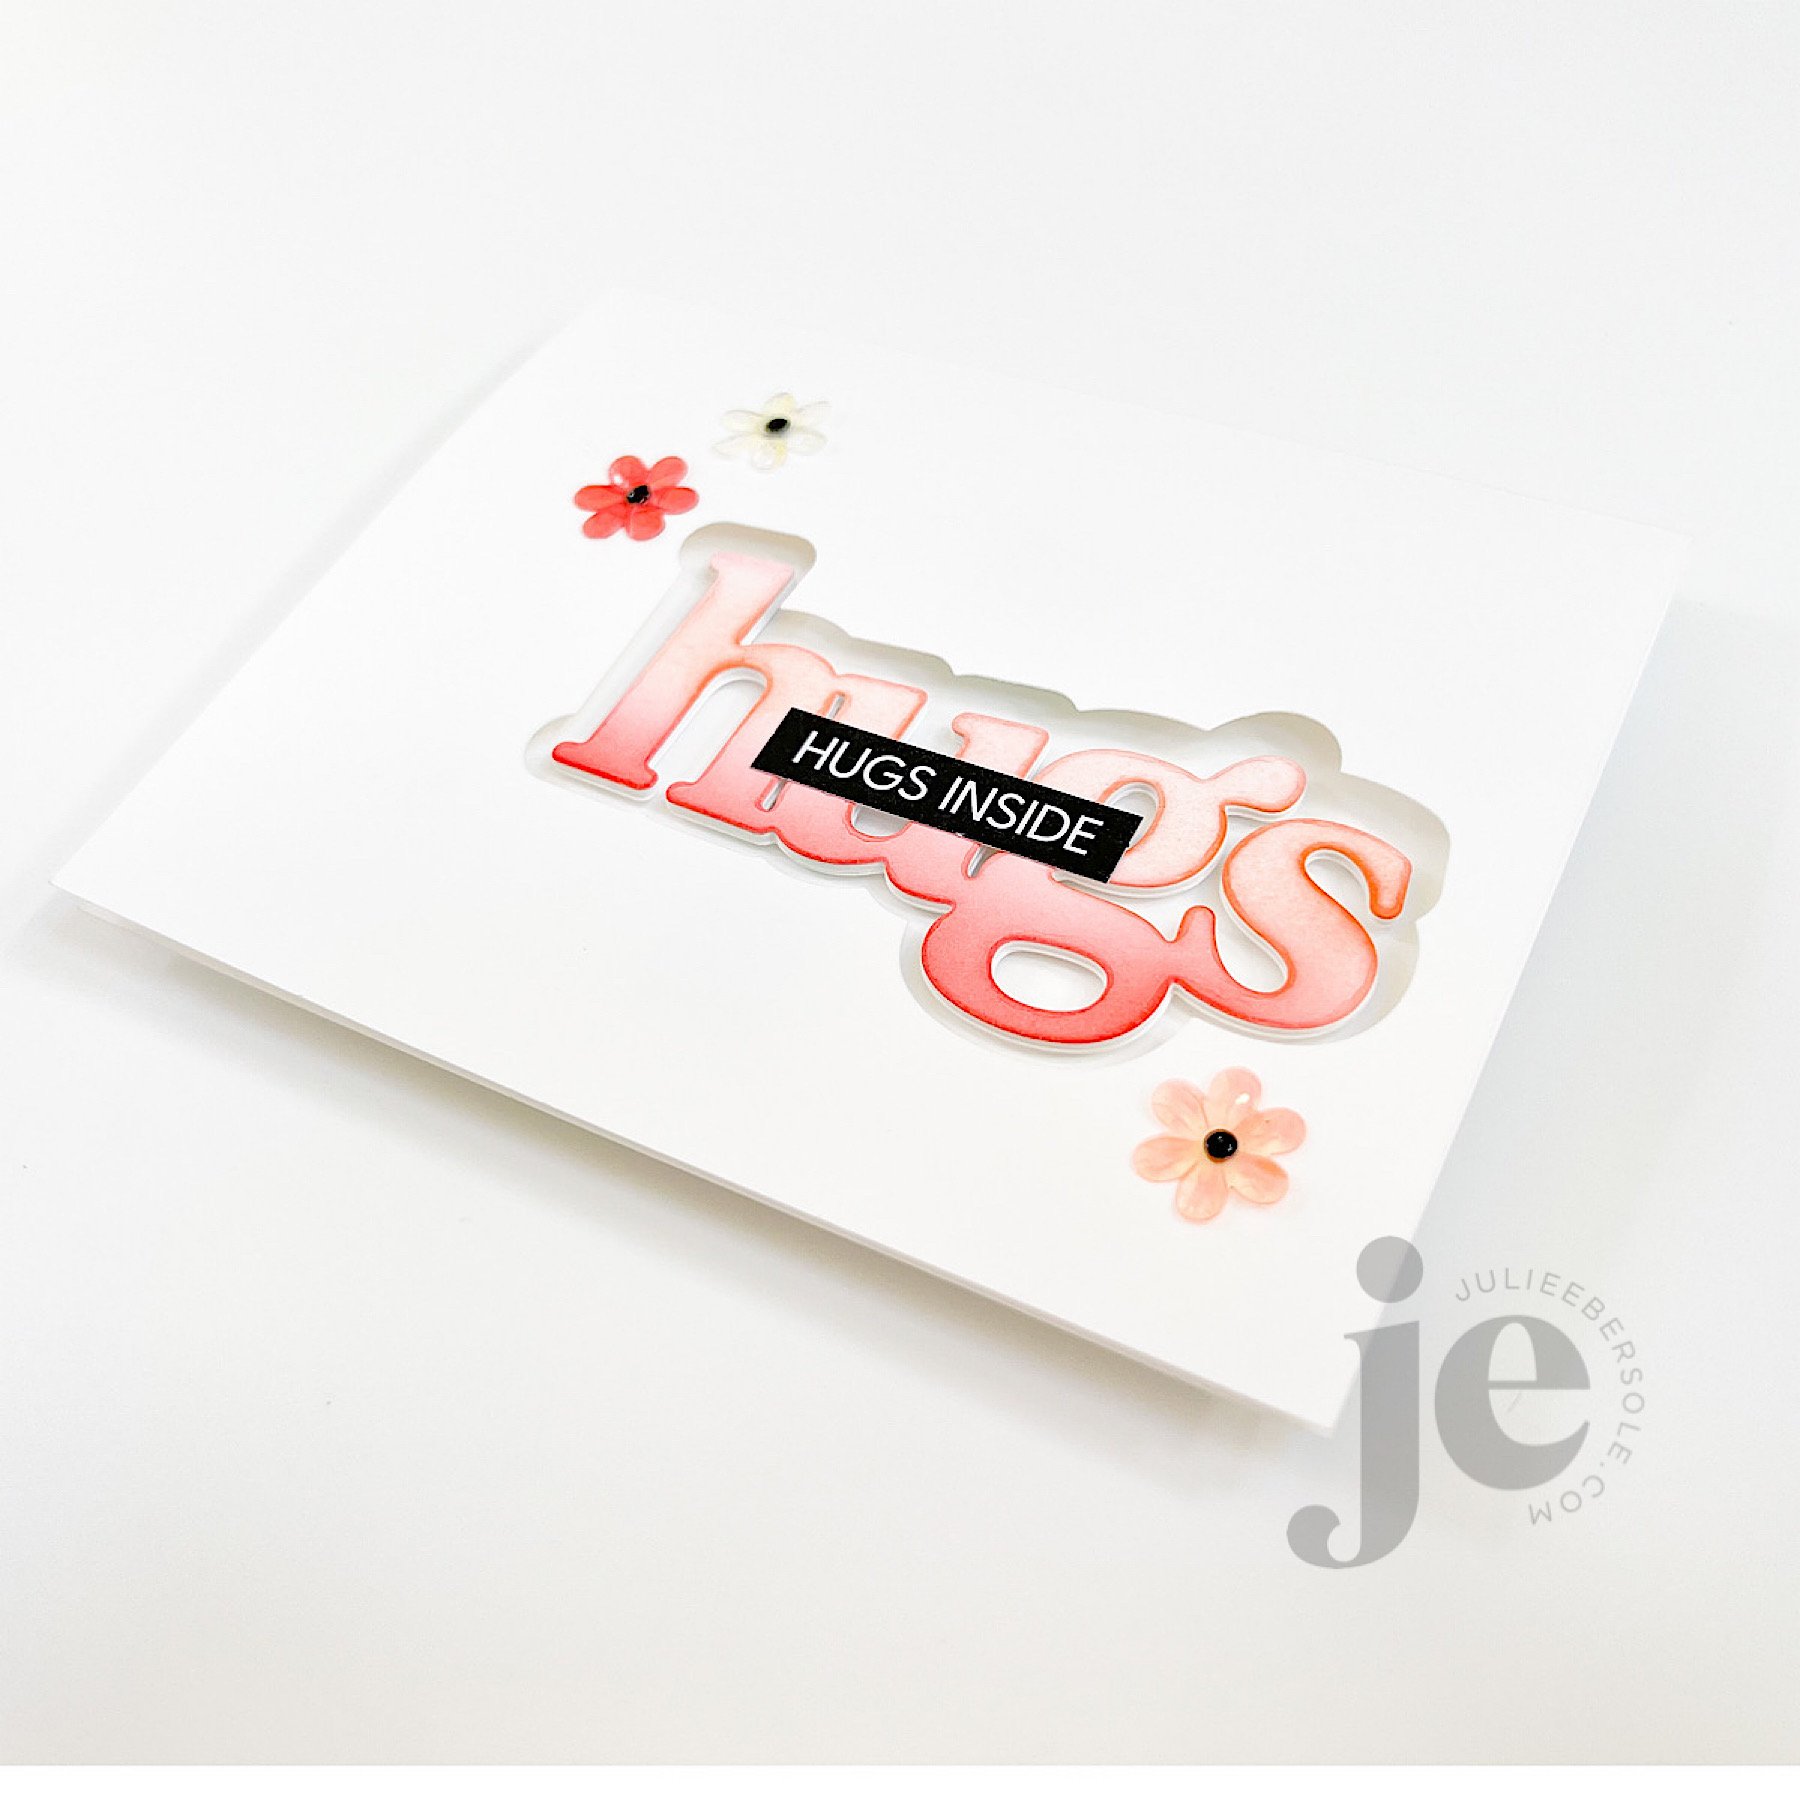
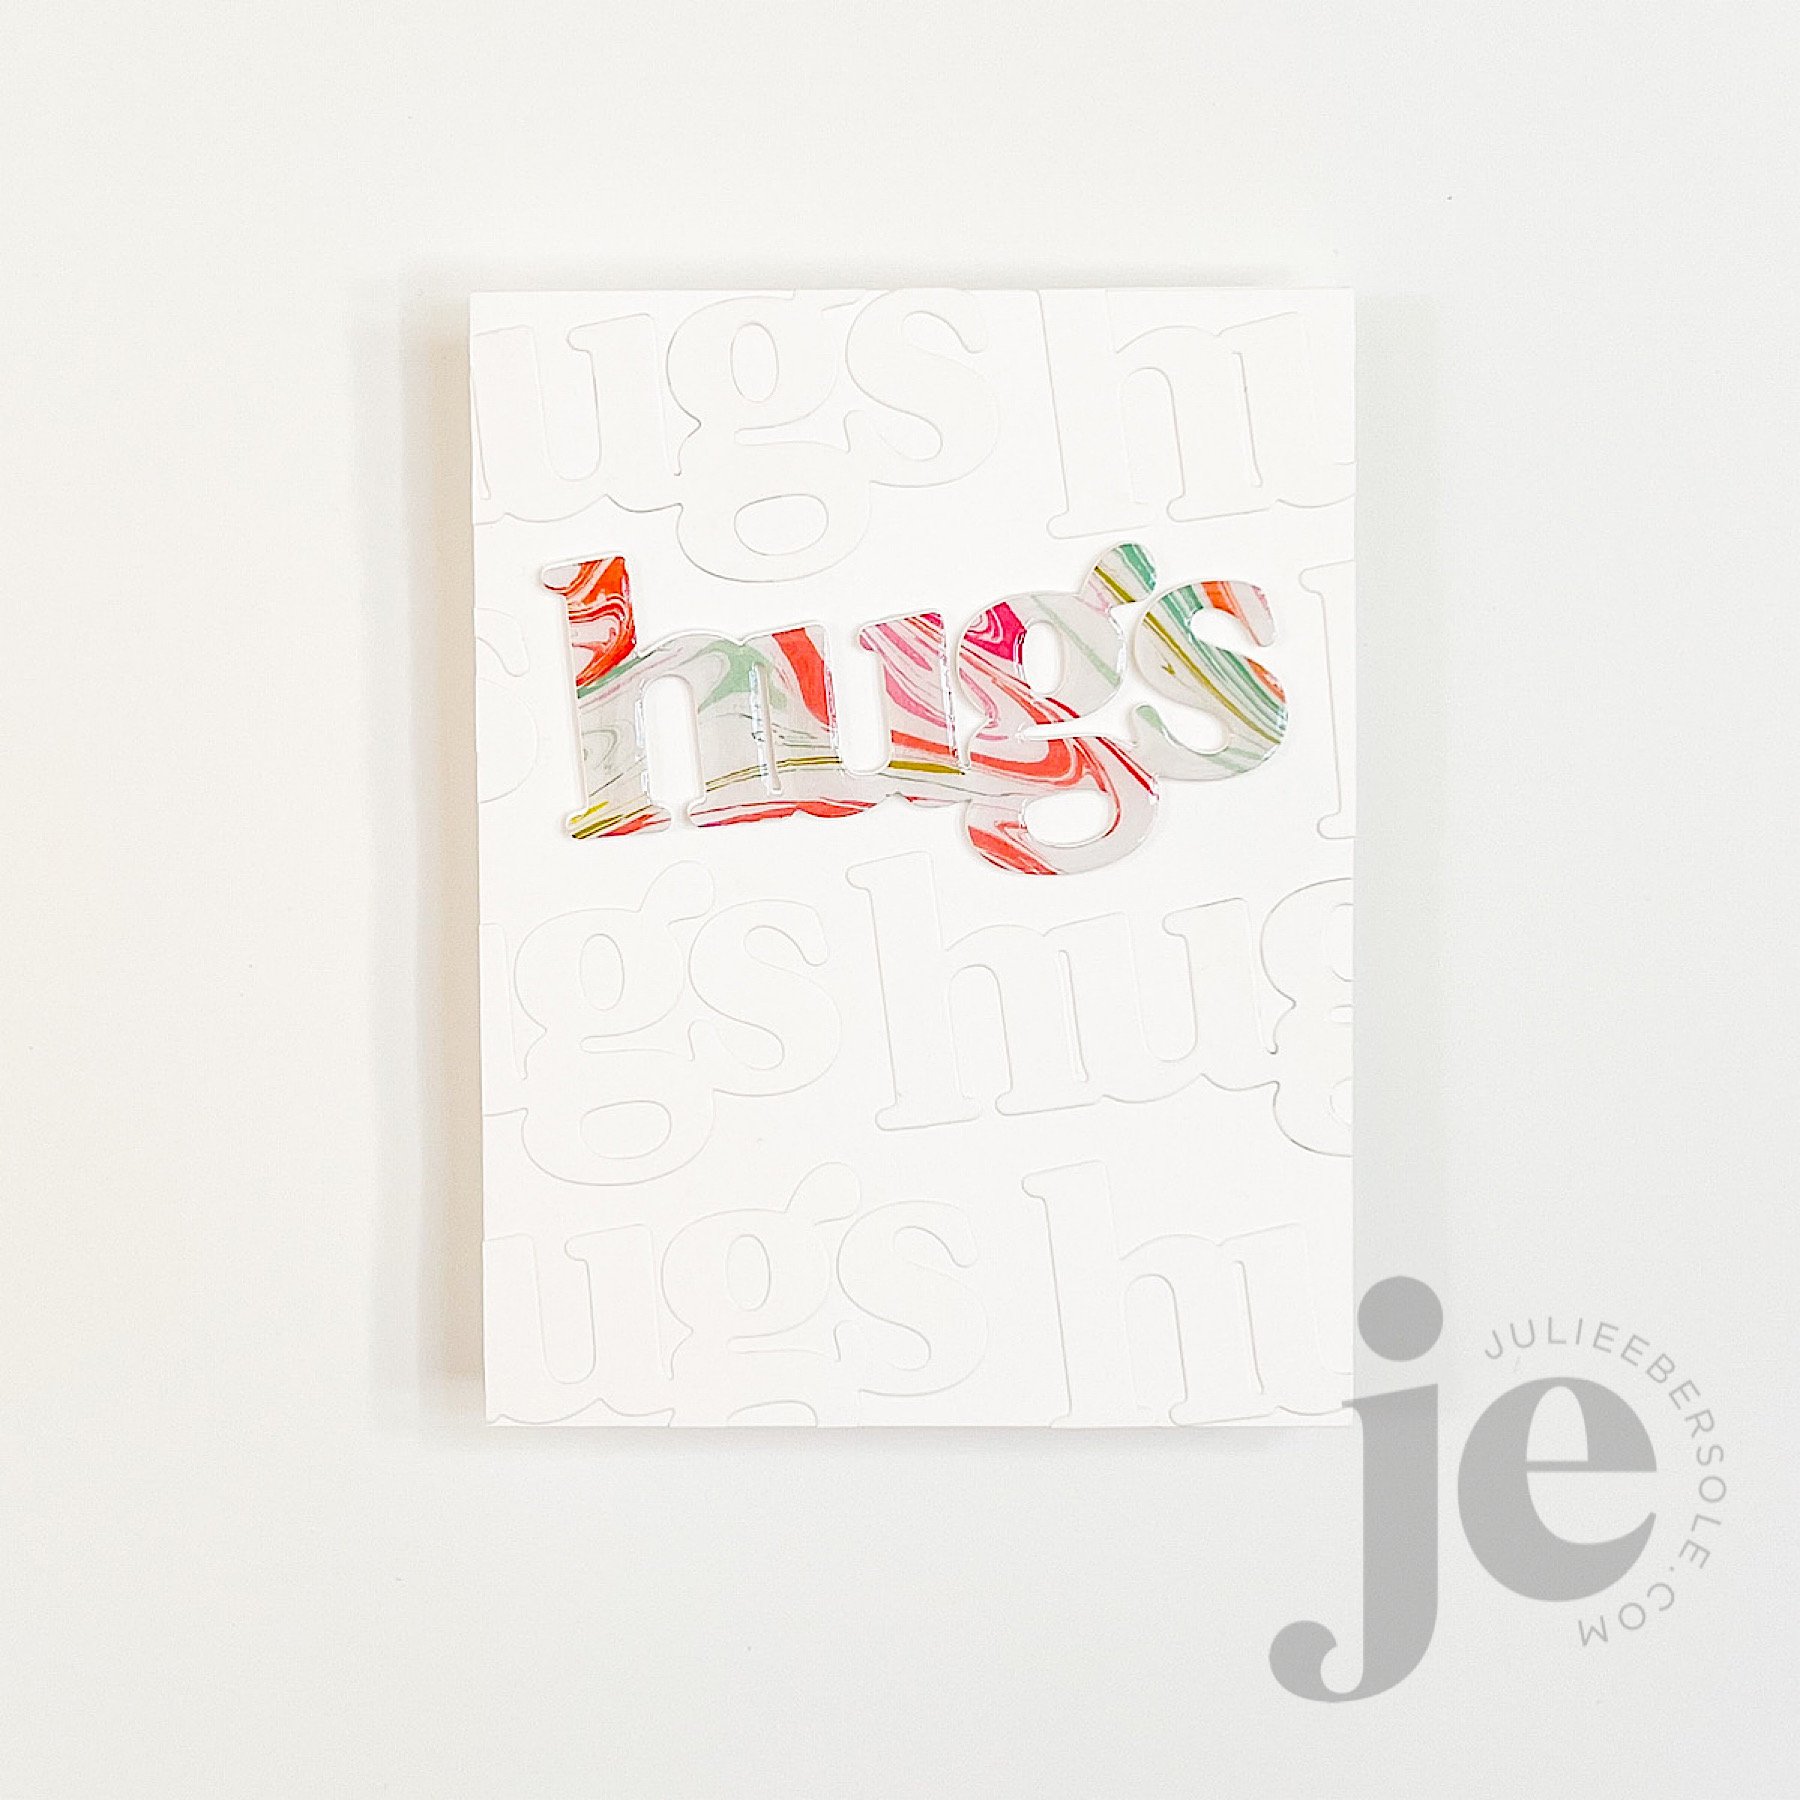
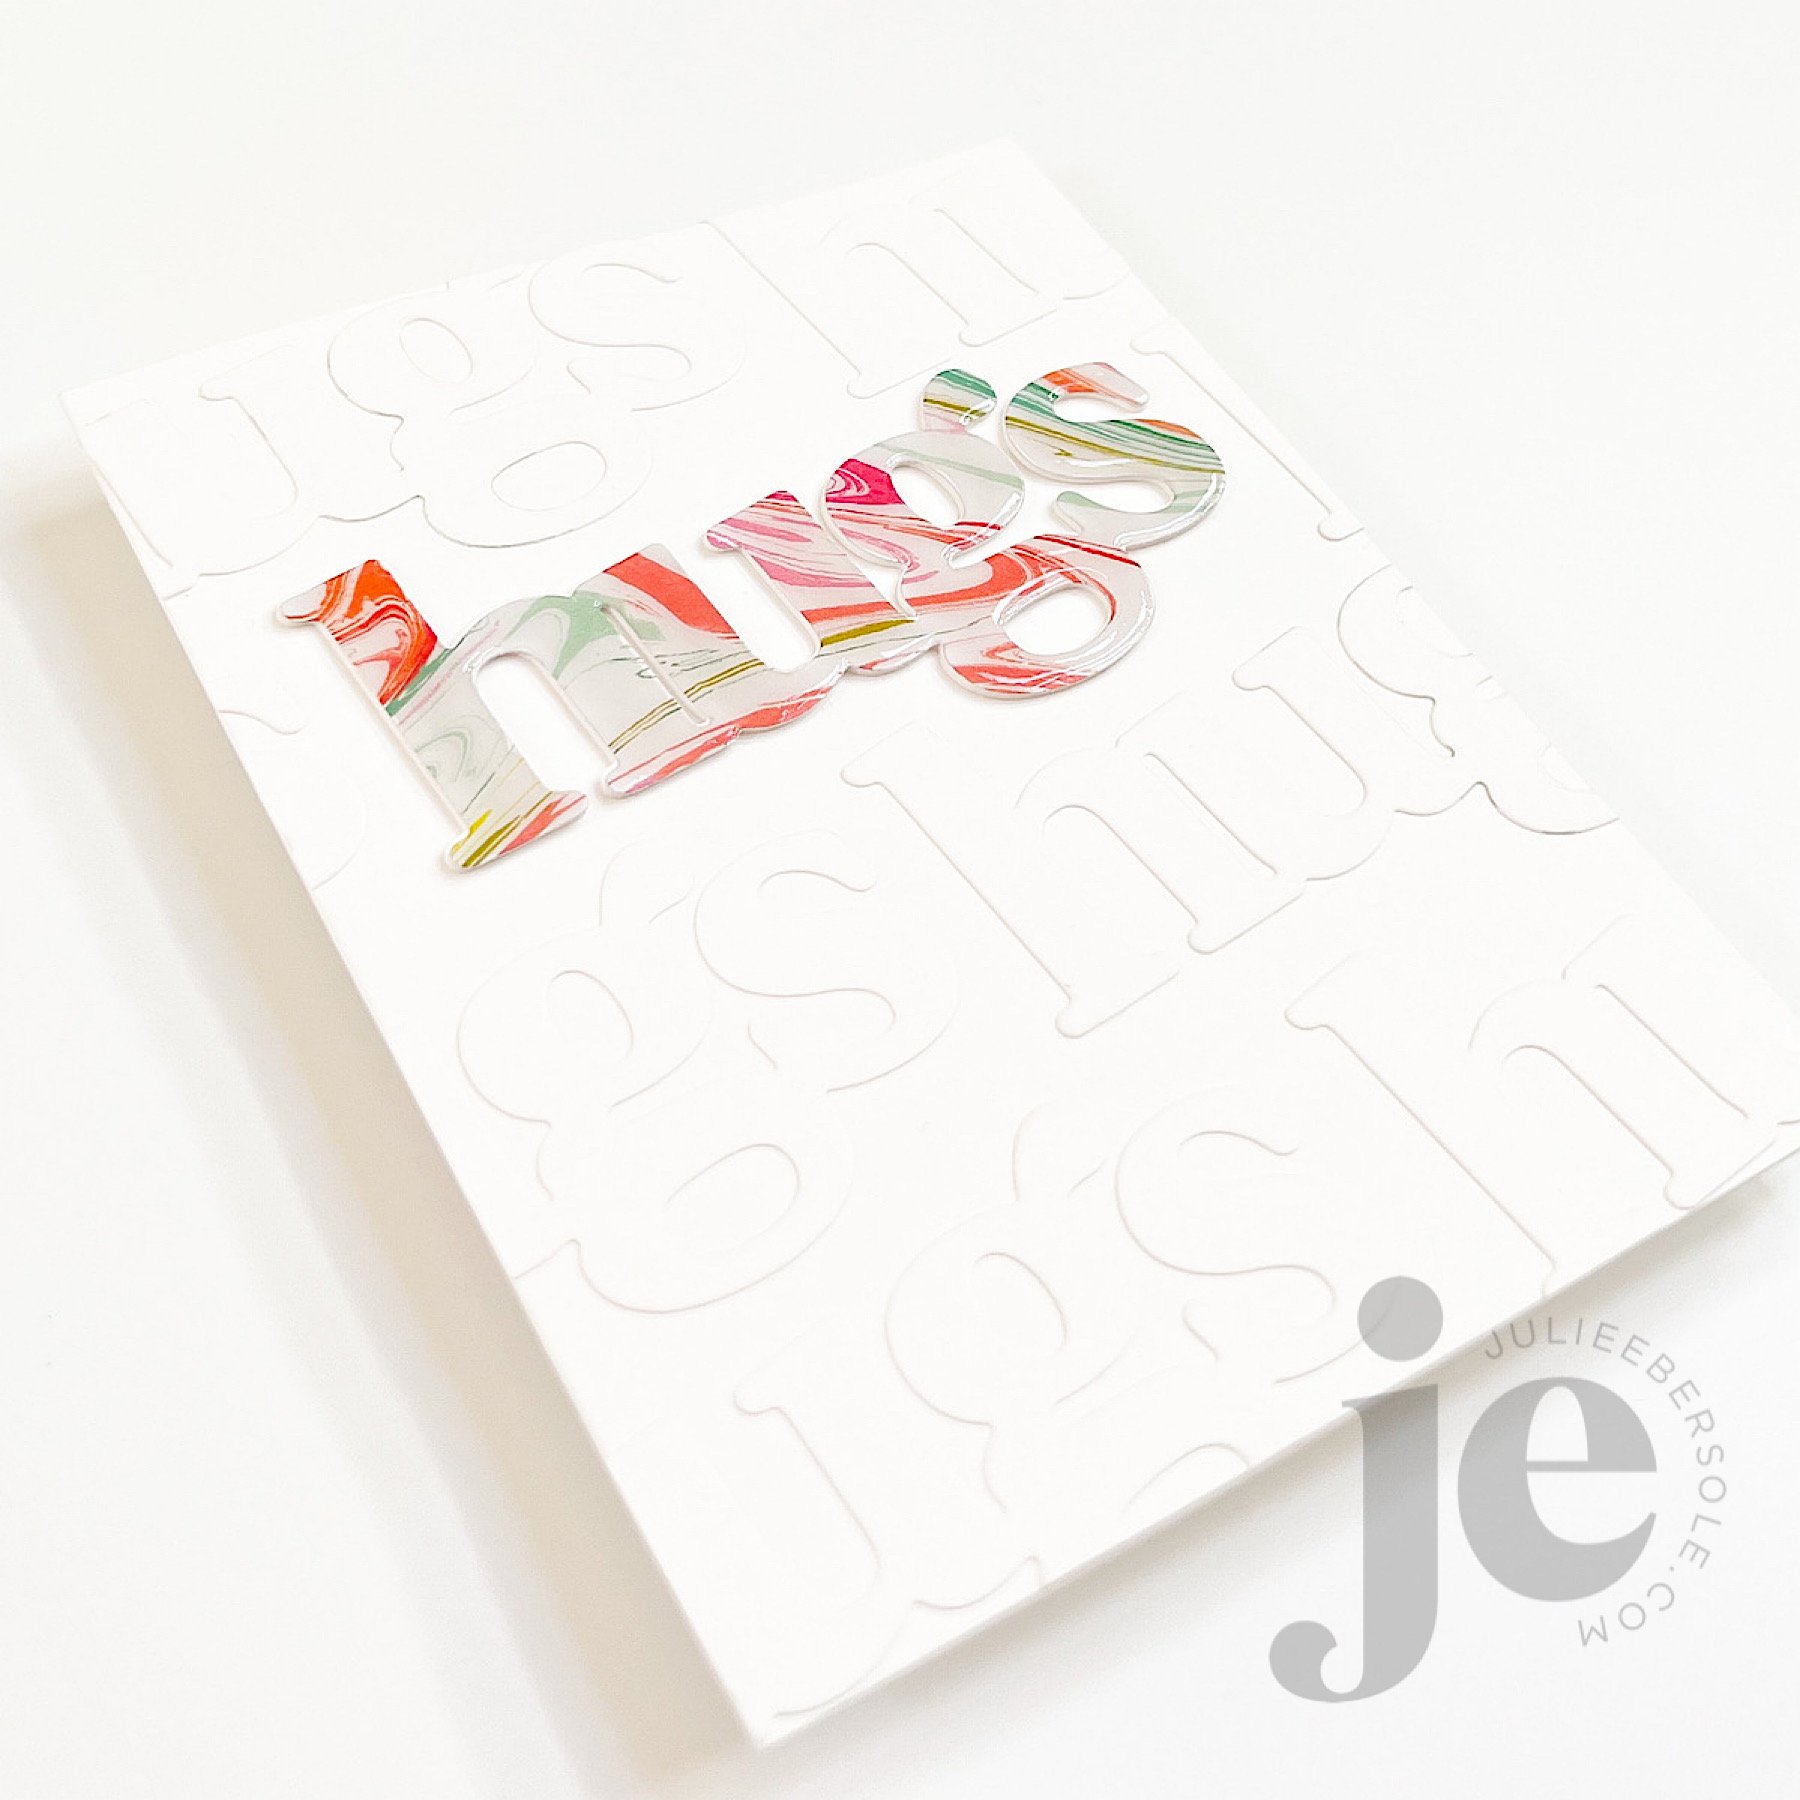
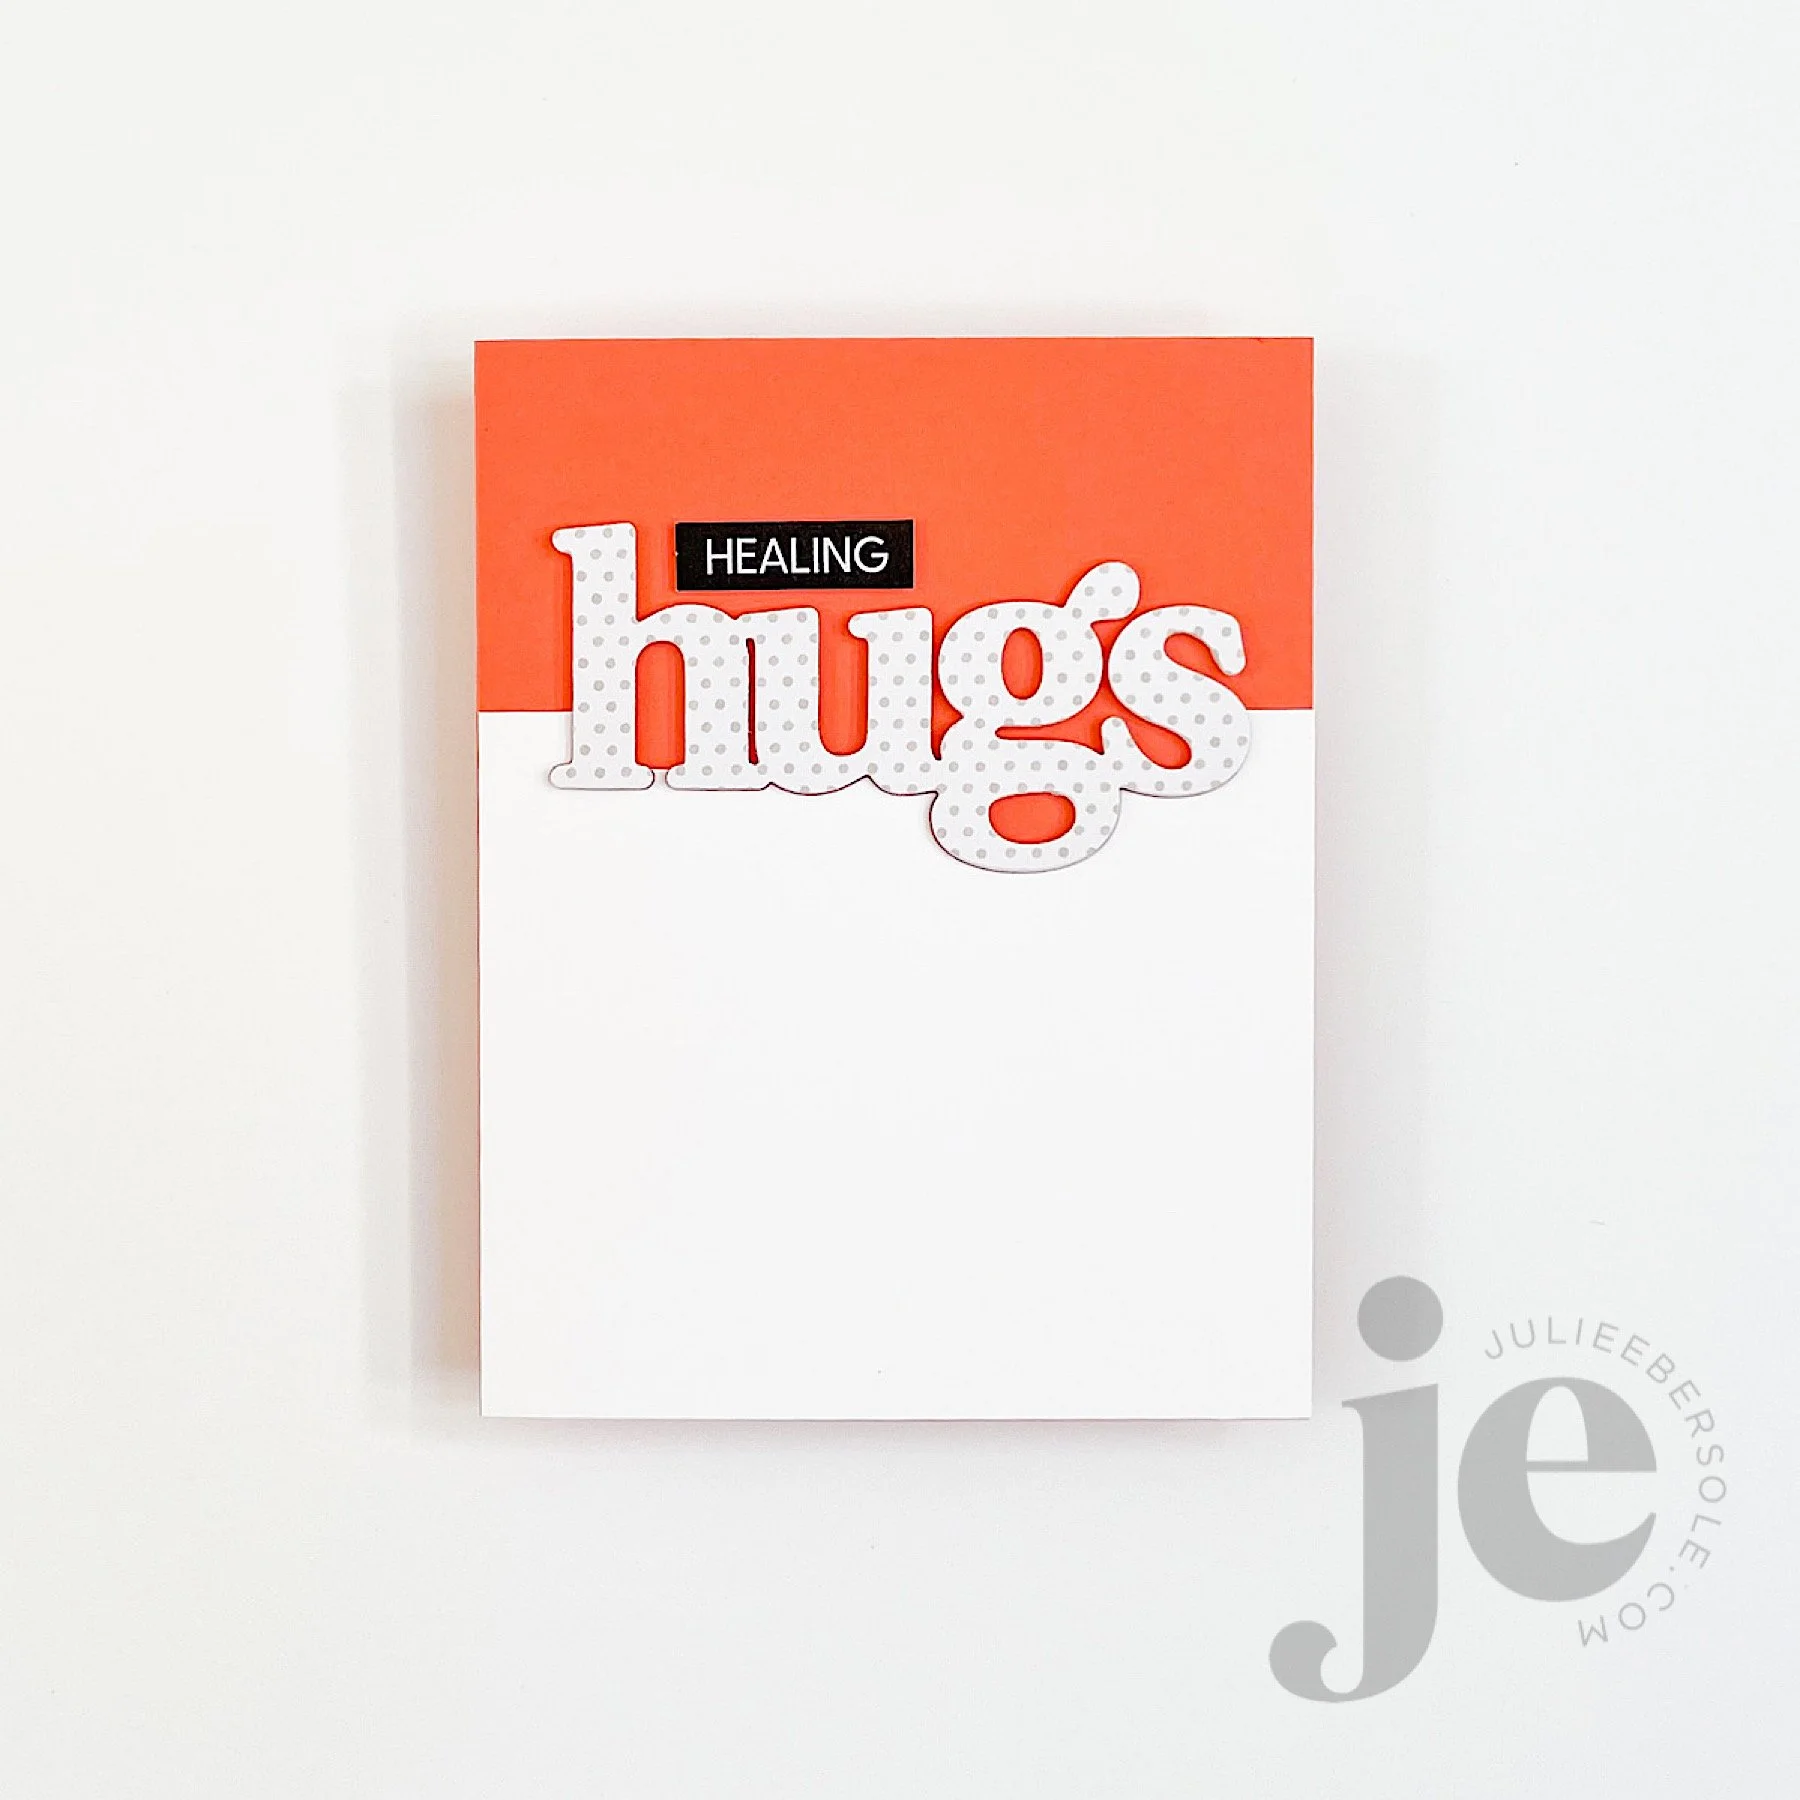
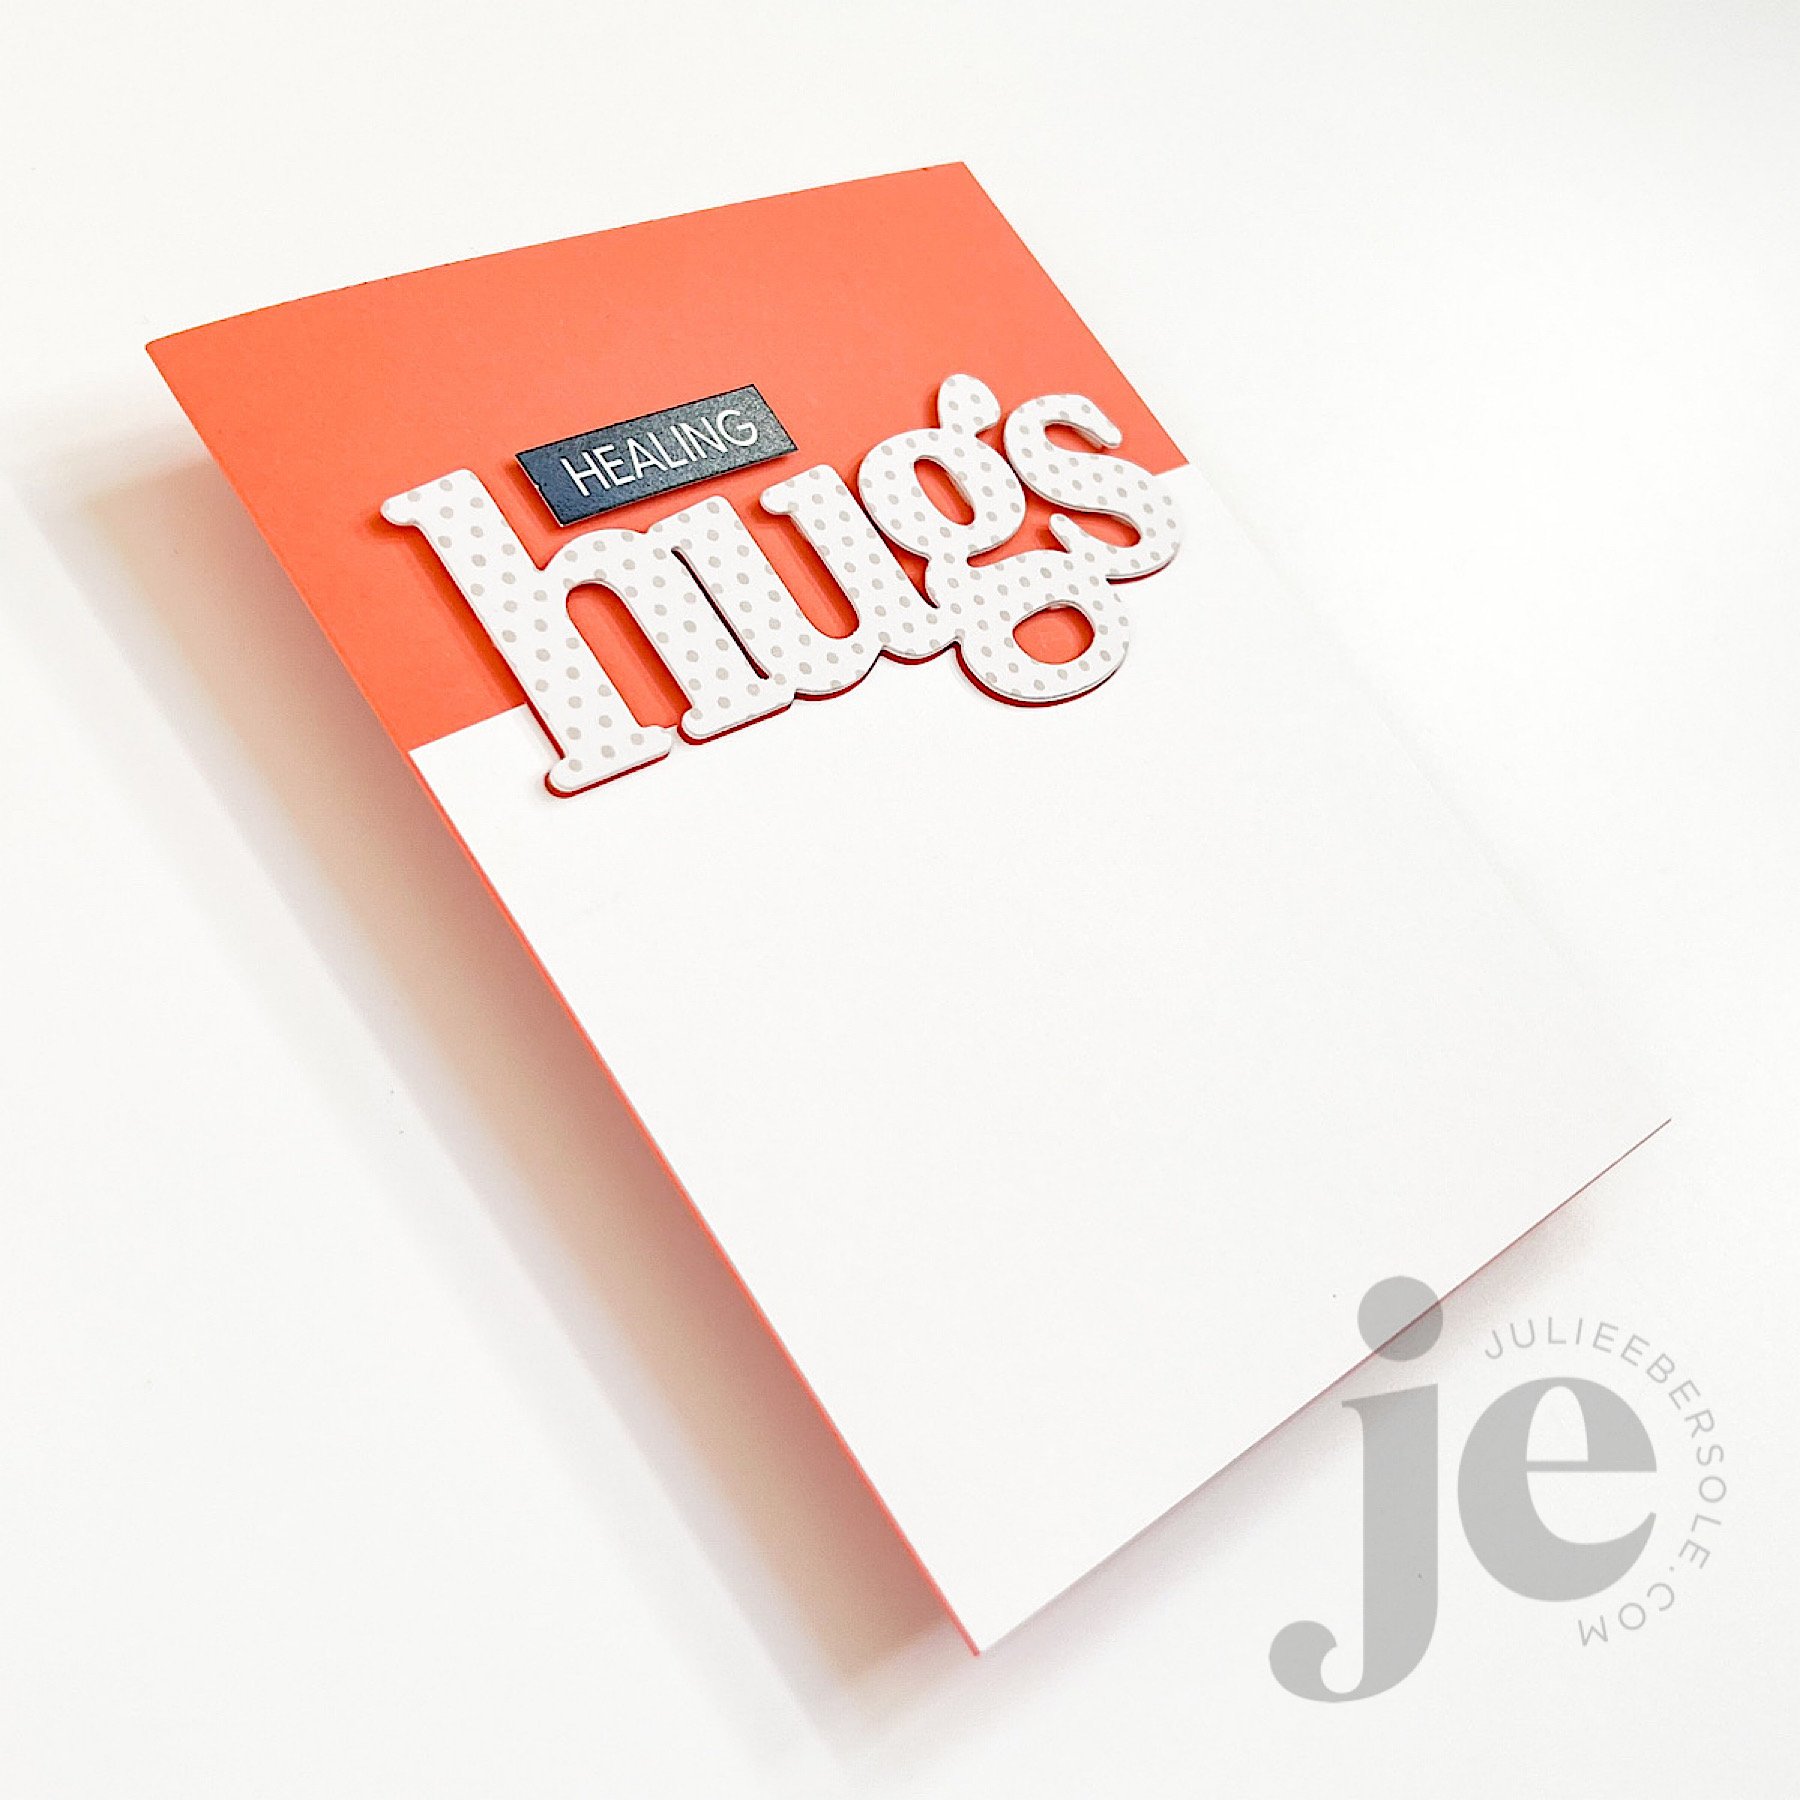
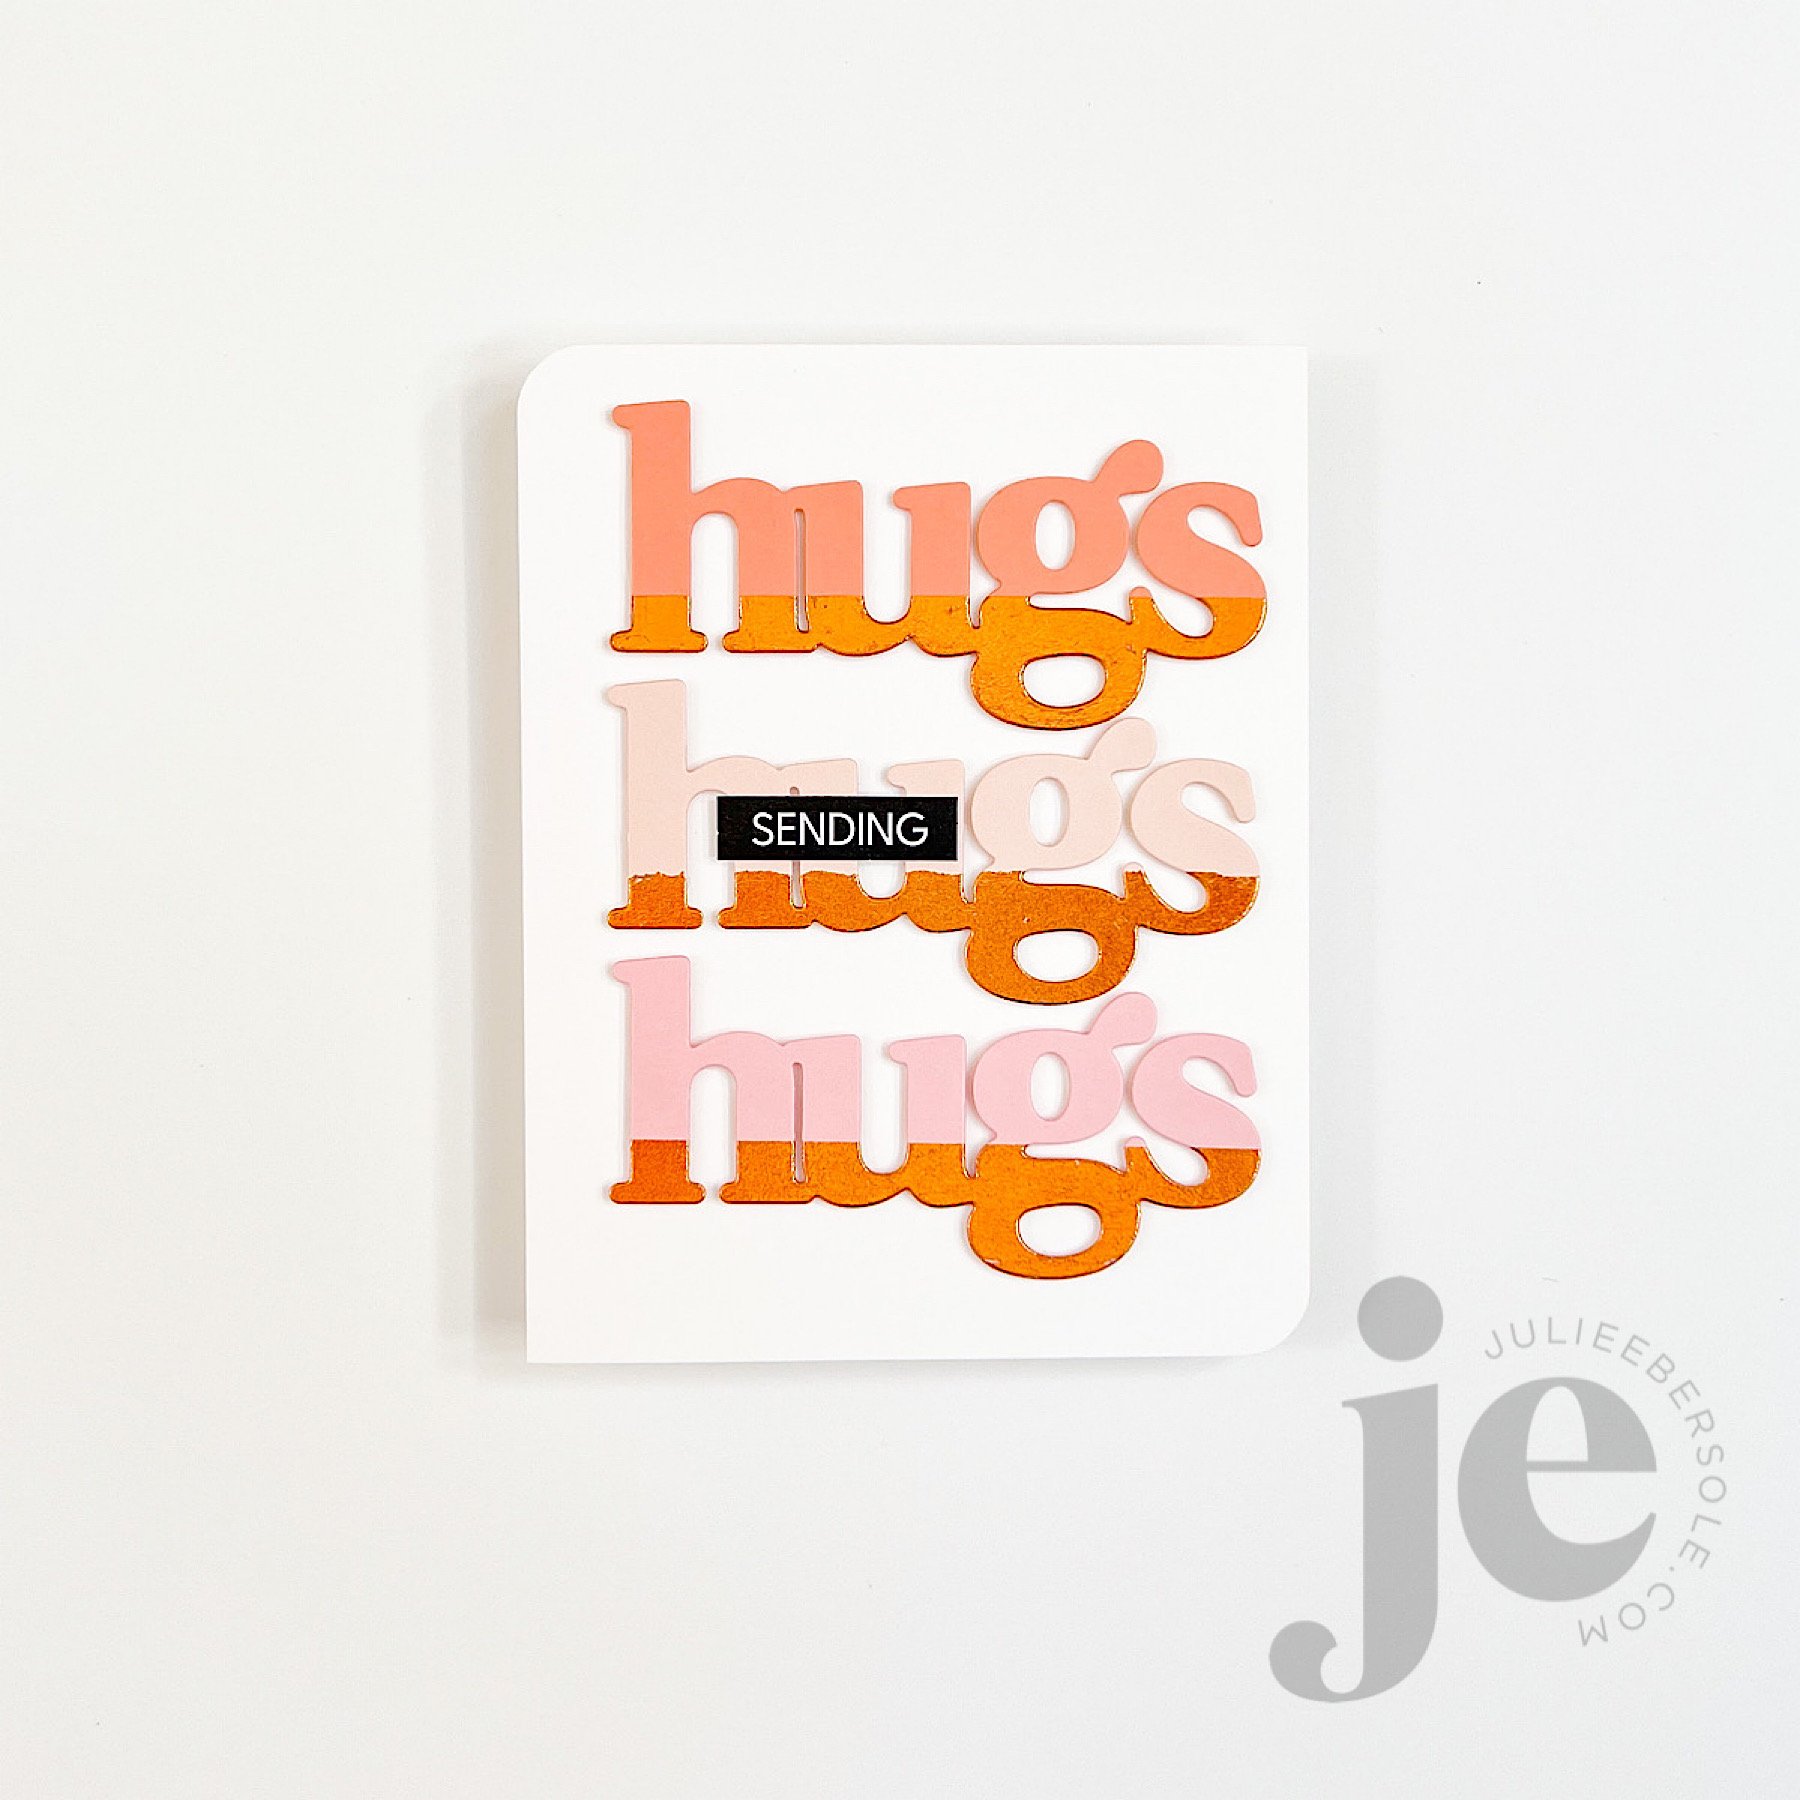
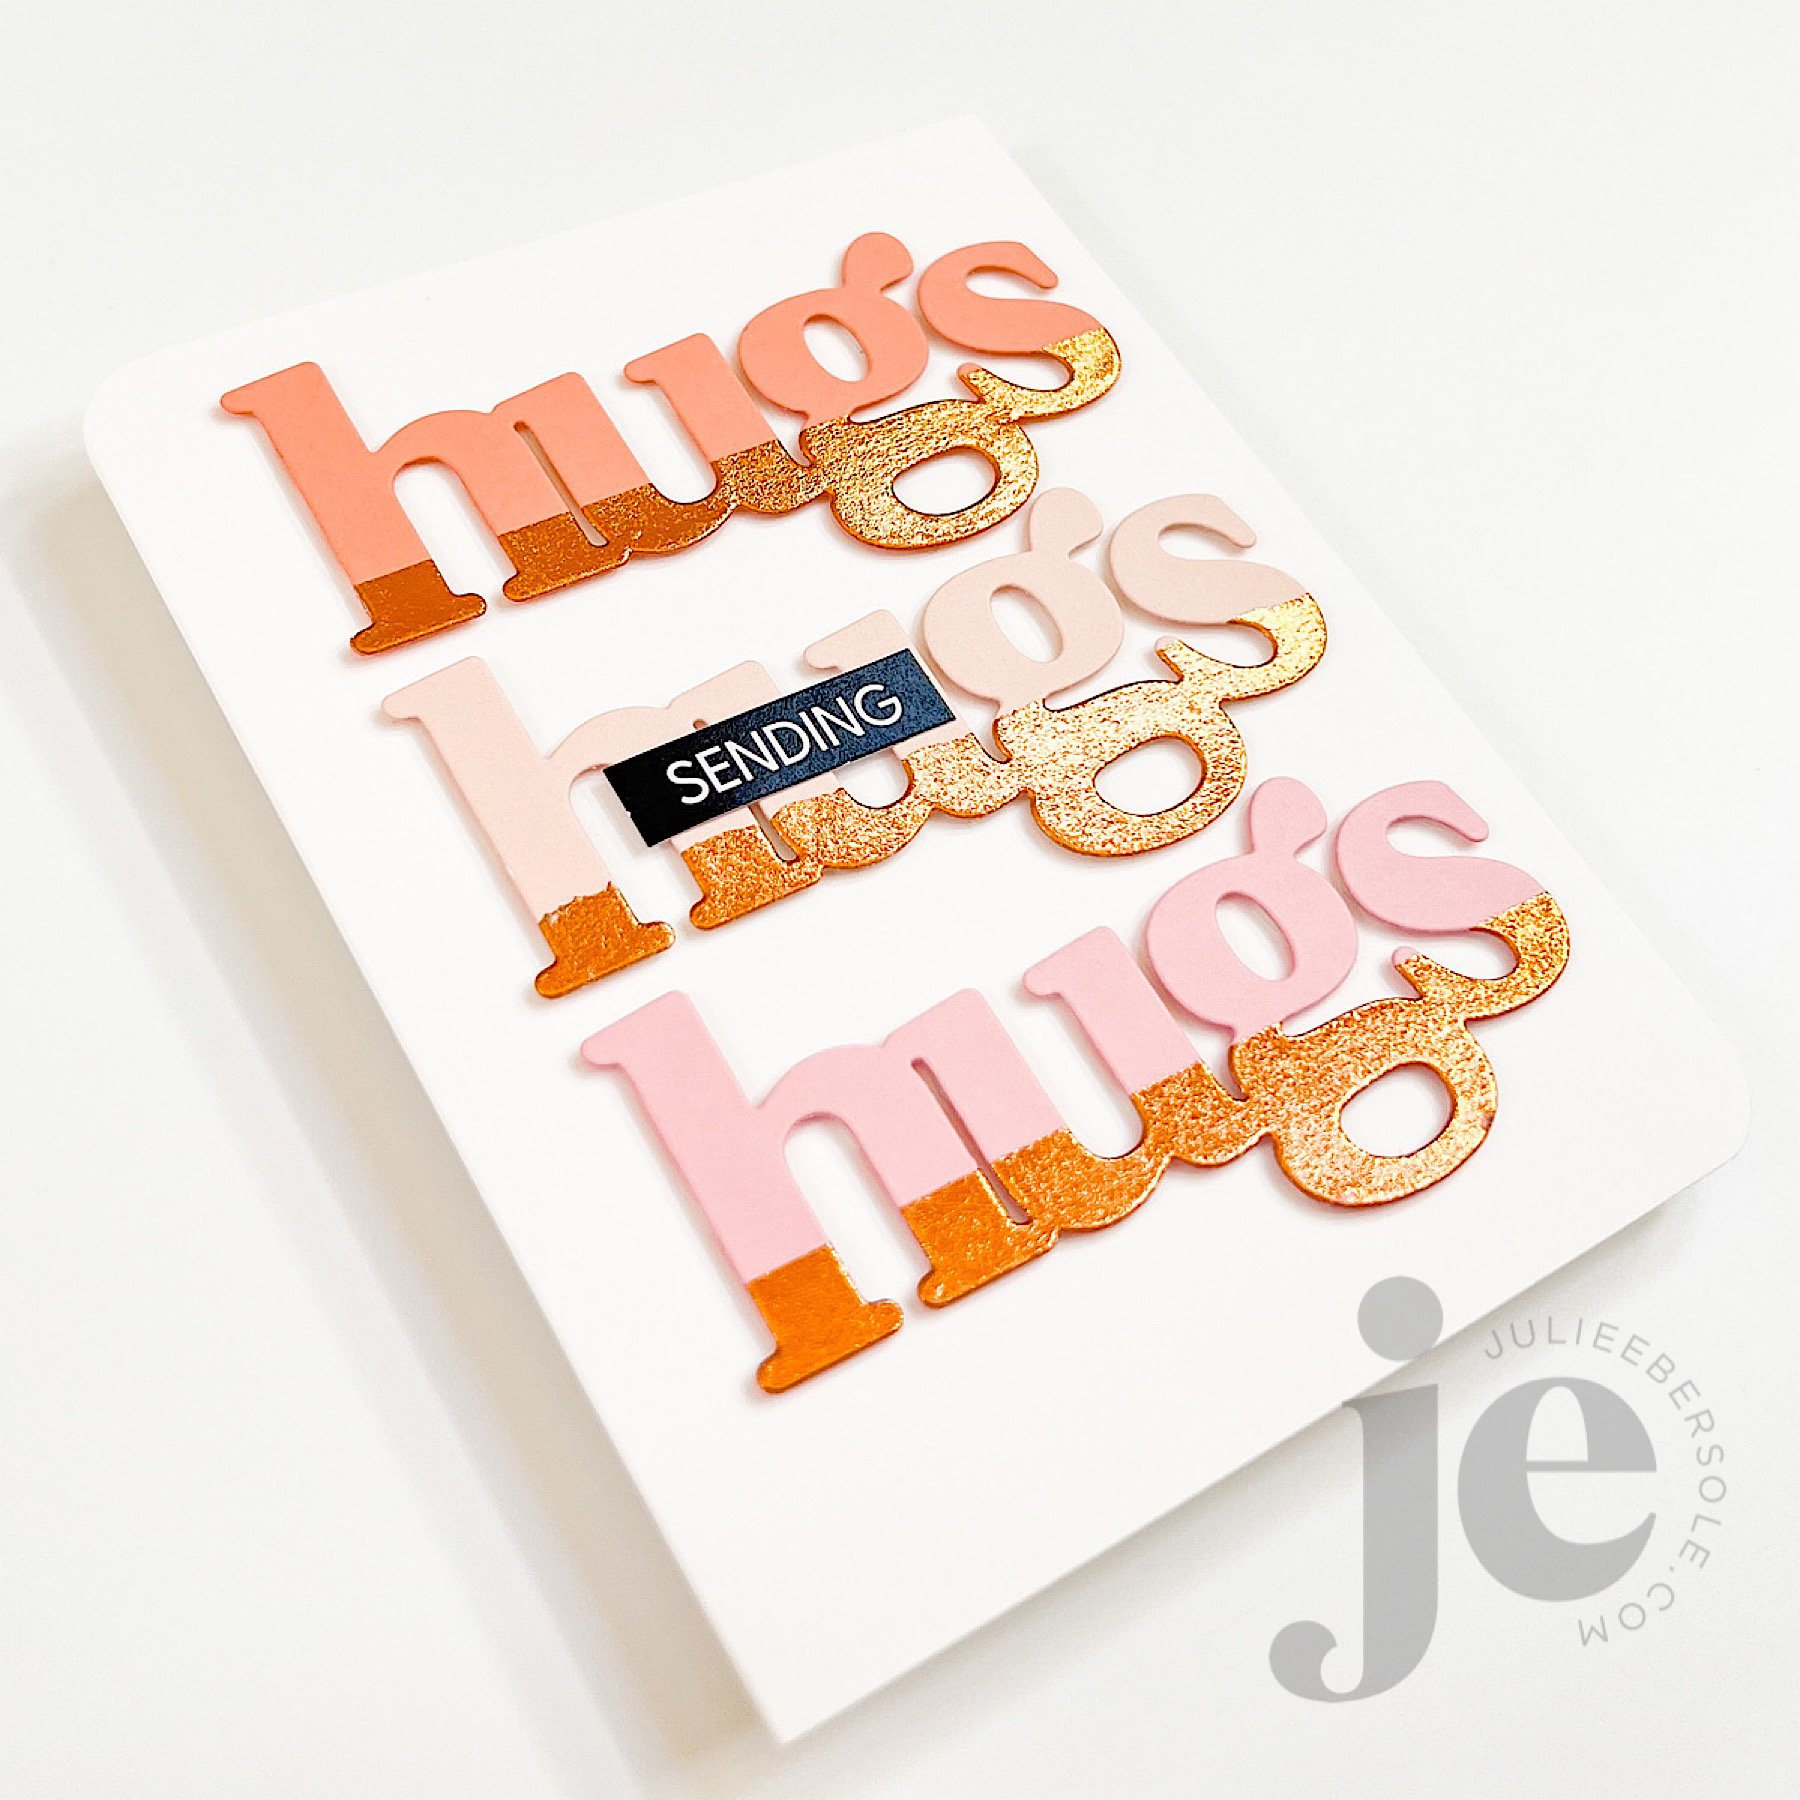
There are a LOT more ways this Oversized Hugs Die can be used, but today, I’m showcasing four!

And, Waffle Flower has a giveaway going on—you could win this Kit #05, from their Sneak Peek Club by leaving a comment for me over on this video on my YouTube Channel!

  • Open to folks with US addresses only at this time.

  • Be sure to comment there by 05/31/2023.

  • The folks at Waffle Flower will draw a winner and contact them.

FYI: Waffle Flower’s Sneak Peek Club is a monthly subscription, with each kit featuring part of an upcoming release. All the products included in Kit #05 will be available individually on 06/05/2023 when their release goes live. New subscribers to the Sneak Peek Club as of today’s date (05/25/2023) will receive the next upcoming kit.

Below is a slide show you can scroll through to see still shots of the 4 different cards I created:

So fun, right?! Scamper on over to my YouTube video so you can enter for a chance to win!

And, may the odds be ever in your favour! (wink!)


SUPPLIES: Affiliate links included wherever possible. I may earn a small commission from qualifying purchases made via my links.

  • Oversized Hugs Die by Waffle Flower (***Kit #05 products will be available individually on 06/05/2023***)

  • Catherine Pooler Cotton Candy Dye Ink - EH

  • Catherine Pooler Do-si-do Dye Ink - EH

  • Catherine Pooler Coral Cabana Dye Ink - EH

  • Blending Brushes - EH

  • Waffle Flower Mini Media Mat - EH

  • Double Sided Sheet Adhesive - EH

  • Scraps of Transfer Foil - *from my stash

  • Spellbinders Platinum 6 Die Cutting Machine - EH

  • Tonic Comfort Trimmer - EH

  • Tonic NUVO Drops in Ebony - SB

  • Flower Sequins - *from my stash

  • Ranger Glossy Accents - EH / SB

  • Bearly Art Glue - EH

  • Neenah Solar White 80# Card Stock - EH

  • Bazzill Pale Rose Card Stock - SB

  • Concord & 9th Ballet Slipper Card Stock - EH

  • Concord & 9th Sorbet Card Stock - EH

  • Patterned Papers - *from my stash

2 PUNNY VALENTINES PLUS A TUCK AND FOLD CARD

This card started as a sketch, but as I temporarily laid everything out, I felt like it needed something “more”—something small, but a little different from what I do out of habit. Originally, I had planned to white emboss the sentiment onto a strip of black card stock and work it into the layout. That’s a great stand-by that works quite well for many of my designs.

But, the idea of deviating from my stand-by, just slightly, kept nagging at me. So, I mounted the solid pink heart to the base card and then moved that to my MISTI, and curved the sentiment slightly, along the edge of the heart, got it mounted to the lid, and then inked and stamped. The golden colored frame was then mounted a little cattywampus (intentionally) with a little bit of glue in just 3 spots—I like the dimension it gives when it curves slightly up from the card front.

Everything else was clear embossed with my favorite black ink (affil) onto watercolor paper (affil), watercolored and die cut before 3D mounting into place.

Immense satisfaction achieved! (fist pump!)

This little bubblegum machine shaker card turned out so cute! Initially, I couldn’t decide on a background/backdrop for the machine and it occurred to me to grab my 1” circle punch and just punched a bunch of “dots” from card stock in coordinating colors—I love it!

I used Staz-On Cotton White (affil) to stamp the sentiment on the Crystal Clear Plastic (affil); I probably should have heat embossed it (this acetate is heat resistant) for better visibility as it’s hard to capture it that well in a photo, but IRL, it shows more prominently. Those teeny, tiny rainbow confetti hearts (affil) were just beggin’ to be filler, so I had to do it!

Here’s a TIP:

If you don’t have any sheet size foam tape (affil) to die cut for the shaker walls, try cutting the shaker front piece 5x from 110# Neenah Solar White (EH / AMZ affil) and just layer/stack them all together with Bearly Art Glue (affil)

feat. BIG LOVE STAMPS (the hearts background) | XOXO DIE

This way fun “fun-fold” design is actually a tri-fold that tucks and folds! I haven’t done one of these in so long and it’s one of my favorites so I need to poke myself as a reminder to do this more often because it’s so easy and always feels “clever”.

Video Tutorial below:

If you give this fun fold a try, you’ll have to let me know what you think! I love that it’s soooooo simple but the explosion of colors just makes it so visually impressive!

I cannot believe we are mid-way through January already; CRAZY!!!

Stay crafty!


Disclosure: I include affiliate links to the products used in my projects and make a small commission when you purchase via those links, at no extra dimes to you. 🙂 Your support is appreciated more than I can say!

OTHER SUPPLIES

The color palette I used for these samples:

Tools:

Embellishments:

Miscellaneous:

PUSH-ME-PULL-YOU FRIENDSHIP CARD

Finished card is A-2 size

Consider this a (basic) tutorial (one of many different types that already exist, for sure!) for creating a reverse action/double slider card; it works for either portrait or landscape layouts—just make sure your images and sentiments are going the same direction.

I used the smaller slit from the Push-me Pull-you Die set. Is this set necessary for making this type of slider? Nope! You can use a straight-blade trimmer or a craft knife + a metal edge ruler, if that’s what you have. I just find the slit die works great and is the perfect size for this particular type of slider card, and I love that you can completely adjust the gap between the slits to suit your project, whereas on a duo slit die, the gap is fixed.

BASE MATERIALS:

  • 2 pcs. White card stock - 4.25 x 4.5” (for the back cover and for the mechanism itself)

  • 1 pc. Preferred color of card stock - 4.25 x 4.5” (for the front cover)

  • 2 pcs. White card stock - 3 x 4.5” (for the “handles”)

    • Optional: 1 pc. White card stock - 4 1/8 x 4 3/8” (for layering onto the front cover and allowing for a slight mat or border effect)

  • 1 strip of thin plastic or cellophane - 3 x at least 8” long (excess can always be trimmed off during assembly; grocery shopping, zipper style and cellophane bags work or you could even use ribbon, if you have some laying around that meets the dimensions)

VIDEO TUTORIAL

Now, if you prefer to skip the mat layer (the green “front cover” one shown in my prototype), just swap it out for white and you can skip the optional smaller layer. But, if you want to stamp directly onto that, make sure to do so while it’s flat and before you start assembling things.

And, don’t forget: Stickles LAST!!!

Have a fab day!


HOW TO OMBRE INK DIRECTLY ON YOUR SOLID STAMPS

That beautiful variegated or ombré ink effect is a wonderful look when combined with solid stamps. You can achieve it by blending ink colors directly on the stamp surface! I’m working with water-based dye inks and using a MISTI positioning tool; for this method, a positioner is key to being able to stamp precisely over the original impression multiple times.

VIDEO

HOW TO:

  1. Select 2-3 shades of ink in the same hue, ranging from light/pale to dark (for really large stamps, you may want 3-5 variations of ink color, but for stamps the size used in this project, 2 is plenty).

  2. Ink stamp with lightest color first and impress to paper; if mass producing and die cutting images out, try my suggestion of trimming quarter sheets of card stock even further down into smaller pieces so you only have to rotate those pieces and not reposition the stamp in order to maximize the paper.

  3. Use the darker color to ink only a portion or a side of the stamp where you want shading or deeper color.

  4. Use a blending tool, like the Little Smoothie, to rock or pounce the rounded end of the sponge across the edge of the ink to soften. Stamp over original impression.

  5. Repeat Step 4 as often as desired.

  6. Highly contrasting colors of ink may require you to clean the stamp before switching colors to avoid cross-contamination of ink pads.


All the beautiful shades of ink pads out there make this one of the easiest methods for achieving “multi-colored” images, especially when working with solid stamps!

Thanks for stopping by!


SUPPLIES:

Disclosure: Affiliate links to the products used in my projects, that I like and use may be included; I make a small commission when you purchase via those links, at no extra cost to you. Thank you for all your support!

EASY SWING VALENTINE CARD (INTERACTIVE)

Swing (a.k.a. flip) cards have been around for a long, loooong time—nowadays, you can, of course, purchase dies that make the cuts and score lines for you, which is always nice! However, if you’ve never made one and want to give it a try, they’re quite simple/easy to do; just make sure that the shape you’re using is symmetrical (equal on both sides opposite each other, i.e. a circle, a butterfly, a square, a rectangle, an oval, a star and, in the case above, a heart) for best effect. Anything asymmetrical will be problematic.

BASIC SWING/FLIP CARD INSTRUCTIONS:

  • Start with a card base measuring 5.5 x 8.5”.

  • At 2 1/8” from the left short side, draw a faint pencil line.

  • Center a symmetrical shaped die along the pencil line and use washi tape to anchor in place.

  • Position the top cutting pad over the die and paper, aligning the edge with the pencil line; this insures that there will only be pressure applied up to that point.

  • After completing the die cut, remove die and tape and erase pencil line.

  • Score card base at 2 1/8” from the left short side (in the same position as your original pencil line), taking care not to score through the shape itself (start from the top of the card base and score right up to the top of the shape, skip over the shape, and then continue to score from the bottom of the shape down to the bottom of the card).

  • Score another line at 4.25” from the left short side (this will be the gutter/main fold) of the card.

  • Fold the card in half along the gutter, creasing well, then fold the smaller section back on itself, creating a “z-fold”.

  • As you open and close the card, the shape will swing or flip back and forth; embellish each side as desired.

  • Finished card is A-2 (4.25 x 5.5”) size when folded.

TIP:

If you plan to create a similar “Conversation Hearts” with a knock-out text effect, it helps to use alphabet dies that have extra letters, OR use phrases that don’t require multiples of the same letter. Here are some “Valentine” phrases that don’t require multiples of any given letter:

  • HUGS

  • HEY GIRL

  • WINK

  • U R HOT

  • CUTIE

  • U R LOVED

  • SWAK

  • U ROCK

  • HUG ME

  • ILYSM (Acronym for “I love you so much”)

  • SOUL MATE

  • LOVE BUG

  • XO

You’re welcome!