DIY HOT FOIL STAMPED CELLOPHANE PACKAGING

2020-12-hotfoilstamp-cellobags-001.jpg

When a girl’s oven breaks down right before Thanksgiving, she’s gotta scramble. Luckily, the Mister knows how to smoke and grill turkey, and girl knows how to make crock pot mashed potatoes and no-bake pumpkin cheesecake pie; the day was saved! But, the part my oven needs (the control panel ) is (still ) on back-order, we’re in the middle of a Pandemic and Christmas is 12 days away . . .

This year will be the one where everything got dipped. In chocolate. Have you ever had dried apricots dipped in dark chocolate? Sinful. White chocolate popcorn? Heavenly. Chocolate coated pretzels—with the fun little sprinkles? Delightful.

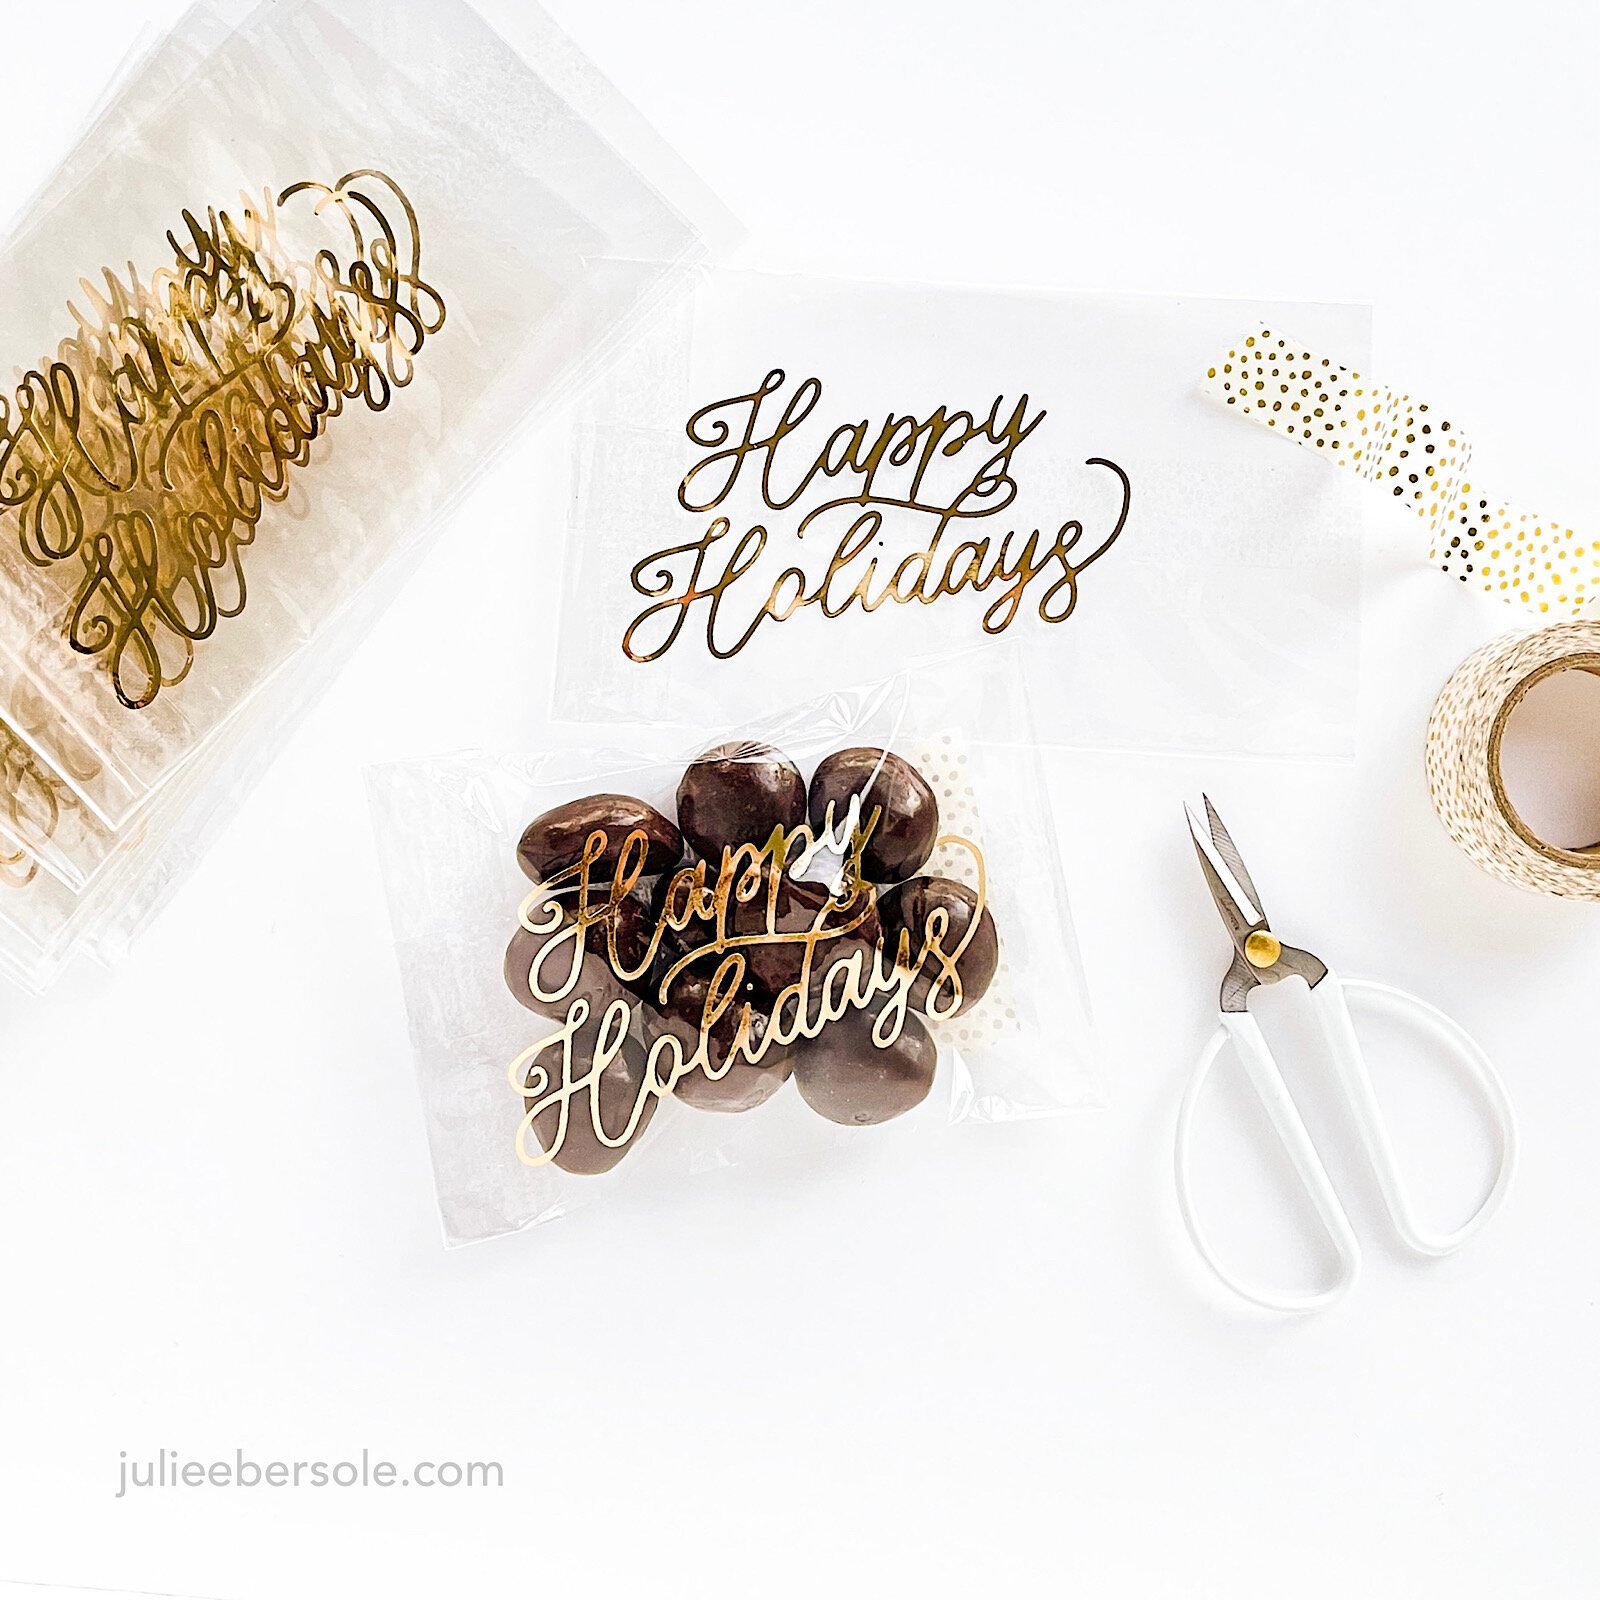
How to gift them in a way that feels special and, dare I say it, “upscale”? Today, I’m taking some plain jane cellophane bags and adding gold foil lettering for a gorgeous, high-end presentation and making Martha Stewart proud in the process! •wink• GO, ME!!!

PLEASE NOTE: I am foiling onto crystal clear CELLOPHANE bags NOT Polypropylene bags ).

My Gemini FoilPress Settings:

  • Medium Heat Setting

  • 15 second timer for a medium sized hot foil stamp

  • 110# sheet of card stock for additional shim

TIPS:

  • This method requires heat/pressure activated foils (NOT toner reactive foils ); while you can try other brands of foil, I have found Crafter’s Companion Paper Craft foils to work beautifully and quite consistently with the Gemini FoilPress system.

  • It’s always best to start with the lowest heat setting first and to test the results before proceeding to your project (be prepared to sacrifice a few bags to practice so you can find the settings that work best for your materials and your FoilPress; once you find the secret sauce, write it down and keep it handy. My notes are taped inside my cabinet door where I store my FoilPress ).

  • Slip a piece of card stock trimmed to fit inside the bag; this will improve foil transfer.

  • Removable/low-tack tape makes a great “hinge” for hot foil stamp placement, and anchoring in place to avoid shifting when sending through the Gemini Jr. I’ve been using Purple Tape, but you could also use washi tape.

  • Always allow the foil/cello bag to cool before peeling to reveal the foil.

  • Over-foiling on cello bags is best removed with the dull edge of the FoilPress Magnetic Tweezers or the dull side of scissors blade. (Do NOT use nail polish remover or rubbing alcohol to remove over-foiling on cellophane; it causes a chemical reaction that discolors the bag in a not pretty way. Ask me how I know . . . )

  • Tape residue on the back of your hot foil stamp can easily be removed with rubbing alcohol.

  • After filling your cello bags with a yummy treat, you can use twist ties, pretty washi tapes or possibly one of those heat sealer thingies (I don’t have one those—yet—but I just may have to bite the bullet . . . ).

2020-12-hotfoilstamp-cellobags-002.jpg

I seriously had THE.BEST.TIME foiling these bags! They turned out SO pretty! I’m packaging food, but DANG!!! you could package SO many different kinds of gifts this way!! YAASSSS!!! •fist pump•

My primary source for food-safe CELLOPHANE flat bags is Clear Bags. I also like their gusseted bags. With the Christmas holiday looming, however, they are currently out of stock of some of their most popular size configurations. ACK!!! You can also find cellophane bags on Amazon and big box craft stores that carry baking tools and supplies. You may even discover some vendors on Etsy that offer them ( ? — I haven’t looked but the thought just occurred to me ).

Thanks for stopping by today!


SUPPLIES:

  • Happy Holidays by Julie Ebersole, Essentials by Ellen Hot Foil Stamps - EH

  • Gold, Gemini FoilPress Papercraft Foil Rolls - EH

  • Rose Gold, Gemini FoilPress Papercraft Foil Rolls - EH

  • Silver, Gemini FoilPress Papercraft Foil Rolls - EH

  • iCraft Purple Tape 1-1/2 in X 15 yds - EH

  • FoilPress Machine, Crafter's Companion Gemini - EH

  • Crafter's Companion Gemini Junior EH

Disclosure: Affiliate links used wherever possible; when you purchase via my links I may receive a small commission at no extra cost to you, so please—buy all the things! And, thanks so much for your support!

HOLIDAY HOT FOIL STAMPS

We’ve got a lovely Instagram hop going on to celebrate Ellen Hutson LLC’s 14th Anniversary! FOURTEEN!!! Amazing or what?! Be sure to check it out by clicking on that graphic above ↑ (it’s a direct link to my Instagram and you can follow all the eye candy!)

New Release available HERE.

I designed a few new products for this release and for the Instagram Hop, I’m showcasing my Holiday Hot Foil Stamps for the following samples:

One of the reasons I love hot foil stamping so SO much is the look is so luxurious and upscale! The Gemini Foil Press Rose Gold Foil is such a lovely, warm metallic color, and it looks stunning against this blush-hued card stock.

The Deer Antlers were die cut from the glitter card stock in that same Rose Gold Luxury Card Stock Pack. Guess what? I didn’t have any tiny rose gold star sequins to match my project, so I made them by using the Star Trails die on that Rose Gold Foil Card Stock. Felt smugly genius for that tiny stroke of brilliance . . . a girl’s gotta celebrate those moments, eh?!

And, I just had to tie some tiny sleigh bells onto the ends of the twine here—just too fitting, right?! The Rose Gold Washi Tape also worked really well here as an accent.

holiday-hotfoilstamping-001-1.jpg

If you haven’t tried hot-foil stamping yet, lemme tell ya’—the Gemini Foil Press is just A.W.E.S.O.M.E. —the results are so so beautiful! I could seriously just make foiled stationery all day long and be incredibly content.

Hope these inspire and be sure to check out the Instagram Hop for more ideas!

Stay safe and healthy, too! Please!

P.S. Here is a link to video tutorial I’ve done in the past, showing how to use the Gemini Foil Press:

YOUTUBE VIDEO TUTORIAL - DIY FOIL LETTERPRESS


SUPER SPARKLY HEAT EMBOSSING

2020-10-05 18.34.08.jpg

Can you use just “glitter embossing powder”—you know, the kind with the glitter built right in? Sure! It works! But, what if you want a “luxe” glitter effect? Oh, man, nothing beats Sticky Stuff + glitter and in my opinion? Totally worth that extra step!

2020-10-05 18.34.51.jpg

I’ve used Sticky Stuff for well over a decade; I like the grind and how it’s always beens super reliable for me. Yes, there are other similar sticky embossing powders out there, but I always come back to this one for the best sticky experience. LOL!

Hope you are doing well and getting some holiday crafty time in! Stay safe and healthy!

TIPS:

  • Use a well-inked embossing pad so this specialty embossing powder really sticks.

  • Pre-heat your embossing tool for at least 30 seconds.

  • Watch carefully as you apply the heat; once the powder turns “wet” looking, move on to the next area; do not overheat or it will cause the embossing powder to cure/harden. When properly heated, you can let it cool and touch it with your finger tip to feel that it is tacky. If it’s “hard”, you overheated and nothing will stick to it.

  • After applying the glitter, “lock” it in (cure the embossing powder) by reheating with powder from the back side and around the front; this will cause the powder to harden and trap the glitter to it.

  • Glitter not your thing? Try ground coffee, sand, flock powder, transfer foils . . .


MAKE A HOLIDAY SHAKER TAG

There’s always more than one way to make a shaker, but this one is an easy favorite! I’ve been asked how to get the woodgrain base on the snow globe and it’s honesty very simple, but some things are easier shown than explained, so enjoy the video here or feel free to watch over on YouTube.

I had planned on reserving these tags for adorning my granddaughters’ packages under the tree, but a little 7 year old was giving me those puppy dog eyes and, well, what’s a Nana to do? She caves, that’s what she does. Because they’re made of paper, and she knows she’ll just have to make more when Christmas rolls around . . . •chuckle•

2020-10-05 18.29.28.jpg

SUPPLIES:

Disclosure: This post contains affiliate links; if you see something you like, want or need, and purchase via my links, I receive a small commission, at no extra cost to you, which I use to buy coffee, which fuels my creativity and provides energy to make more card ideas. And, pay the rent.

RESCUE A CLEAN AND SIMPLE CARD

feat. MERRY LITTLE CHRISTMAS / ALPINE SNOWFALL DIE

feat. MERRY LITTLE CHRISTMAS / ALPINE SNOWFALL DIE

There’s nothing more annoying than a random ink smudge on a card—even more so when the design features a lot of beautiful, clean, white space . . . GAAAAH!!! Sometimes, it’s bad . . . so bad . . . and other times, you can salvage it. Just before frisbee-ing (is that a word?) into the circular file, I figured a Hail Mary might save it . . .

One of the best.expenditures.ever.

2020-10-05 18.36.08.jpg

What are your favorite “little” things for dressing up your cards?

BTW, I voted today and am super thankful for WA state’s long-established mail-in ballot system.

Hope you are staying safe, healthy and hopefully, crafty when time permits!


TIPS FOR THE DAY:

  • A sand eraser can work pretty well with dyed card stock, rather than printed or “white core” card stock, which is why dyed is my preferred.

  • Seriously etched cutting plates/pads will transfer those marks to the inside of your card; not a good look. You can reduce or even eliminate this by laying down some typing paper between the card and the plate before running the project through your die cutting machine.

  • Need to kick your project up a notch? Stickles and Twine (or cord) are two staples in my craft supplies that I can always rely on for that little extra sumpin’-sumpin’.