gift wrap

COZY HOLIDAY GIFTING AND TAG IDEAS

You know the saying, “Good things come in small packages!”? TRUTH!!!

feat. WIDE HOUSE BOX & HOLIDAY-ADD ON COMBO*

The Wide House Box Die and Holiday Add-On assemble very similarly to the Tall House Box Die (video tutorial link) and Halloween Add-On (video tutorial link).

Hostess gifts, teacher gifts, co-worker gifts, party favors . . . small, thoughtful tokens can have a HUGE impact when presented in charming packaging! Here are some fab ideas to tuck inside this adorable house box:

  • A gift card to the local coffee shop

  • Cookies or chocolates (Heath Miniatures are my personal fave, LOL!)

  • Lip balm and/or nail polish would be so cute

  • Sweet smelling hand-made soap

  • Purse or travel sized lotion/hand-sanitizer

  • Individually packaged tea bags & honey packets

  • Jewelry, like a fun pair of earrings or a necklace

  • Pretty hair ties or scrunchies

  • Cute stickers, washi tape, magnets and fun shaped paper clips for stationery lovers

  • Vials/bottles of essential oils or a mini refillable perfume atomizer

  • Battery operated tea lights or strings of mini LED fairy lights (the house box can be safely lit up as a decor item)

  • A personalized key ring or fob

These are actually useful and fun gifts for any occasion, not just the holidays. Heck, it’s just as much fun to present cash inside one of these as I’m sure it is to receive! I have no doubt you will come up with even MORE ideas for great tiny gifts. Just sayin’ . . . ! 😉

feat. WIDE HOUSE BOX & HOLIDAY-ADD ON COMBO (also available separately)

Santa and his sleigh are designed to attach and fit between the flaps of the roof peaks; I like to die cut two or three and layer them together before before attaching, especially if I’m working with 80# or lighter weights of card stock.

You can mix and match the windows/doors between the Wide House Box and the Holiday Add-On sets for a lot of versatility. The little gables look so cute on the snow capped roof and there’s even a wreath for the door and a tree in the Holiday Add-On set.

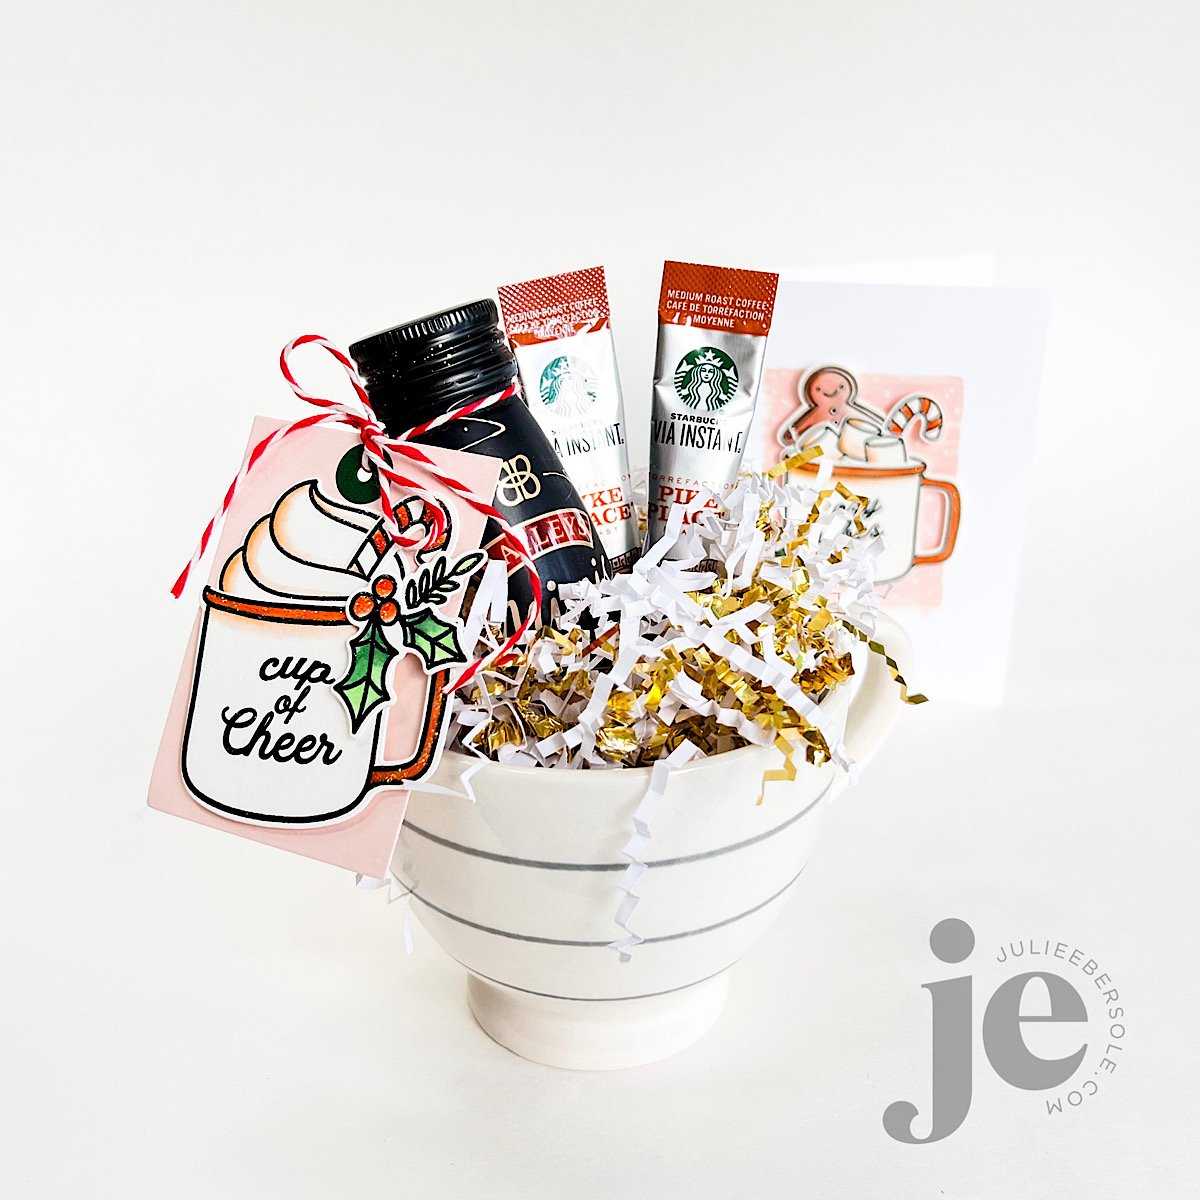
If you read my post the other day, I mentioned watching from the window as the family played in the snow, while sipping a coffee and Baileys . . .

feat. COZY CUPPA STAMP & DIE COMBO (also available separately) / MODERN TAGS DIE SET

A holiday, or even a simple, plain white mug serves as a “gift box”, and nestled among the paper shreds are a mini bottle of Baileys (a fun grocery store find—yes, I found 3 mini bottle packs of these at the grocery store! SCORE!!!) and some instant coffee packets!

My design elements from Cozy Cuppa were all watercolored, 3D mounted to a simple tag and tied to the bottle. Whip up a stack of tags and you’ve got an easy peasy, enchanting gift ensemble!

feat. COZY CUPPA STAMP & DIE COMBO (also available separately)

This adorable design just makes me think of my granddaughters—they love hot cocoa. AND marshmallows. So fun to tuck a gingerbread cookie and a candy cane inside to boot! Like the tag, I watercolored all the elements and that background was made by dragging my Tattered Rose Distress OXIDE Ink Pad across the front of the card and then dotting it with a white gel pen before assembling the rest of the card.

And, don’t forget the Stickles.

Speaking of which . . . what’s the golden rule about Stickles? Anybody? Anybody?

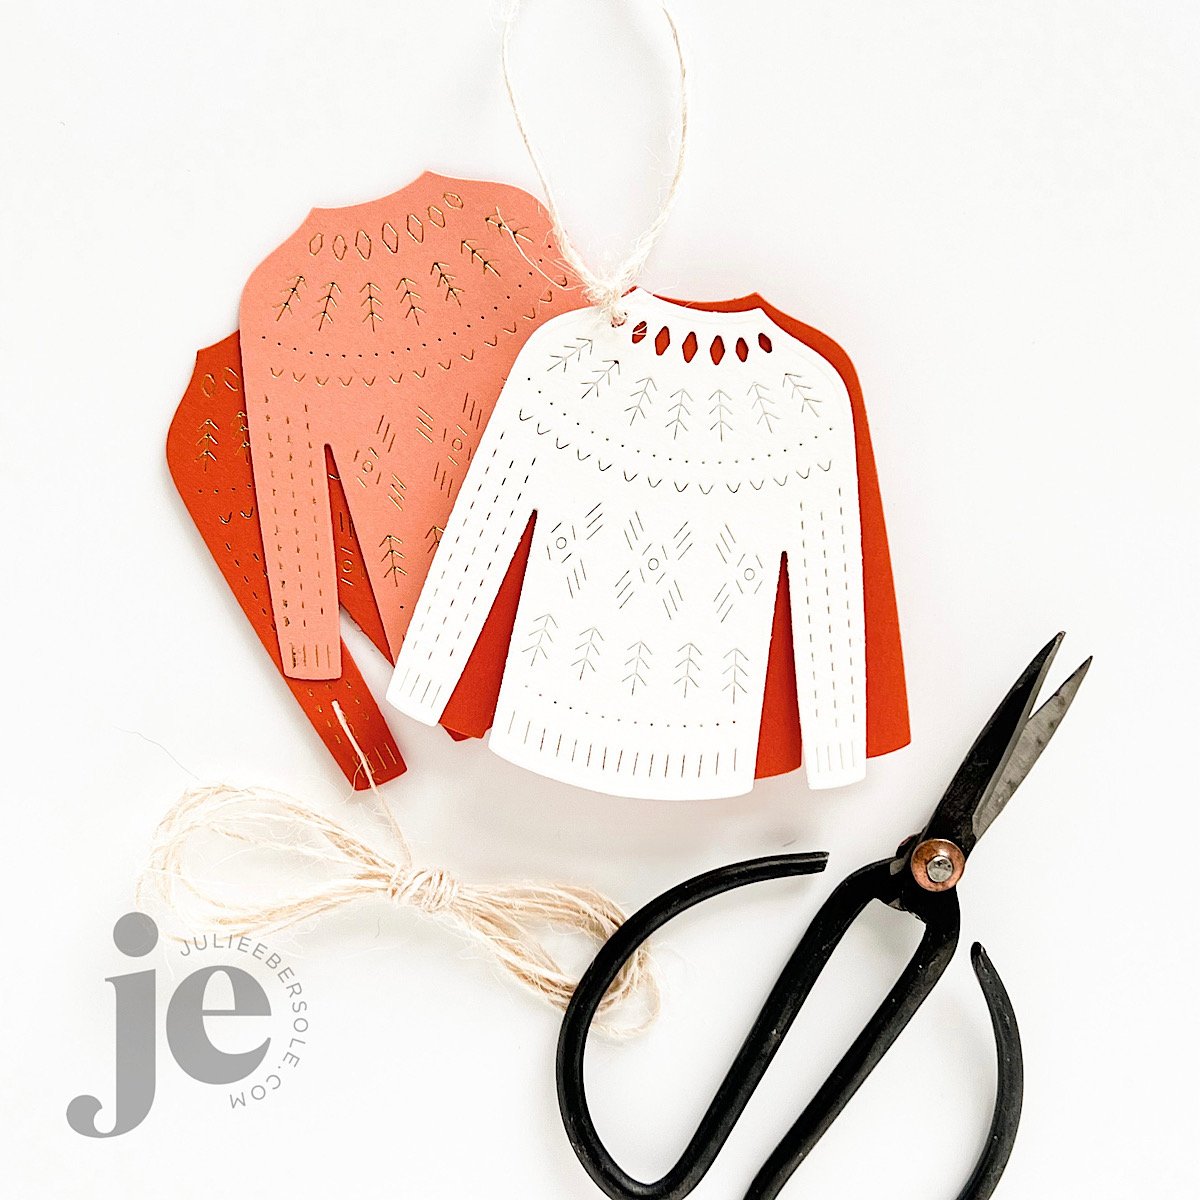
Need a super simple, highly impressive gift tag you can mass produce quickly?

This one is perfect for those of you who are short on time, long on love, LOL! I’m a sucker for a pretty sweater and this one has such a lovely pattern! I REALLY love to “deboss” it into watercolor paper because it’s thicker/heavier and the combination of textures between the pattern and the paper itself just looks and feels so luxe! I also think it looks pretty chic layered with a solid sweater shape underneath in a hue that coordinates with your wrapping paper.

The added bonus is being able to foil the pattern if I want an extra touch of glam!

Yes, you can foil low-profile dies and it doesn’t cut through the paper! Here’s a video I did on the Ellen Hutson YouTube Channel showing how to do that: Hot Foil Stamping with Low Profile Dies (Gemini Foil Press System used at the time; you can, however, also use the Glimmer Foil System by Spellbinders)

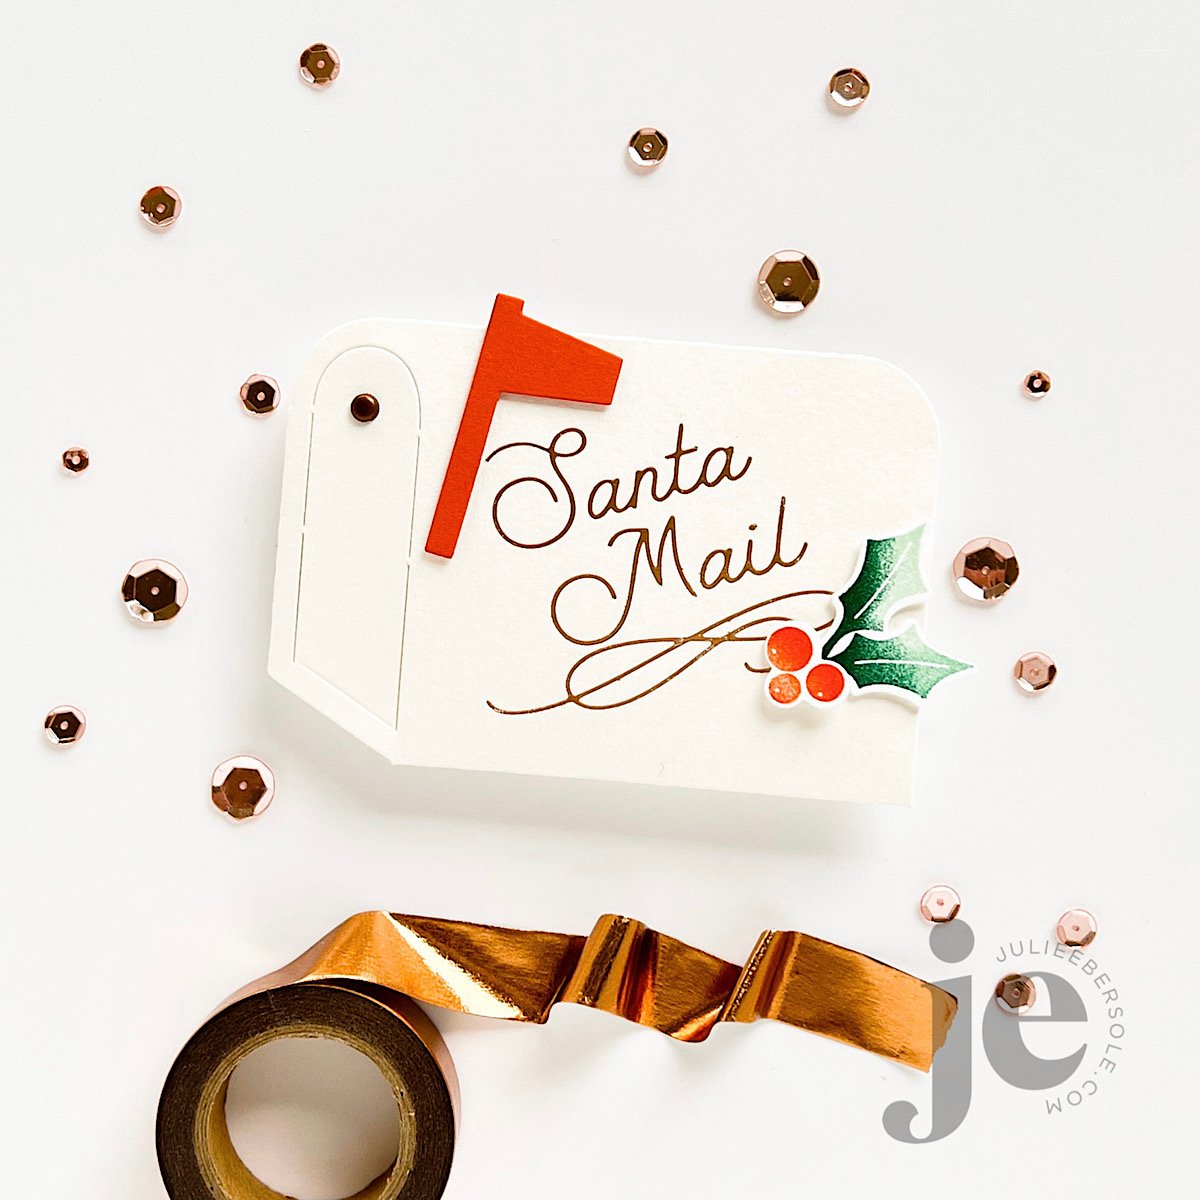
Speaking of foiling, you can obtain gorgeous results on that Canson XL Watercolor Paper, as shown on this interactive mailbox die:

  1. After die-cutting the shape, I hot foil stamped the designs I wanted onto the front side of the mail box.

  2. After creasing all the main fold lines well (a bone folder really helps because the paper is thicker than average) I inserted a mini brad from my stash, added strong, double-sided sticky tape (1/8” Scor-Tape —great for skinnier/tighter areas— and 1/4” Scor-Tape) to the flaps.

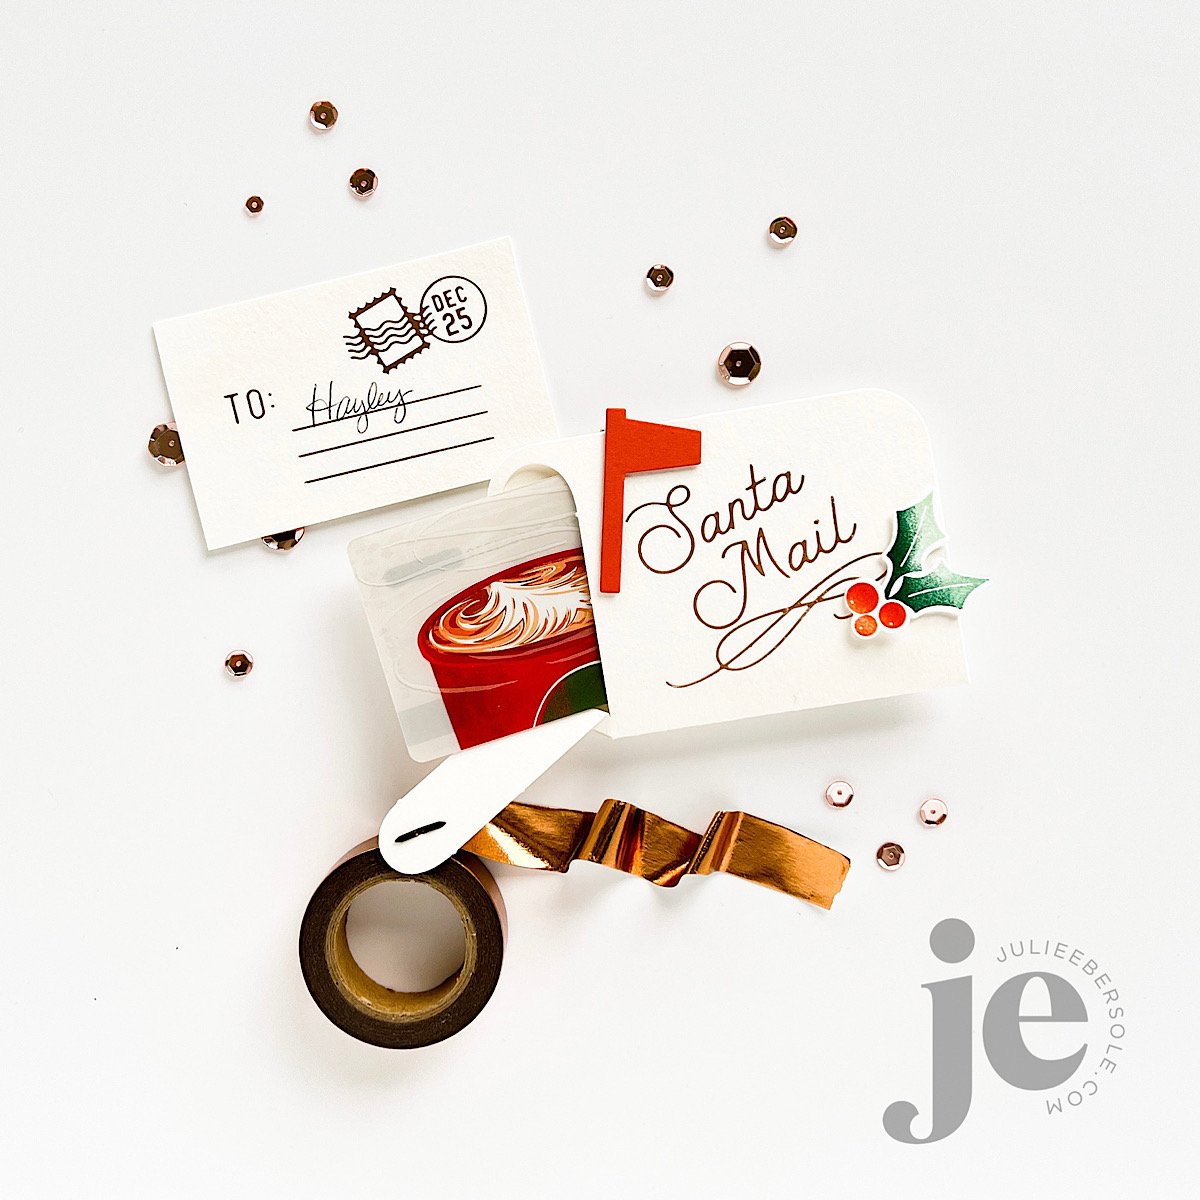
  3. Then I positioned a gift card inside and attached all the flaps to assemble, sealing the gift card.

  4. I added the mailbox flag, and a stamped/die cut holly sprig to further embellish.

I also foiled a piece of watercolor paper cut to the same dimensions as the gift card—it could be used as a gift tag, without the mailbox, but I think it’s just soooo stinkin’ cute to have a little mini letter to go with! (insert lots of monkey clapping here)

When the recipient pulls on the “handle/latch”, the mailbox door bursts open along the perforations and he/she can then slide the gift card out. SO FUN!!!

Hope you enjoyed these ideas for gifting at the holidays and thanks for stopping by!


Disclosure: I include affiliate links to the products used in my projects and make a small commission when you purchase via those links, at no extra dimes to you. 🙂 Thank you for buying all the things!

NEVER-ENDING FRINGE IDEAS AND INSPIRATION

fringe-hit-that-1.jpg

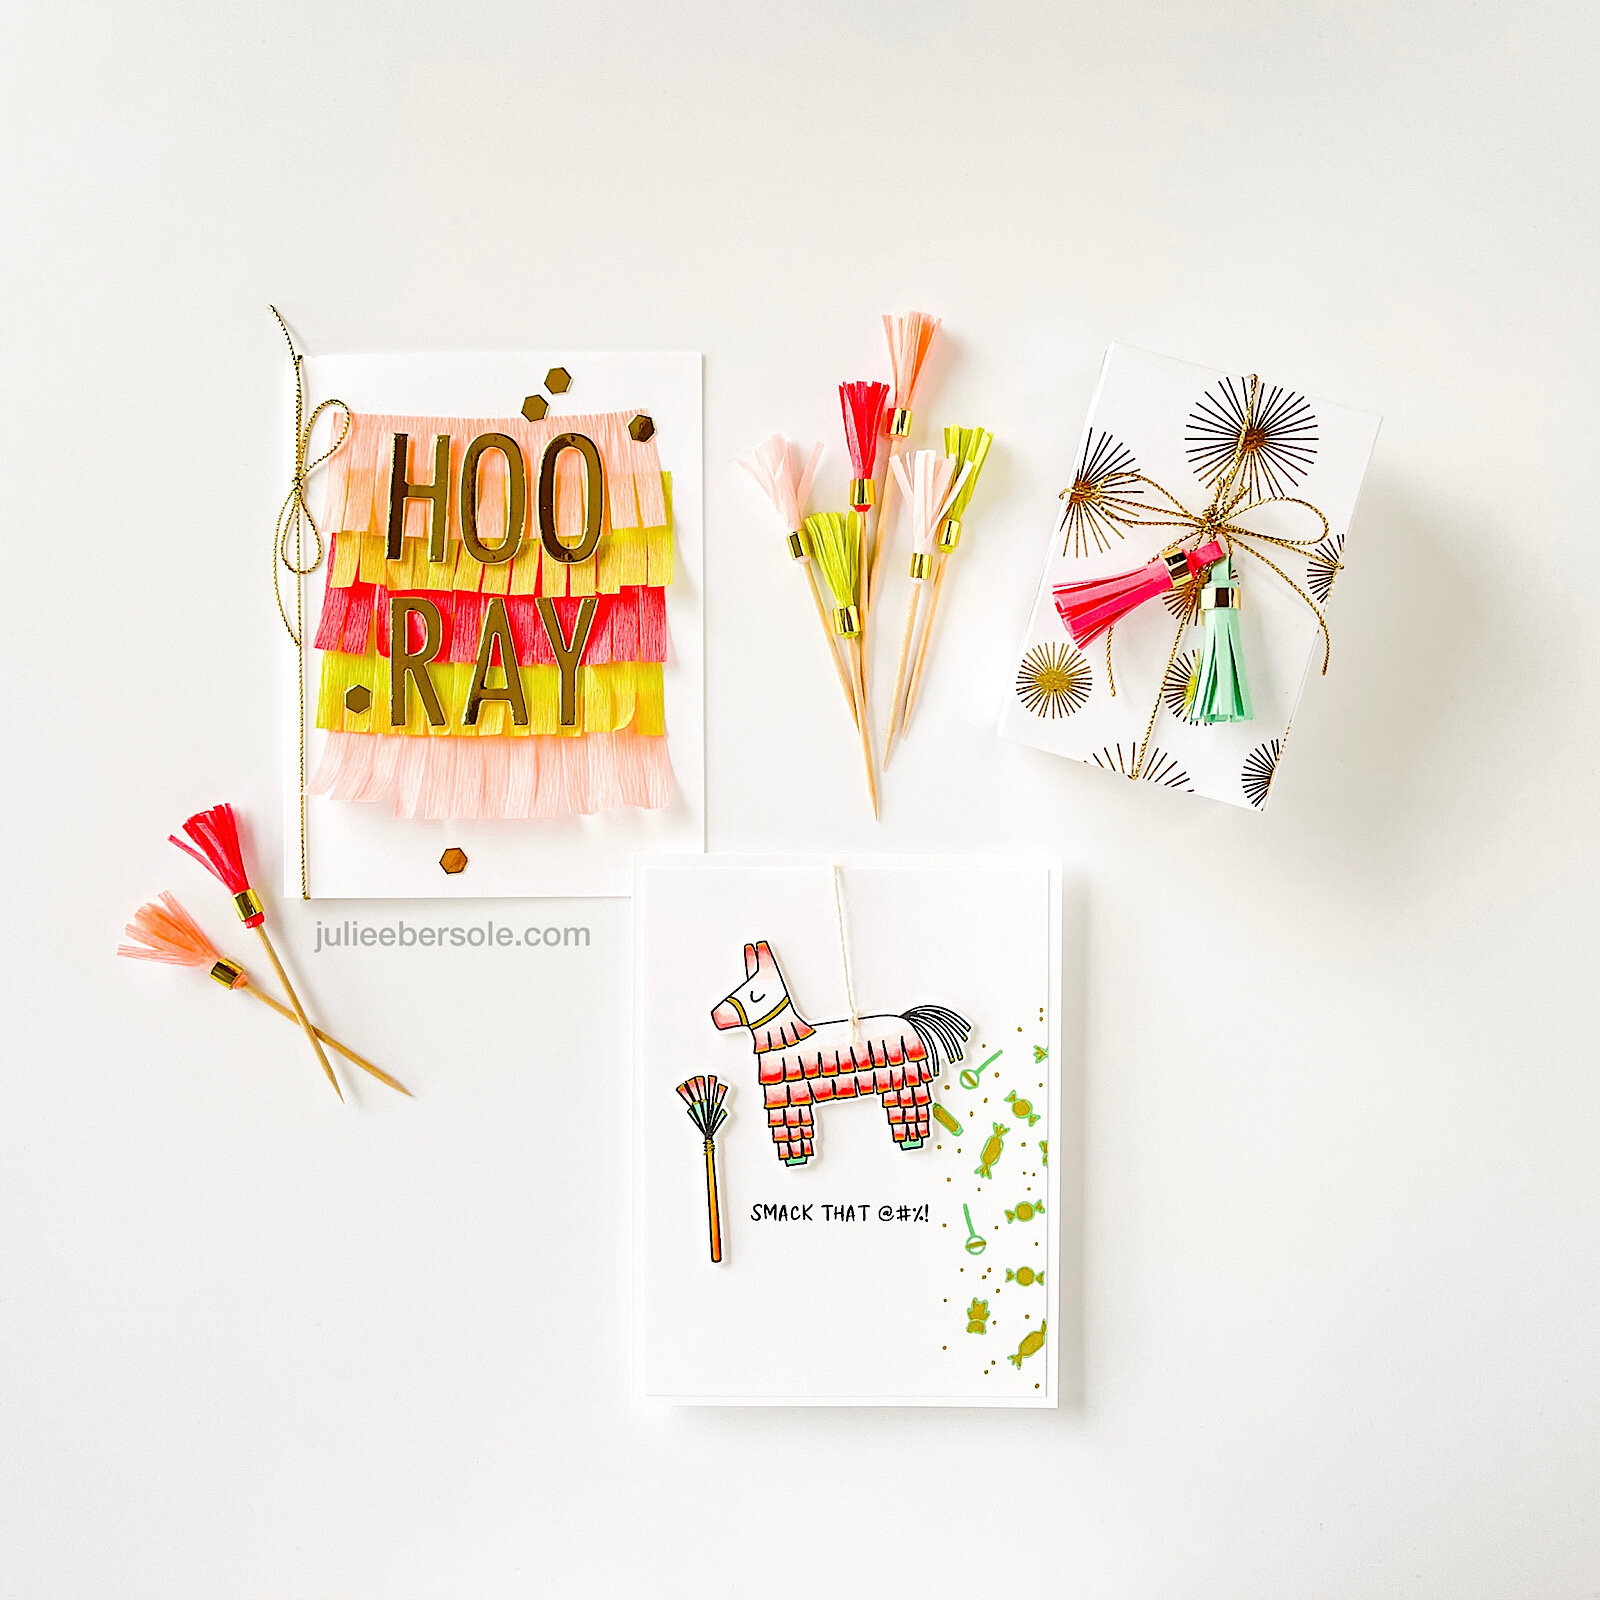
There are so, SO many ways to use the Never-ending Fringe Die—I love having 3 different sizes/widths of fringe to work with! Sometimes you need a smaller size for things like the party picks . . .

fringe-hit-that-5.jpg

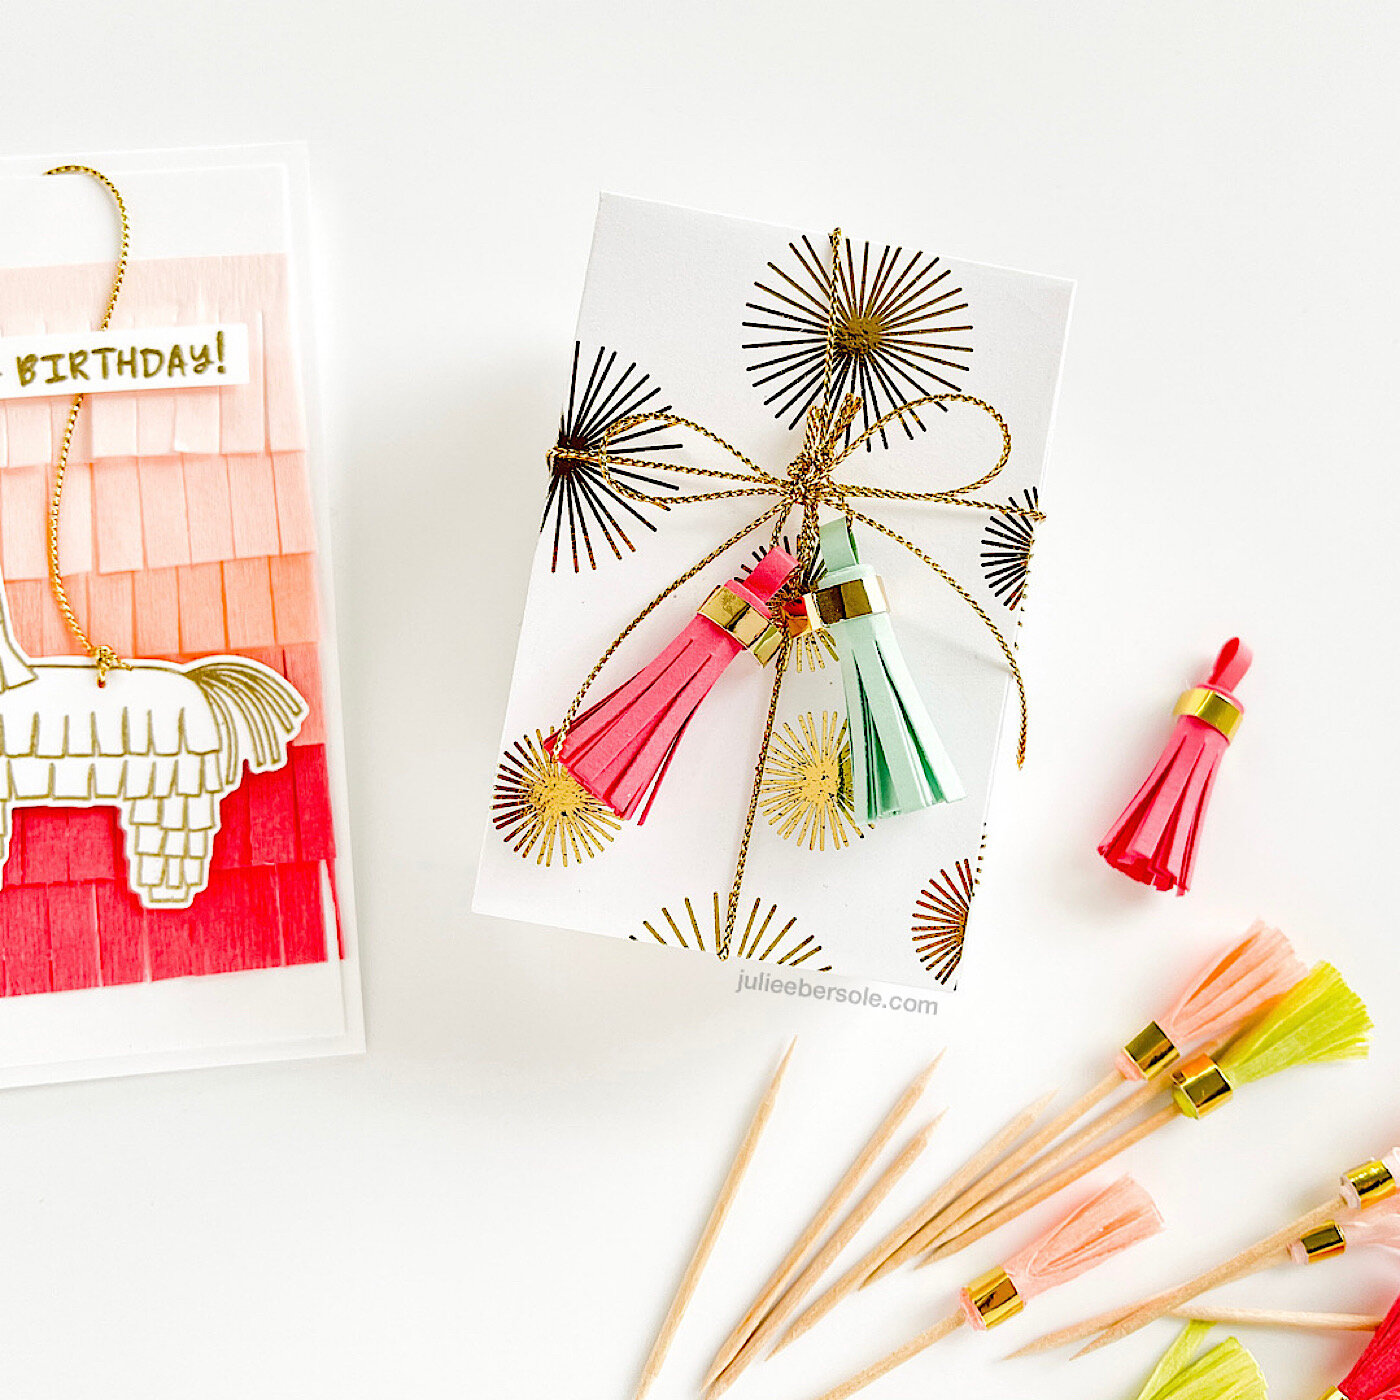
. . . and gift package tassels shown here, which are made simply out of card stock. They just finish off this package so nicely! I recently did a how-to video for making tassels using the Never-ending Fringe over on the Ellen Hutson YouTube Channel, linked HERE.

fringe-hit-that-2.jpg

Even tho my piñata above ↑ (from Hit That) is not multi-colored in more, customarily, “traditional” piñata hues, I think it turned out adorable in this ombré pink with minty green and metallic gold accents! (Copic marker colors I used are linked below down in supplies)

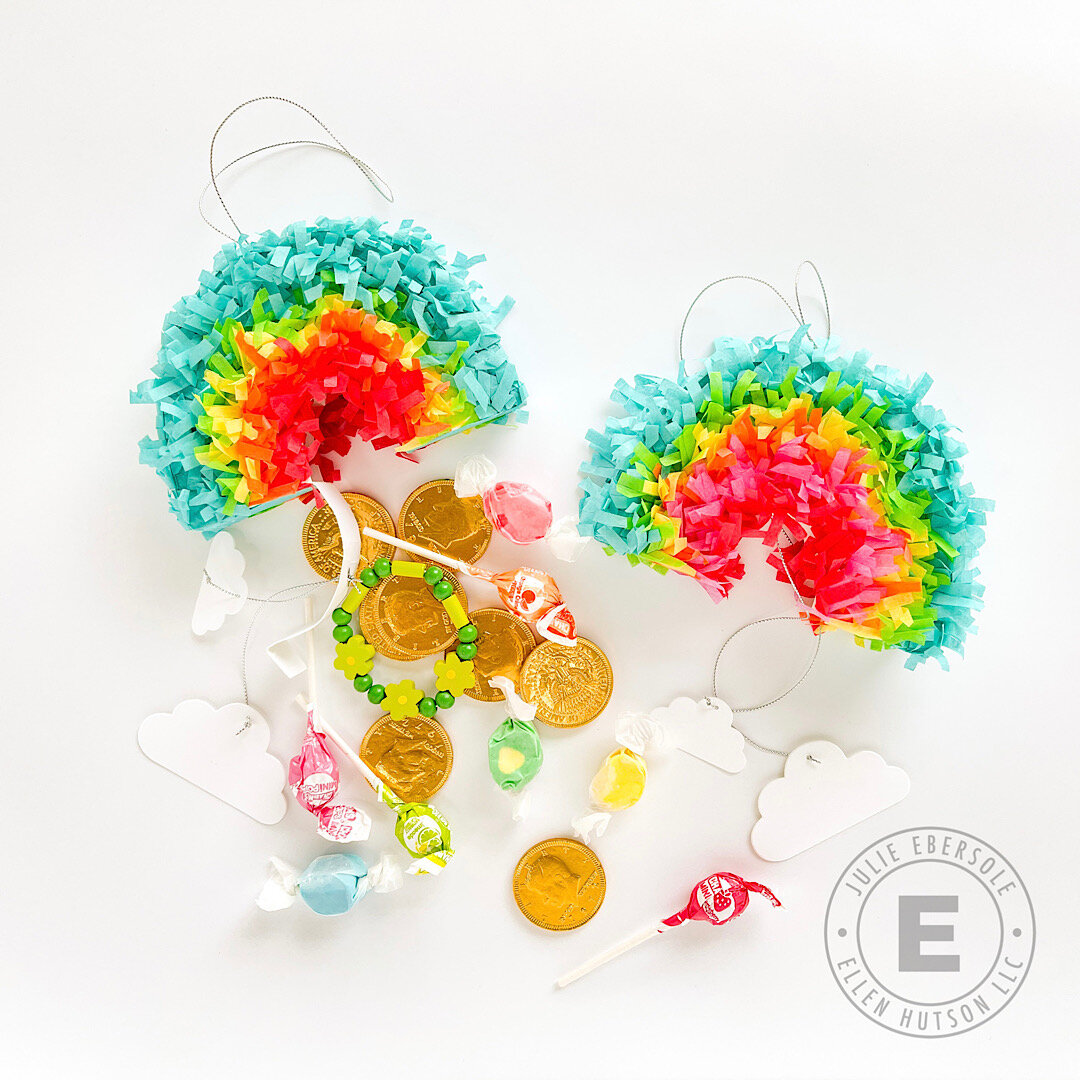
This DIY Mini Pull Piñata video tutorial I did for the Ellen Hutson YouTube Channel, linked HERE, is another of my most favorite projects—I really cannot wait for St. Patrick’s Day to hand them over to my granddaughters and watch their faces when they pull the strings! Here on Whidbey Island, we have very little of the shopping that folks are accustomed to on the mainland (seriously, a trip to Target is an hour+ drive away), but I am lucky in that our local downtown has a wonderfully well-stocked candy and toy shop where I found darling wooden bead bracelets, gold chocolate coins, colorful salt water taffy, and a few other items to stuff inside. Yay!!!

So, what about you? Are you as smitten with fringe as I am?

Thanks for stopping by today!


SUPPLIES:

Disclosure: Affiliate links used wherever possible; when you purchase via my links I may receive a small commission at no extra cost to you. It helps keep the lights on around here. And, if I could reach through the interwebs to hug you, you’d be wrapped up in the most appreciative mondo squishy hug on the planet!

DIY HOT FOIL STAMPED CELLOPHANE PACKAGING

2020-12-hotfoilstamp-cellobags-001.jpg

When a girl’s oven breaks down right before Thanksgiving, she’s gotta scramble. Luckily, the Mister knows how to smoke and grill turkey, and girl knows how to make crock pot mashed potatoes and no-bake pumpkin cheesecake pie; the day was saved! But, the part my oven needs (the control panel ) is (still ) on back-order, we’re in the middle of a Pandemic and Christmas is 12 days away . . .

This year will be the one where everything got dipped. In chocolate. Have you ever had dried apricots dipped in dark chocolate? Sinful. White chocolate popcorn? Heavenly. Chocolate coated pretzels—with the fun little sprinkles? Delightful.

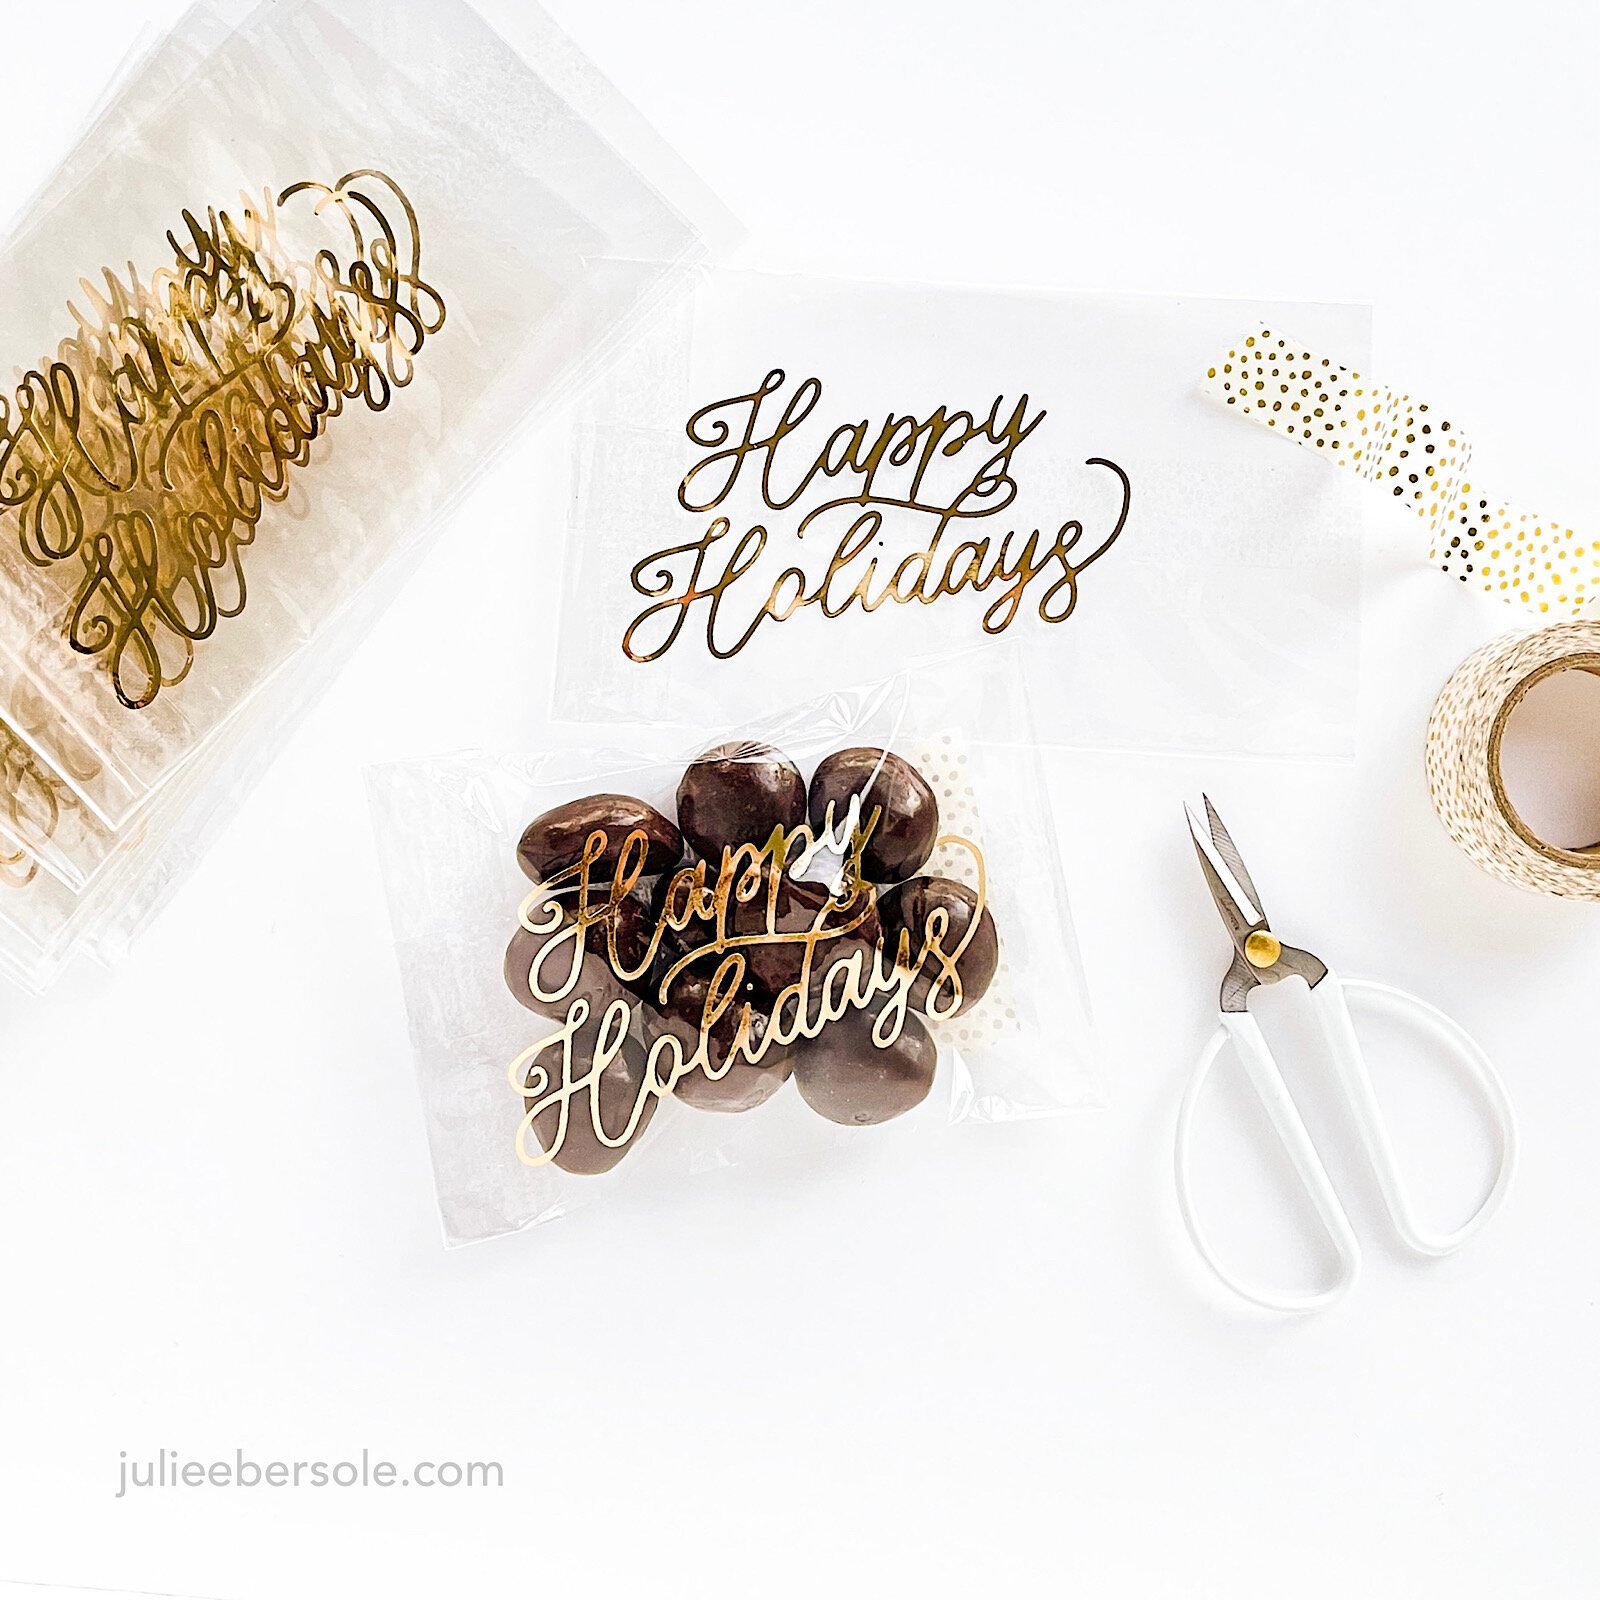
How to gift them in a way that feels special and, dare I say it, “upscale”? Today, I’m taking some plain jane cellophane bags and adding gold foil lettering for a gorgeous, high-end presentation and making Martha Stewart proud in the process! •wink• GO, ME!!!

PLEASE NOTE: I am foiling onto crystal clear CELLOPHANE bags NOT Polypropylene bags ).

My Gemini FoilPress Settings:

  • Medium Heat Setting

  • 15 second timer for a medium sized hot foil stamp

  • 110# sheet of card stock for additional shim

TIPS:

  • This method requires heat/pressure activated foils (NOT toner reactive foils ); while you can try other brands of foil, I have found Crafter’s Companion Paper Craft foils to work beautifully and quite consistently with the Gemini FoilPress system.

  • It’s always best to start with the lowest heat setting first and to test the results before proceeding to your project (be prepared to sacrifice a few bags to practice so you can find the settings that work best for your materials and your FoilPress; once you find the secret sauce, write it down and keep it handy. My notes are taped inside my cabinet door where I store my FoilPress ).

  • Slip a piece of card stock trimmed to fit inside the bag; this will improve foil transfer.

  • Removable/low-tack tape makes a great “hinge” for hot foil stamp placement, and anchoring in place to avoid shifting when sending through the Gemini Jr. I’ve been using Purple Tape, but you could also use washi tape.

  • Always allow the foil/cello bag to cool before peeling to reveal the foil.

  • Over-foiling on cello bags is best removed with the dull edge of the FoilPress Magnetic Tweezers or the dull side of scissors blade. (Do NOT use nail polish remover or rubbing alcohol to remove over-foiling on cellophane; it causes a chemical reaction that discolors the bag in a not pretty way. Ask me how I know . . . )

  • Tape residue on the back of your hot foil stamp can easily be removed with rubbing alcohol.

  • After filling your cello bags with a yummy treat, you can use twist ties, pretty washi tapes or possibly one of those heat sealer thingies (I don’t have one those—yet—but I just may have to bite the bullet . . . ).

2020-12-hotfoilstamp-cellobags-002.jpg

I seriously had THE.BEST.TIME foiling these bags! They turned out SO pretty! I’m packaging food, but DANG!!! you could package SO many different kinds of gifts this way!! YAASSSS!!! •fist pump•

My primary source for food-safe CELLOPHANE flat bags is Clear Bags. I also like their gusseted bags. With the Christmas holiday looming, however, they are currently out of stock of some of their most popular size configurations. ACK!!! You can also find cellophane bags on Amazon and big box craft stores that carry baking tools and supplies. You may even discover some vendors on Etsy that offer them ( ? — I haven’t looked but the thought just occurred to me ).

Thanks for stopping by today!


SUPPLIES:

  • Happy Holidays by Julie Ebersole, Essentials by Ellen Hot Foil Stamps - EH

  • Gold, Gemini FoilPress Papercraft Foil Rolls - EH

  • Rose Gold, Gemini FoilPress Papercraft Foil Rolls - EH

  • Silver, Gemini FoilPress Papercraft Foil Rolls - EH

  • iCraft Purple Tape 1-1/2 in X 15 yds - EH

  • FoilPress Machine, Crafter's Companion Gemini - EH

  • Crafter's Companion Gemini Junior EH

Disclosure: Affiliate links used wherever possible; when you purchase via my links I may receive a small commission at no extra cost to you, so please—buy all the things! And, thanks so much for your support!