not a card

HOW TO MAKE A MAILBOX GIFT CARD HOLDER

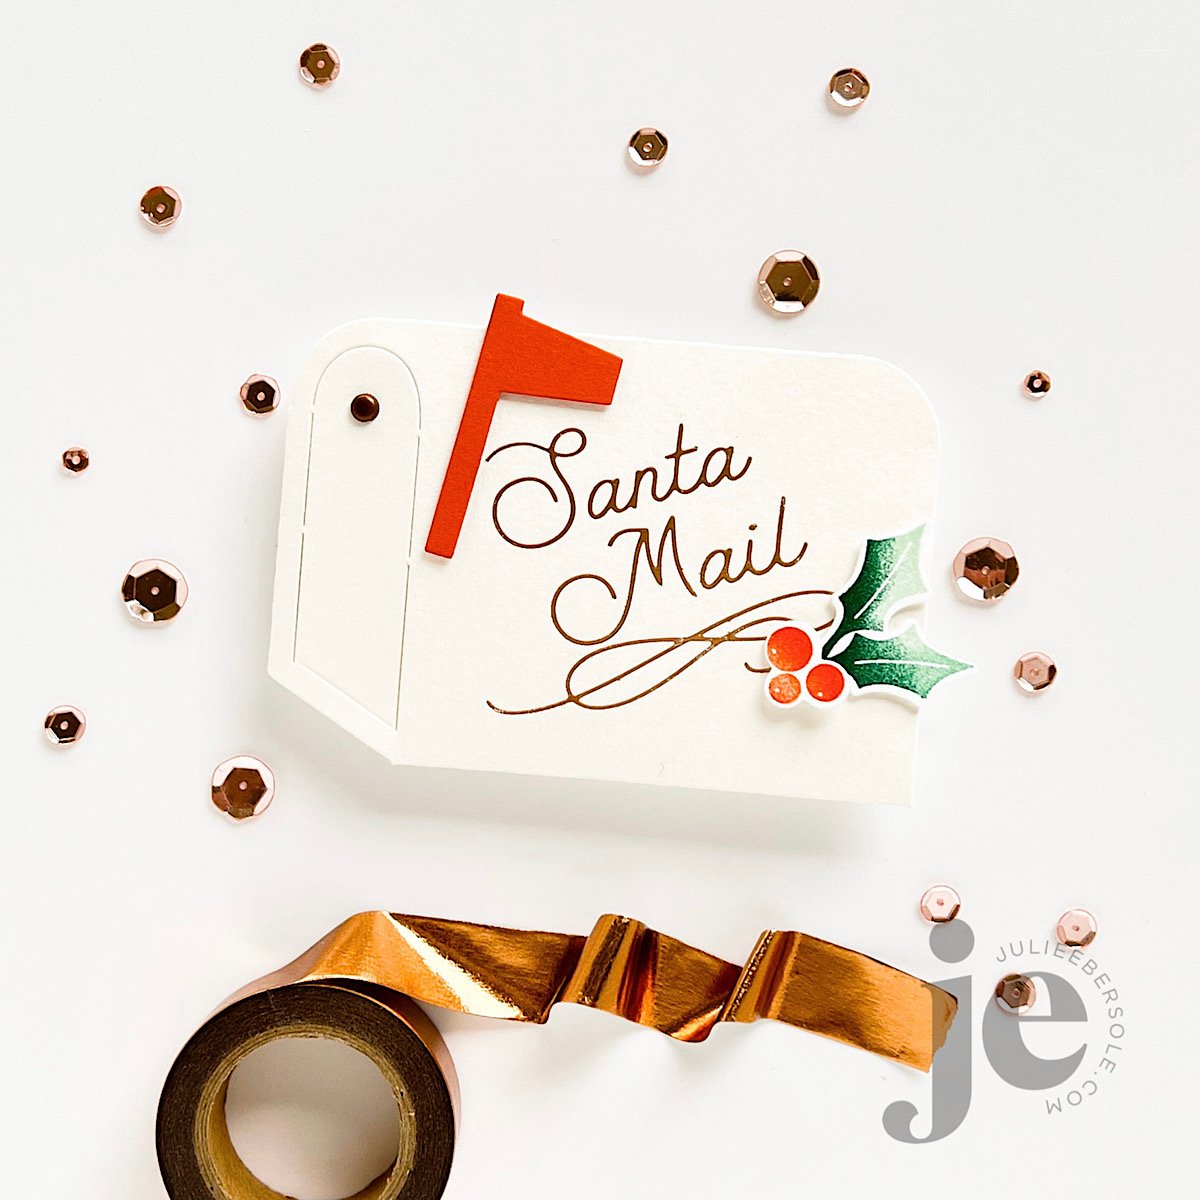
I received some questions on Instagram regarding how to assemble this gift card holder so I did a video—I also included how to get the gorgeous foiled effect on watercolor paper! I have had such great results foiling on Canson XL, 140#. Note in the video I did use a 110# Neenah solar white shim. Because watercolor paper has a rough texture, I found I needed additional pressure. Depending on how your particular machine is calibrated, you may or may not need a shim; experiment on scrap with foil scraps!

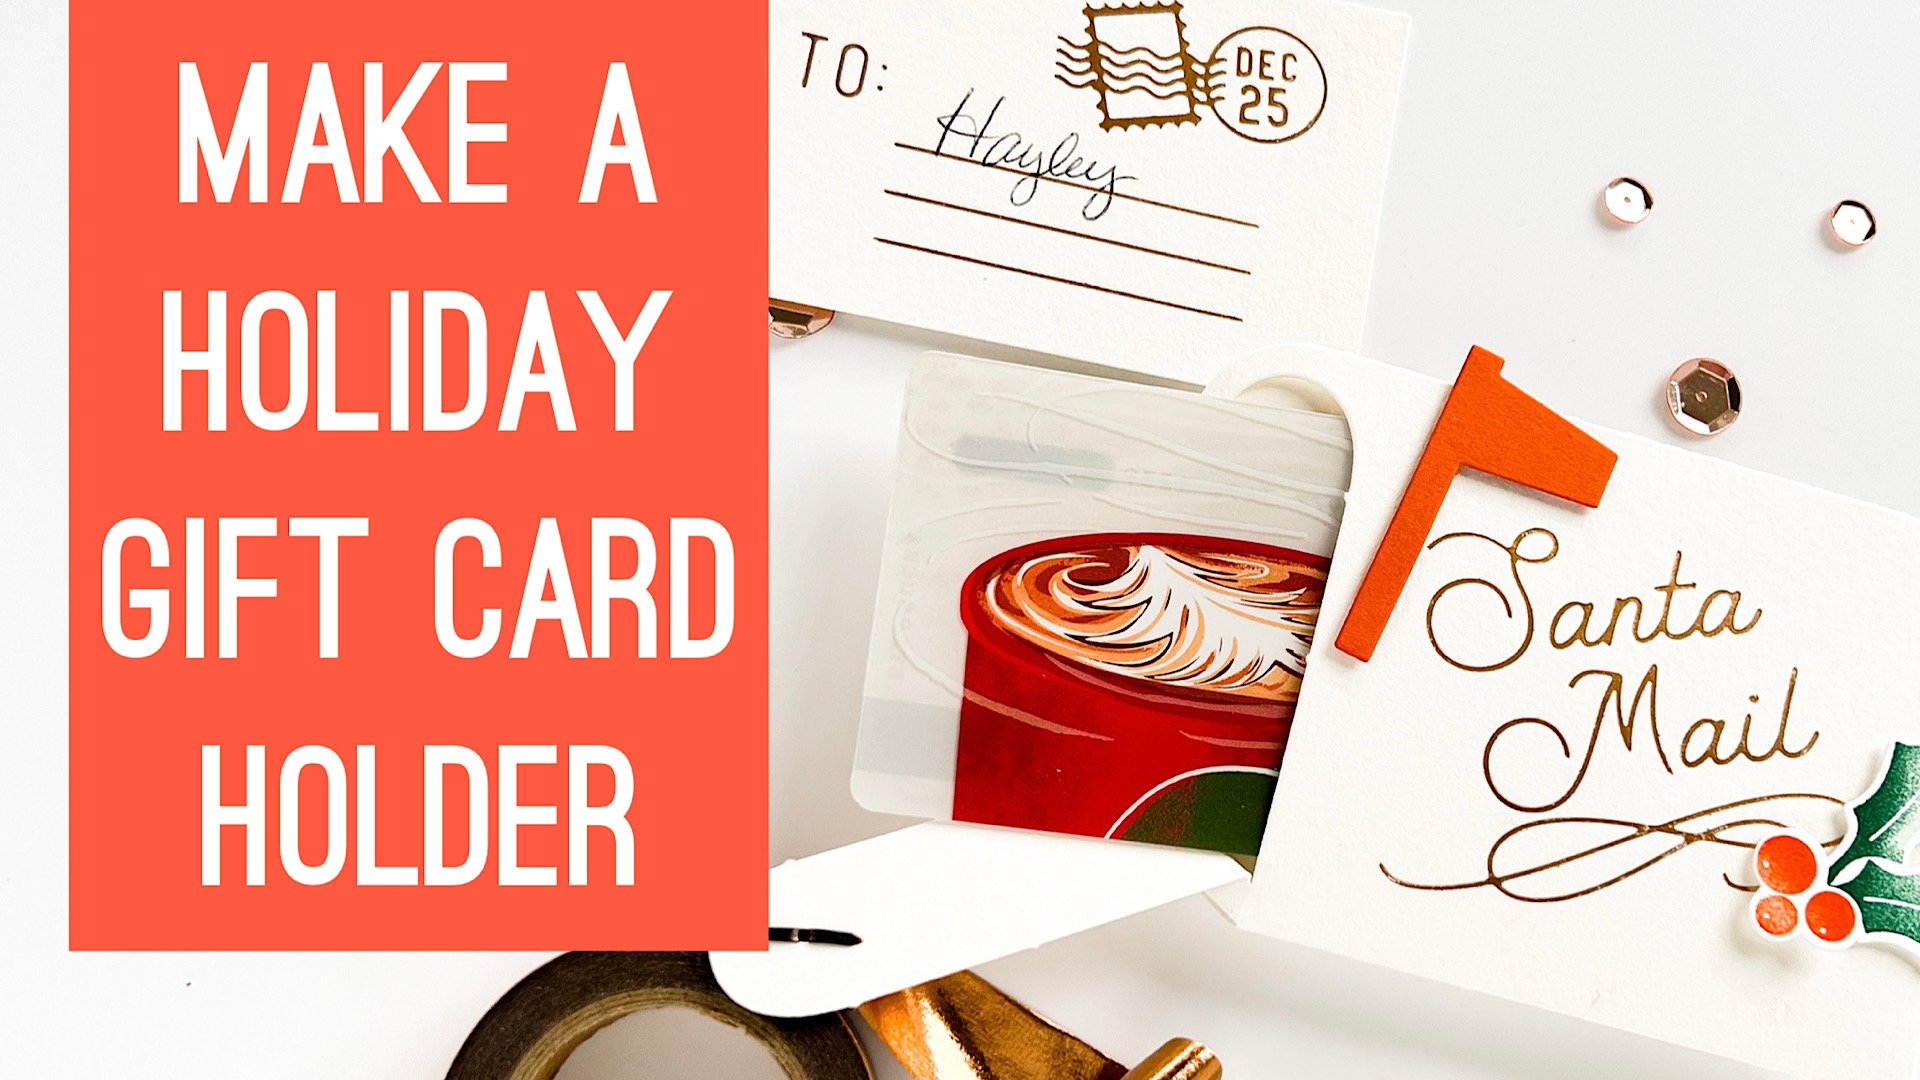
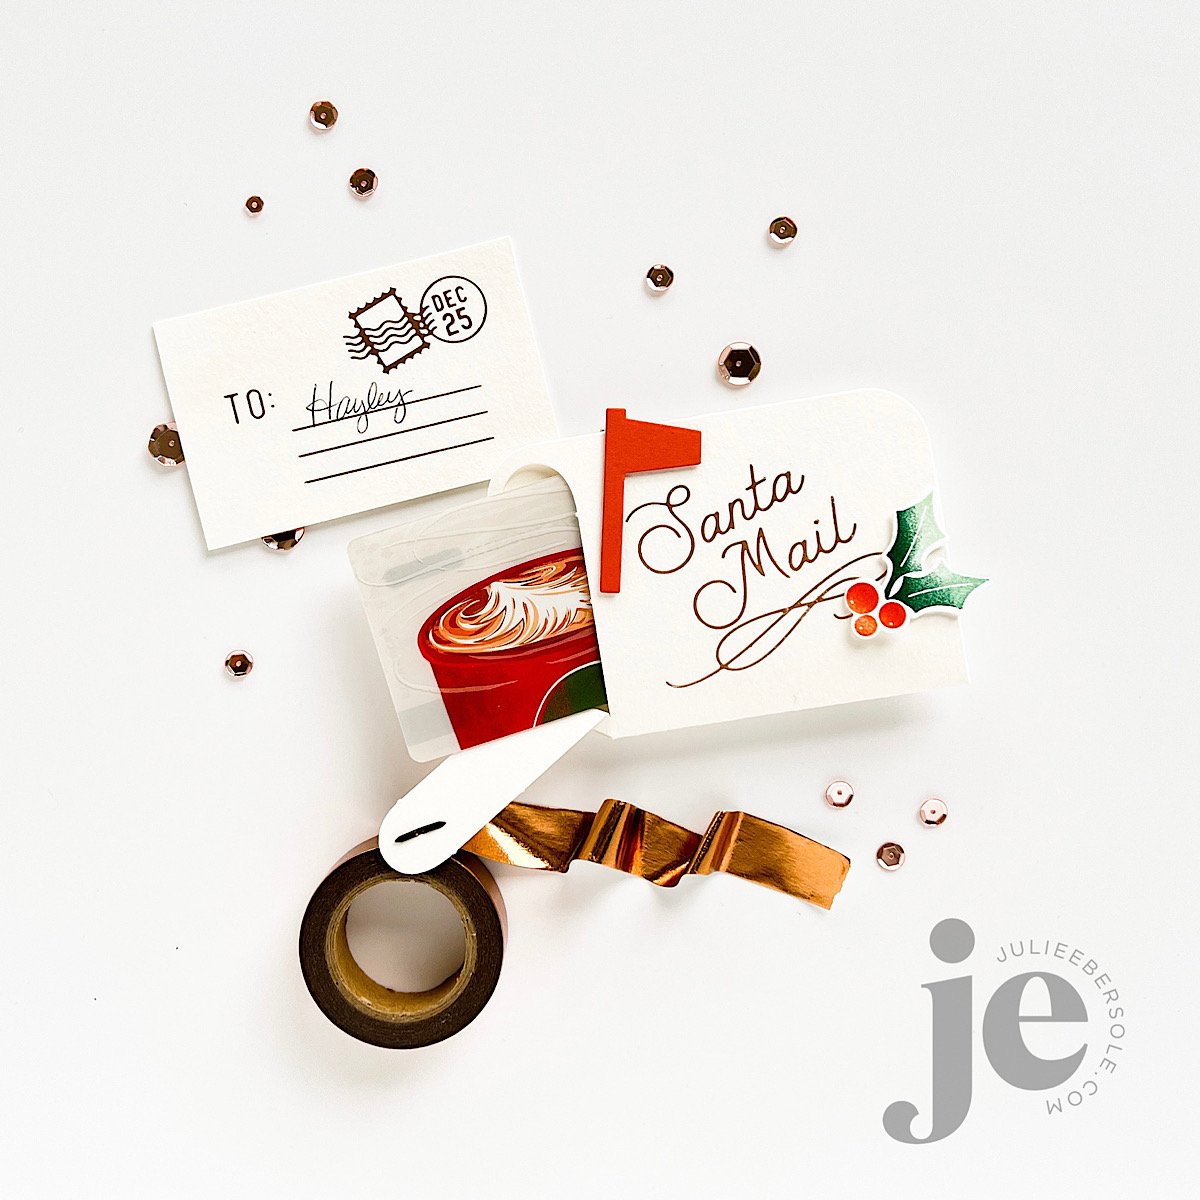
How to make a gift card holder with the Happy Mail Die

Please note: I own the Gemini Foil Press and a Gemini Jr. motorized die cutting machine; they’re designed to work together. I also used Gemini Paper Craft Foil. I recently heard the Foil Press is being discontinued (or reconfigured? replaced with something even better??? I have no clue, but I’m really bummed!) That’s what I used in my video because I don’t own the Spellbinders Glimmer System. I can’t tell you what it’s like to work with first-hand. I do know I’ll use my Gemini Foil Press into the ground before replacing it because it has performed beautifully for me for as long as I’ve had it.


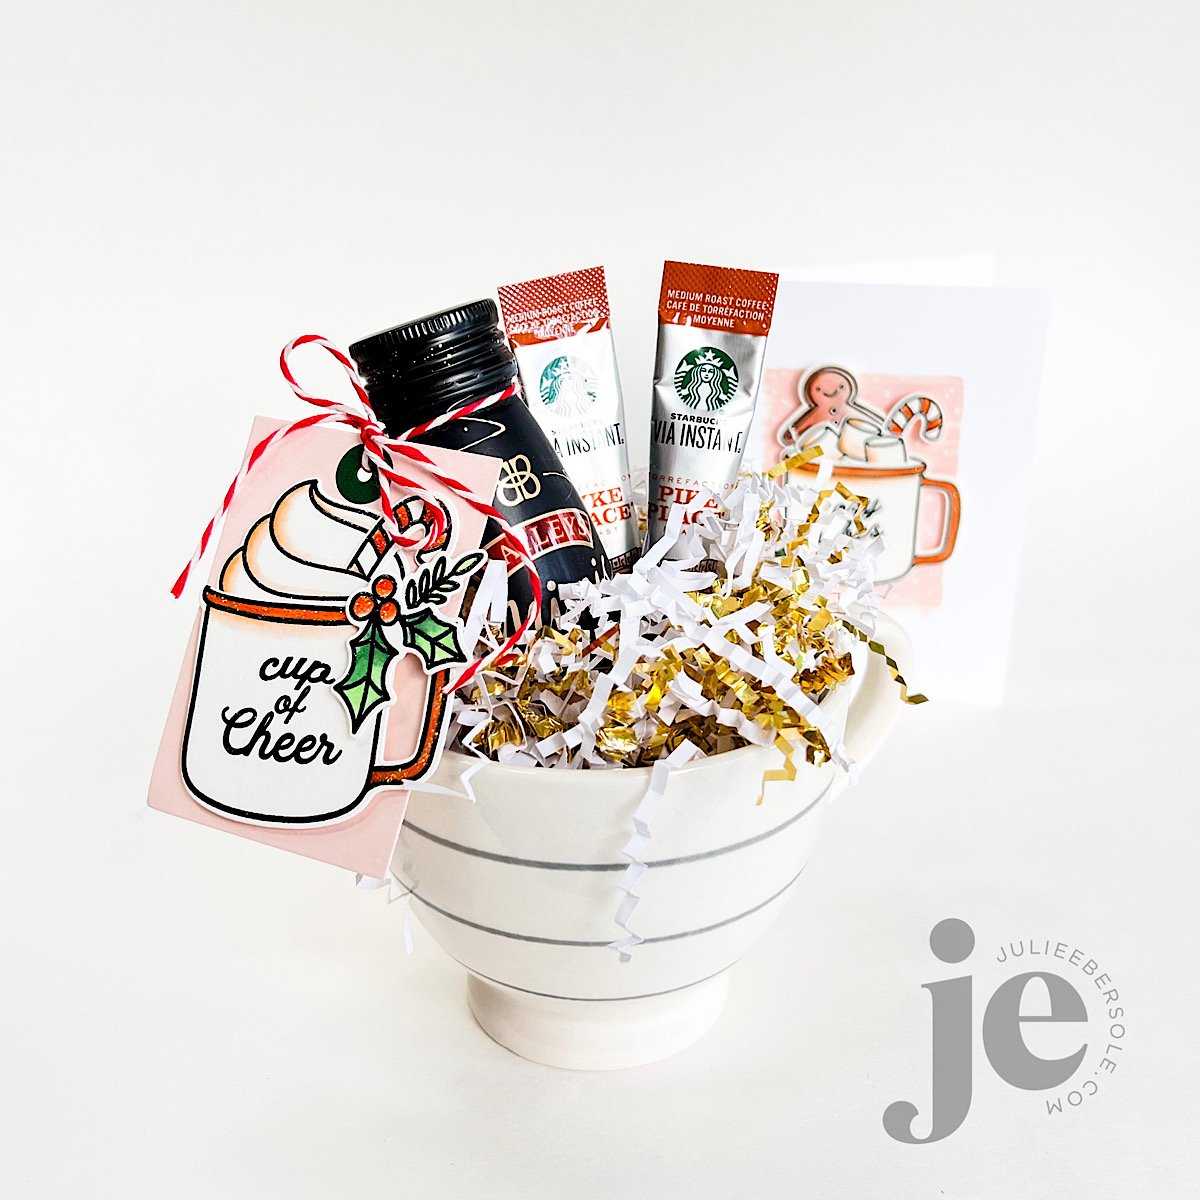
I hope this helps y’all see the method to my madness, LOL! I am ALWAYS on the hunt for a unique gift card presentation and I’m going to be making a big stack of these because they are so easy and so dang CUTE!!!

Have a splendid day!


Disclosure: *I include affiliate links to the products used in my projects and make a small commission when you purchase via those links, at no extra dimes to you. 🙂 Thank you for buying all the things!

SUPPLIES:


COZY HOLIDAY GIFTING AND TAG IDEAS

You know the saying, “Good things come in small packages!”? TRUTH!!!

feat. WIDE HOUSE BOX & HOLIDAY-ADD ON COMBO*

The Wide House Box Die and Holiday Add-On assemble very similarly to the Tall House Box Die (video tutorial link) and Halloween Add-On (video tutorial link).

Hostess gifts, teacher gifts, co-worker gifts, party favors . . . small, thoughtful tokens can have a HUGE impact when presented in charming packaging! Here are some fab ideas to tuck inside this adorable house box:

  • A gift card to the local coffee shop

  • Cookies or chocolates (Heath Miniatures are my personal fave, LOL!)

  • Lip balm and/or nail polish would be so cute

  • Sweet smelling hand-made soap

  • Purse or travel sized lotion/hand-sanitizer

  • Individually packaged tea bags & honey packets

  • Jewelry, like a fun pair of earrings or a necklace

  • Pretty hair ties or scrunchies

  • Cute stickers, washi tape, magnets and fun shaped paper clips for stationery lovers

  • Vials/bottles of essential oils or a mini refillable perfume atomizer

  • Battery operated tea lights or strings of mini LED fairy lights (the house box can be safely lit up as a decor item)

  • A personalized key ring or fob

These are actually useful and fun gifts for any occasion, not just the holidays. Heck, it’s just as much fun to present cash inside one of these as I’m sure it is to receive! I have no doubt you will come up with even MORE ideas for great tiny gifts. Just sayin’ . . . ! 😉

feat. WIDE HOUSE BOX & HOLIDAY-ADD ON COMBO (also available separately)

Santa and his sleigh are designed to attach and fit between the flaps of the roof peaks; I like to die cut two or three and layer them together before before attaching, especially if I’m working with 80# or lighter weights of card stock.

You can mix and match the windows/doors between the Wide House Box and the Holiday Add-On sets for a lot of versatility. The little gables look so cute on the snow capped roof and there’s even a wreath for the door and a tree in the Holiday Add-On set.

If you read my post the other day, I mentioned watching from the window as the family played in the snow, while sipping a coffee and Baileys . . .

feat. COZY CUPPA STAMP & DIE COMBO (also available separately) / MODERN TAGS DIE SET

A holiday, or even a simple, plain white mug serves as a “gift box”, and nestled among the paper shreds are a mini bottle of Baileys (a fun grocery store find—yes, I found 3 mini bottle packs of these at the grocery store! SCORE!!!) and some instant coffee packets!

My design elements from Cozy Cuppa were all watercolored, 3D mounted to a simple tag and tied to the bottle. Whip up a stack of tags and you’ve got an easy peasy, enchanting gift ensemble!

feat. COZY CUPPA STAMP & DIE COMBO (also available separately)

This adorable design just makes me think of my granddaughters—they love hot cocoa. AND marshmallows. So fun to tuck a gingerbread cookie and a candy cane inside to boot! Like the tag, I watercolored all the elements and that background was made by dragging my Tattered Rose Distress OXIDE Ink Pad across the front of the card and then dotting it with a white gel pen before assembling the rest of the card.

And, don’t forget the Stickles.

Speaking of which . . . what’s the golden rule about Stickles? Anybody? Anybody?

Need a super simple, highly impressive gift tag you can mass produce quickly?

This one is perfect for those of you who are short on time, long on love, LOL! I’m a sucker for a pretty sweater and this one has such a lovely pattern! I REALLY love to “deboss” it into watercolor paper because it’s thicker/heavier and the combination of textures between the pattern and the paper itself just looks and feels so luxe! I also think it looks pretty chic layered with a solid sweater shape underneath in a hue that coordinates with your wrapping paper.

The added bonus is being able to foil the pattern if I want an extra touch of glam!

Yes, you can foil low-profile dies and it doesn’t cut through the paper! Here’s a video I did on the Ellen Hutson YouTube Channel showing how to do that: Hot Foil Stamping with Low Profile Dies (Gemini Foil Press System used at the time; you can, however, also use the Glimmer Foil System by Spellbinders)

Speaking of foiling, you can obtain gorgeous results on that Canson XL Watercolor Paper, as shown on this interactive mailbox die:

  1. After die-cutting the shape, I hot foil stamped the designs I wanted onto the front side of the mail box.

  2. After creasing all the main fold lines well (a bone folder really helps because the paper is thicker than average) I inserted a mini brad from my stash, added strong, double-sided sticky tape (1/8” Scor-Tape —great for skinnier/tighter areas— and 1/4” Scor-Tape) to the flaps.

  3. Then I positioned a gift card inside and attached all the flaps to assemble, sealing the gift card.

  4. I added the mailbox flag, and a stamped/die cut holly sprig to further embellish.

I also foiled a piece of watercolor paper cut to the same dimensions as the gift card—it could be used as a gift tag, without the mailbox, but I think it’s just soooo stinkin’ cute to have a little mini letter to go with! (insert lots of monkey clapping here)

When the recipient pulls on the “handle/latch”, the mailbox door bursts open along the perforations and he/she can then slide the gift card out. SO FUN!!!

Hope you enjoyed these ideas for gifting at the holidays and thanks for stopping by!


Disclosure: I include affiliate links to the products used in my projects and make a small commission when you purchase via those links, at no extra dimes to you. 🙂 Thank you for buying all the things!

INK 101

People often ask, what’s the best ink. Honestly, there is no “best”, nor is there one ink to rule them all . (heh, heh, heh . . . LOTR fans will totally get me with that reference.) Inks come in a variety of formulas and ink pad formats, and ink pad sizes (full-size or cubes, often referred to as “minis”).

Click on the pics to enbiggan and see in greater detail.

In basic terms, these are the primary categories of ink:

DYE

  • Dye inks are typically very fluid, quick drying on porous surfaces, as well as glossy style card stocks.

  • They can be water-soluble (non-permanent), or permanent, and, with the exception of dark colors, can have a lovely transparency to them.

  • Some are archival quality, bleed-proof and fade resistant.

  • These ink pads usually come with a felt pad, topped with linen, but a now increasingly popular style of dye ink pad utilizes a gel foam style ink pad. These (gel foam) are my personal favorite type of dye ink pads; over time and use, linen topped felt pads can fray, with stray threads needing to be trimmed off. On the other hand, linen pads seem like they can withstand more aggressive techniques, such as direct-to-paper/ink-dragging, etc.

  • Dye inks are not typically designed for heat embossing, but under certain circumstances some can be, if you work fast or stamp onto a particular surface that allows them to remain wet for a longer period of time, such as vellum.


PIGMENT

  • Pigment inks are a thicker formula, almost resembling a thin paint, with a slower drying time and an opaque finish.

  • Tend to be fade resistant and richly saturated in color.

  • Can be stamped onto porous surfaces, but will never dry on glossy/coated card stocks and must be sealed with heat-embossing.

  • Come with a foam/sponge style pad.

  • Pigment inks are designed for heat embossing; they often contain glycerine, which gives the ink a slower drying time.


CHALK

  • Similar to pigment ink, these inks have a slower drying time, are opaque and have a distinctive chalky finish that you can see and actually feel on the paper surface.

  • Typically have a foam/spongey like pad.

  • Chalk inks often do not work well for heat embossing because the chalky ingredient in the formula doesn’t allow embossing powder to stick well.


HYBRID

  • These inks may contain the properties of several of the aforementioned inks, which may vary by brand.


SOLVENT PERMANENT

  • Can be dye OR pigment and are formulated for use on glossy coated card stocks as well as slick surfaces, such as acetate, polyshrink, glass, vellum, etc. And, yes, they will/do dry!

  • Pigment style solvent inks are slower drying but can be speed heat set with an embossing tool or sealed with embossing powder.

  • Due to their permanent nature, they will stain your stamps quite severely; this doesn’t typically affect their performance, but stain removal will require the use of a specialty or solvent type stamp cleaner. In some cases, with clear stamps, you may never “completely” remove the staining. I highly recommend Ultra Clean (affil) for deep cleaning stamps, but work in a well-ventilated area.


METALLIC

  • Pigment based and slower drying on porous surfaces; can be speed heat-set with an embossing tool.

  • Most will require sealing with embossing powder on glossy/coated surfaces, vellum, etc.

  • Exception: Some brands of metallic pigment inks are formulated specifically to dry on non-porous surfaces, such as Brilliance by Tsukineko/Imagine Crafts.


WATERMARK

  • Think of watermark ink as a completely CLEAR pigment ink.

  • On darker colored card stocks, it will deepen the shade of the paper color, hence why it is called “watermark” ink.

  • Can be heat-embossed.

  • Slower drying on porous surfaces; will require sealing with embossing powder on glossy/coated card stocks, vellum, etc.


EMBOSSING

  • Basically, a pigment style ink that may have a slight tint to it, i.e. pale blue.

  • Specifically designed/intended for heat-embossing, with some brands offer even slower drying properties.


Do I have personal favorites? Of course—every stamper does!

  • I looooooove water-based dye inks for quick and easy stamping: Concord & 9th as well as Catherine Pooler offer a wide range of colors and are my normal go-to inks.

  • If I’m coloring outline images, I tend to reach for Versafine Clair in Nocturne, as it is a little faster drying pigment ink and is a rich dark black. I also love Fallen Leaves, which is more of a black brown. VFC can also be sealed with clear embossing powder for coloring with alcohol markers (FYI, it does NOT play nice unsealed when coloring with Copics)

  • For coloring with alcohol markers, i.e. Copics, I tend to reach for Memento Dye ink in Tuxedo Black, but many folks also like the Gina K Amalgam Ink in Obsidian because it works for water-based, alcohol and dry mediums like colored pencils—a rare tri-fecta in the world of inks!

  • Favorite white ink on dark surfaces? Hero Arts Unicorn Pigment has great opacity!

  • Heat embossing in general? Versamark is my preferred and I love using it for watermark stamping on mid-darker colored paper.

  • Delicata Golden Glitz is probably the most beautiful gold metallic ink I’ve ever stumbled across; I prefer it “nekked” (un-embossed) because the shimmer is drop-dead gorgeous!


That covers the basics of ink, but if you have any questions I didn’t happen to answer, ask away in the comments and I will follow up with answers!

Have an excellent—and I hope, crafty—weekend!


Disclosure: This post includes my affiliate link(s). If you use my links to make a purchase, thank you so, so much for your support!

LAST MINUTE HOLIDAY GIFT

This is a very late share, but a share nonetheless; the holidays were crazy busy!

I shared this pic on my Instagram prior to Christmas because I was soooooo excited about how they turned out! My granddaughters are 7 years apart, age-wise. It’s becoming harder and harder to find matching pajamas or sister outfits as the oldest one gets older—ones I actually like, I mean. This year, I finally cried Uncle and decided to buy some matching “plain” pajamas and use my Cricut Maker to get what I wanted. Nana’s gotta do what Nana’s gotta do, am I right?!

Over the years, I have invested in various digital die cutting machines—still own the ones that haven’t died on me (RIP Eclips). Primarily, I got them to test my paper craft metal die designs prior to sending the designs off for production. Beyond that, for whatever reason, I didn’t really feel compelled to use them for much of anything else. When a friend raved about her Cricut Maker, I sat on the fence. C’mon, did I really, really need another such machine? Could it really be that much better than what I already had???

During all the holiday sales going on last year, I decided to “dip” my toe into the waters . . . I was pleasantly surprised at how much quieter it was in comparison to all my previous machines. It cut.like.buttah. Thoroughly impressed by the results, I plunged even deeper . . .

I LOVE playing with it! Honestly, I didn’t anticipate the extent to which I’d enjoy working with it or that I’d want to explore making NON-CARD (gasp!) things, LOL!

It was immensely gratifying to be able to customize/personalize these otherwise plain pajamas for the grandweebles! Note to self: Must get more flocked HTV. Meantime, I’m thinking about making some Valentine’s Day Mugs for them, because they love hot cocoa (Yes, I did get a Cricut Mug Press. And Infusible Ink. When I go deep, I go deep, LOL!) #notkidding #noregrets

Do you have/use a digital cutter? What do you like making with yours? I’ve heard some folks got one and a year later still haven’t taken it out of the box! GAAAAAH!!! (insert horrified look)


MATERIALS/SUPPLIES (I am not currently an affiliate for any of the companies/manufacturers listed below):

  • 100% Cotton Striped Kids Pajamas from Target online

  • Siser Stripflock Pro Red HTV (Heat Transfer Vinyl)

  • Cricut Maker

  • Cricut Easy Press 2


ANNOUNCEMENT

Also, I wanted to give you a heads’ up that I am going to be transitioning to a new email platform; currently my blog’s RSS feed goes out via MailChimp to those of you that signed up. But, how those emails look has always bugged me (like really, really bugged me!), so I’m moving over to FloDesk.

If you’d like to continue receiving updates/news, other yadda yadda via my email list, please sign up! There’s a new form along the bottom right of my site’s home page you can fill out.

If you’re not interested, no worries; I just didn’t want those who are accustomed to receiving that RSS feed via email to miss out when I finish the transition.

Thanks muchly!

5 OF MY FAVORITE ESSENTIALS BY ELLEN PRODUCTS

Yup—it’s your lucky day! Ellen Hutson is having a 25% of sale on the Essentials by Ellen product line! My stamp sets/die designs are part of that line, so yes! That discount applies to my exclusive designs, too! Yippee!!! Here’s a direct (affiliate) link to the sale category: Essentials by Ellen

The sale ends December 17th, 11:59pm Pacific and don’t forget to use code EBEDEC2021 at check out!

Aside from my own designs, tho, Ellen’s shop carries a number of other exclusives that are among some of my all-time faves!

5 ESSENTIALS BY ELLEN PRODUCTS I RELY ON:

  • EBE Storage Envelopes - When Ellen first started producing my designs, she asked what kind of packaging I would want, from a crafter’s perspective. I mentioned I’d really love it if they came in storage sleeves/pockets that were so sturdy I could keep and organize them in the same, without the need to invest in something else extra. She nailed it!

  • EBE Crystal Clear Plastic - I use this not only for shaker windows, but also for clear cards, as support for various pop-up mechanisms, making DIY clear overlays, as a mixing palette for watercolor paints and so on and so forth. Sometimes acetate can have a slight haze or cloudiness but not this one; it’s always literally crystal clear!

  • EBE Ebony Black Card Stock - It’s a nice rich black, and at 100# it’s also got a nice heft to it. It’s my go-to black card stock.

  • EBE Teflon Bone Folder - Ellen actually gifted me my first teflon bone folder many years ago; at the time I was skeptical that it being teflon made any kind of difference. I later ate my words, because after my first use it became a tool I can’t imagine being without. It creases my fold lines all buttery smooth, and doesn’t leave a shine on the paper. Truth.

  • EBE 40# Vellum - A frosty but translucent finish that is also weighty enough to serve as a card base. That’s what I’m talkin’ ‘bout.

I can’t say enough good things about the above products—they are/have been long-time staples for me! If you haven’t tried any of ‘em yet, now’s a good time!

Hope your week is going well, and thanks for popping in!


ANNOUNCEMENT

Also, I wanted to give you a heads’ up that I am going to be transitioning to a new email platform; currently my blog’s RSS feed goes out via MailChimp to those of you that signed up. But, how those emails look has always bugged me (like really, really bugged me!), so I’m moving over to FloDesk.

If you’d like to continue receiving updates/news, other yadda yadda via my email list, please sign up! There’s a new form along the bottom right of my site’s home page you can fill out.

If you’re not interested, no worries; I just didn’t want those who are accustomed to receiving that RSS feed via email to miss out when I finish the transition.

Thanks muchly!