HOW TO MAKE A FULL GLITTER PANEL

If you could see how much this sparkles IRL, you would ooh and aaaaahh. Seriously.

Oh, and I do have a few extra tips that I’ve included (towards the end of my post) that I didn’t actually think to mention in the video at the time of recording, so you may want to check those out, too.

Deer-antlers-2.jpg

This is really a simple card, but it looks a LOT more complex. And, the “full-on glitter” always seems to dazzle peeps! I’m sure it also shocked anyone that knows me that I would actually let my hands get glitter all over them. Now, in all honesty, I really do hate getting stuff on my hands like this, BUT, this is one of the few end results that I will actually tolerate getting a little messy over.

And, if I can do this, you can do this. Well, I should say, “most of you”; I do have one stamping friend who cannot abide loose glitter and she would refuse.

FULL-ON GLITTER PANEL TIPS:

  • Stamp images with a fast-drying dye ink; pigment ink takes a long time to dry completely and sheet adhesive (double-sided sticky tapes, tape runners, etc.) will not stick to any surface that has wet ink.

  • Bold images tend to show through the glitter better than fine/detail images.

  • If you have a Xyron machine, use that instead of sheet adhesive.

  • A plastic bin large enough to place a card front face down makes this technique much easier and more convenient.

  • Turn OFF your ceiling fan during the “glitter bath” (if you have one); ask me how I know . . .


INK SWIPED BACKGROUND

Joan Bardee, a.k.a. Dear Paperlicious has shared a number of card designs featuring bold colors that just had me craving to make something along the same lines . . .

“Ink swiping” is an oldie but goody that fit the bill so I grabbed some Altenew Dye Ink Cubes for this project.

The sentiment was clear embossed over the ink swiping so the colors would show through—I love this look so much! But, a word to the wise: Make sure the inked surface is COMPLETELY dry before heat embossing. Sit on your hands and wait, or be like me, •hair flip• and heat set, then pounce the surface well with an anti-static powder (blow excess off before stamping) so the embossing powder only sticks to the embossing ink from the sentiment itself.

2020-10-05 18.33.30.jpg

The deer couple looks so elegant and sophisticated all in white—I just layered the die cuts multiple times to create faux chipboard, and then spot foiled some details using a Zig Two Way Glue Pen and some gold I-craft Deco Foil

INK SWIPING TIPS:

  • Pigment inks or dye inks work for this; you can use full size or ink cubes, as I did here, but having them well inked (as opposed to dry) will tend to give you the best results. Dry ink pads can result in the pad separating from the base, instead of gliding over the paper surface.

  • Depending on the desired effect, small cubes can be easier when applying multiple colors.

SPOT FOILING TIPS:

  • Use a glue that remains tacky when dry; I personally like Zig Two Way Glue Pens because they go on blue, but become clear when dry.

  • Make sure the glue is dry and tacky or foil will not transfer.

  • Apply transfer foil with pretty side up; use pads of your fingers (not your nails) to rub firmly to transfer the foil. For a project like the above, scraps of foil are all you need, so it’s worth saving foil scraps . . . just sayin’ . . . •wink•

Have you tried ink swiping? I should remember to use it more often.

Thanks for stopping by and continue to stay safe and healthy out there!


HOCUS POCUS CRYSTAL BALL SHAKER

OK, just one more round of Halloween inspiration and then I’ll (try to) move on. I can’t help it. I had too much fun making these not to share them!

I love black and white + orange for Halloween, but when you throw pink into this mix . . . I’m not sure if it’s my aversion to purple that makes it work for me—but I seriously, SERIOUSLY LOVE it!

2020-10-05 18.24.00.jpg

I actually designed the Twirling Flurries with Christmas in mind, but then it worked so well as a magical background for Halloween projects, just had to use it this way, too!!! •fist pump•

I love the detail image on the base of the Shaker Globe—so good white embossed on black!

And, I gotta’ say, if you haven’t tried THESE FOAM SHEETS for die cutting odd shaker shapes (by that, I just mean not square, cuz those are easy, right?), I’m tellin’ ya’ right now—they are DA’ BOMB!!!

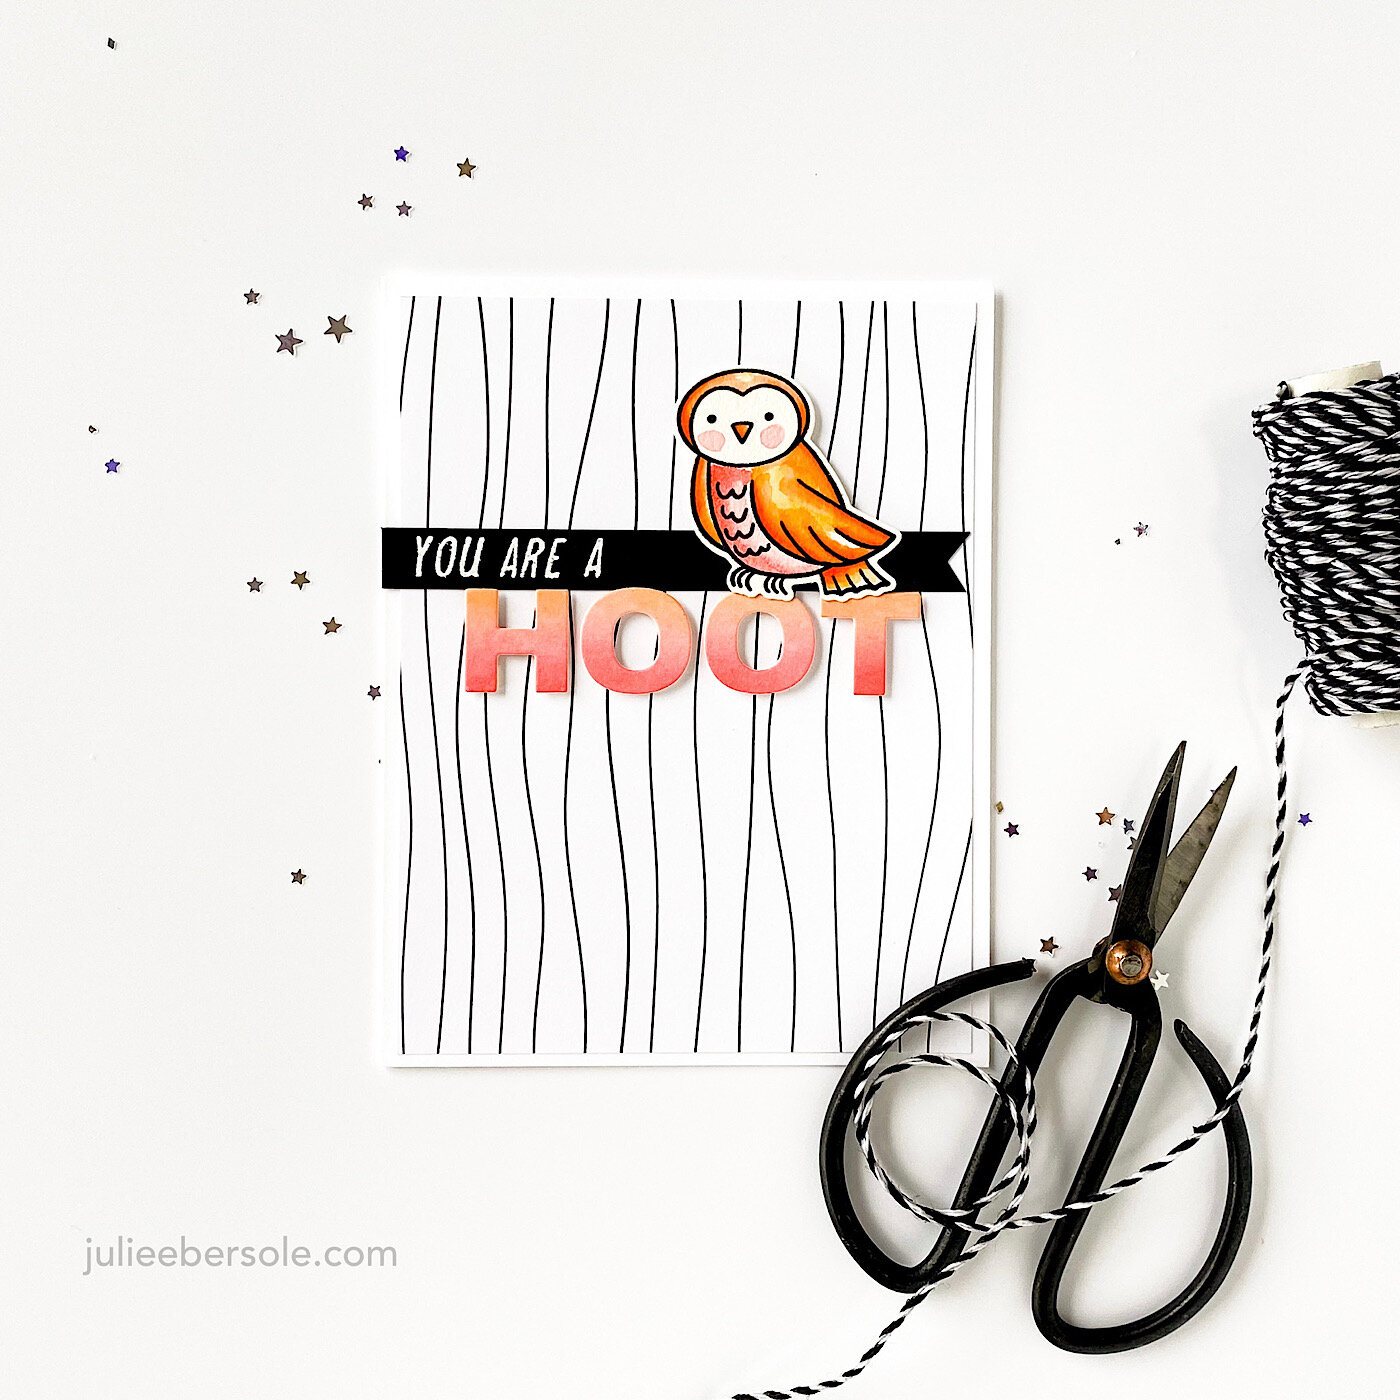
The owl is so sweet and I love using her here for a non-Halloween design . . .

2020-10-05 18.25.11.jpg

I know, I know . . . don’t judge me—this was a prime opportunity for a pun. I saw it, and I took it. •hair flip•

2020-10-05 17.40.19.jpg

Look at all that spooky goodness!!! Just makes my eyes so happy!

Thanks for stopping by, and stay safe & healthy!


SUPPLIES:

Disclosure: This post contains affiliate links; if you see something you like, want or need, and purchase via my links, I receive a small commission, at no extra cost to you, which I use to buy coffee, which fuels my creativity and provides energy to make more card ideas. And, pay the rent.

BIRCH TREES FOR HALLOWEEN

I really love Halloween—besides being the Mister’s birthday, it’s just one of the most fun holidays to celebrate! When my kids were little, carving jack o’ lanterns was something they so looked forward to, along with hay rides at the pumpkin patch, trying to find our way through the corn mazes, sipping apple cider, and ultimately putting on their costumes (I used to make them, which was fun for me, too!) and heading out to trick or treat. GOOD TIMES!!!

How ‘bout that Birch Trees Cover Die in black for Halloween??? PERFECTION!!! Stickles on pumpkins for sparkle, and a few of those HAI Supply sequins in black (love.those.things.) Oh, and that moon behind the trees? Well, when I was die cutting a bunch of Shaker Globes, these leftover circles were put to use! •BOOM• (Hey, it’s the little things, #amirite ?) BTW, the Super Silver Shine Stars I used as props for my photo are pretty doggone sparkly and I love using them for my shakers . . . just sayin’ . . .

Modern Graphics Vol. 2 paper pack has been updated—you can see it peeking out on the left side of this card. I adore black and white patterned paper because it’s so versatile, but these papers come with an extra benefit—they can be foiled! •fist pump•

I wish you could see the shimmer on the owl—used that Tonic Clear Aqua Shimmer pen and IRL it is such a gorgeous effect.

Halloween will be different this year, with the Pandemic and all . . . but, we’ll be keepin’ the fun going


Stay safe out there!


SUPPLIES:

Disclosure: This post contains affiliate links; if you see something you like, want or need, and purchase via my links, I receive a small commission, at no extra cost to you, which I use to buy coffee, which fuels my creativity and provides energy to make more card ideas. And, pay the rent.

ESSENTIALS BY ELLEN HOLIDAY 2020 HOP

YAY!!! the Essentials by Ellen Holiday 2020 Release is officially available! You can see all the new stamps and dies right here on the Release Page .

We have a TON of inspiration for you on this hop, so I hope you’ve settled in cozy with a nice hot cuppa; you are gonna be mighty happy with all this eye candy to feast on. Just sayin’ . . . AND, after ogling my shares, be sure to scroll down for details on the prizes to be had and how to enter into the giveaway!

I’ve had my head down the last few weeks making as many samples as I could before release, and I will be sharing them over the coming days. •grin•

SIDE NOTE: I love mixing favorite previously released with new stuff when I make my projects; all new in this release are marked with a “”, beneath the photo.

Shall we begin?

You may have seen this lovely Autumn-themed one I sneaked over on Instagram:

Feat. BIRCH TREES COVER DIE ★ / HALLOWEEN MAGIC ★ / TIS THE SEASON (all Essentials by Ellen)

Feat. BIRCH TREES COVER DIE ★ / HALLOWEEN MAGIC ★ / TIS THE SEASON (all Essentials by Ellen)

I’m SO pleased with how this cover die turned out—it’s absolutely perfect for ANY season—it’s a two piece set, with the trees and the leaves being separate. There are no outer cutlines along this die so you can use it to make a window right through the card’s front panel, or cut through a quarter sheet of card stock to create a frame effect or a shaker front.

birch-cover-moth-002.JPG

The moth and crescent moon were borrowed from the Halloween Magic set to create my scene—I wish you could see IRL just how sparkly the moth is . . . Diamond Stickles. I wish I could get that stuff in a pint size bottle.

Feat. HALLOWEEN MAGIC ★/ SHAKER GLOBE DIE ★ / SWIRL BACKGROUND (all Essentials by Ellen);

Feat. HALLOWEEN MAGIC ★/ SHAKER GLOBE DIE ★ / SWIRL BACKGROUND (all Essentials by Ellen);

Many of you may know that the Mister’s birthday is on Halloween; this year, I thought it would be so much fun to have a “crystal ball” type stamp set, and a die to go with . . . to make a crystal ball shaker card, of course!!! How fun is that??!!!

2020-10-05 18.26.53.jpg

The “all-seeing” eye foresees magic, mischief and mayhem. Imagine me saying that last bit in a deep, booming voice that is a little scary, but not too scary . . .

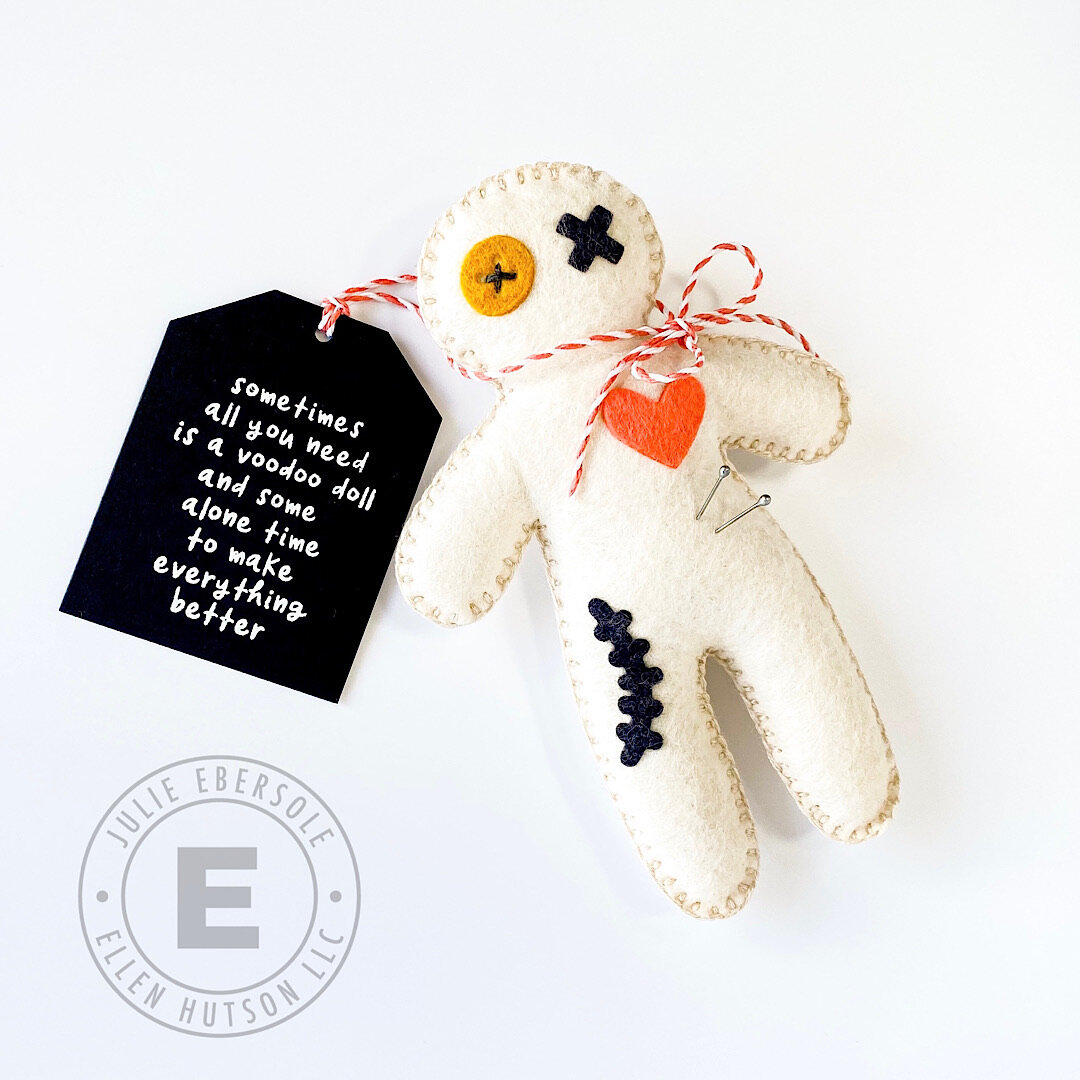
feat. GINGER BOY DIE SET ★ / SKELLIE ADD-ON DIE SET ★ / BAD DAY STAMP SET ★ (all Essentials by Ellen)

feat. GINGER BOY DIE SET ★ / SKELLIE ADD-ON DIE SET ★ / BAD DAY STAMP SET ★ (all Essentials by Ellen)

You also may have seen this hysterical little guy over on the Ellen Hutson blog earlier this week (LINK), but if not, I couldn’t resist sharing him again here. Makes me laugh and he’s just so stinkin’ cute!!! Check out the how-to video on YouTube (LINK) I did to see how quick and easy he is to put together.

feat. MERRY LITTLE CHRISTMAS ★ / MODERN GRAPHICS VOL. 2 PAPER PACK ★ (newly updated!) (all Essentials by Ellen)

feat. MERRY LITTLE CHRISTMAS ★ / MODERN GRAPHICS VOL. 2 PAPER PACK ★ (newly updated!) (all Essentials by Ellen)

Merry Little Christmas has adorable little scenes from a cabin in the woods, to suburbia and the city during the frosty season—there’s even a snowman and a wee little car for fetching the Christmas tree! And, these were also designed to fit in the Shaker Globe Die . . . (I’m sure you’ll see a few of examples along the hop! I’ll be sharing a few, too, in the coming days)

2020-10-05 18.32.01.jpg

One of my favorite things to do is create a little shaped die cut windows with an image showing through to the front, and when you open the card, there’s more to see! EEP!!!

feat. SANTA’S LIST ★ (all Essentials by Ellen)

feat. SANTA’S LIST ★ (all Essentials by Ellen)

I also shared a video sneak preview of Santa’s List on Ellen Hutson YouTube Channel (LINK). Once you start playing with this guy, good luck putting him down . . . •chuckle•

feat. SANTA’S LIST ★ / KNOCK OUT FOREST DIE ★ (all Essentials by Ellen)

feat. SANTA’S LIST ★ / KNOCK OUT FOREST DIE ★ (all Essentials by Ellen)

And, gosh I love this Knock Out Forest Die—this is one of many ideas for its use!

WHEW!!! I have lots more ideas to share in the coming days, so y’all come back now, ya’ hear?! •wink•


Prize Info ...
Prizes, prizes, we've got the prizes! One lucky commenter will win the whole Essentials by Ellen holiday release! And another will receive $25 to spend at ellenhutson.com! For a chance to win, all ya' gotta' do is hop along, enjoy the fabulous eye candy, and leave a little love for your fellow crafters: increase your chances by commenting on each stop on the hop! Comments left before 11:59 PDT on October 14 will be entered to win. (Winners are selected randomly.)


The Essentials by Ellen Holiday 2020 Release is available exclusively at ellenhutson.com

Disclosure: This post contains affiliate links; if you see something you like, want or need, and purchase via my links, I receive a small commission, at no extra cost to you, which I use to buy coffee, which fuels my creativity and provides energy to make more card ideas. And, pay the rent.