digital designs

HAVE YOU HEARD ABOUT THE CRICUT CARD SUMMIT?

If you're new around here, you may not have realized yet just how much I enjoy card-making with my Cricut Maker, or why I use it so often now.  It's literally become one of my favorite and funnest tools to work with!

Maybe you're on the fence about whether or not you would really use one or maybe you have one, but you still haven't taken it out of the box.  I know folks that have had theirs sitting unopened for a year or more!  ACK!!! 

That said, I wanted to encourage you to grab your free ticket to the Cricut Card Summit, which is coming up May 16-18th!  I will be presenting at this online event and would LOVE to see you join the fun!  I am an affiliate so if you purchase the All Access Pass via my link, I do receive a commission.

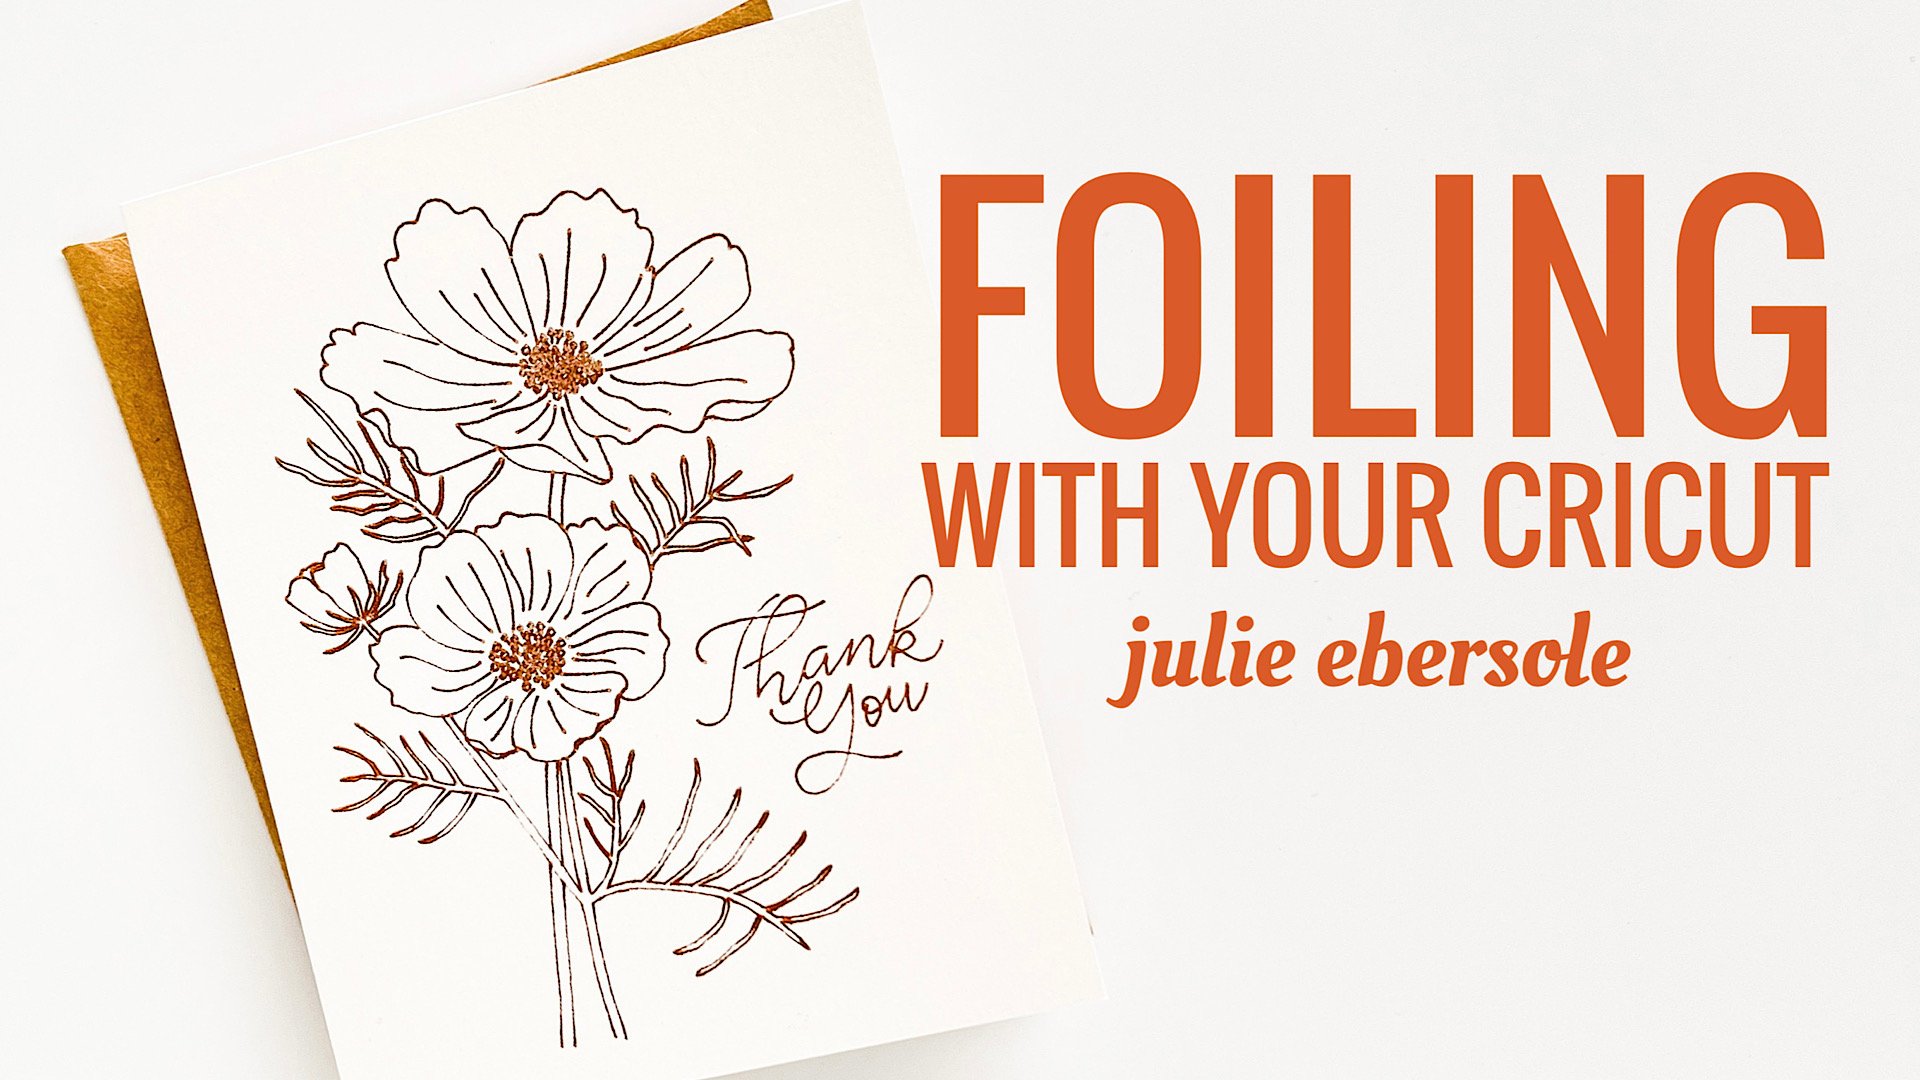
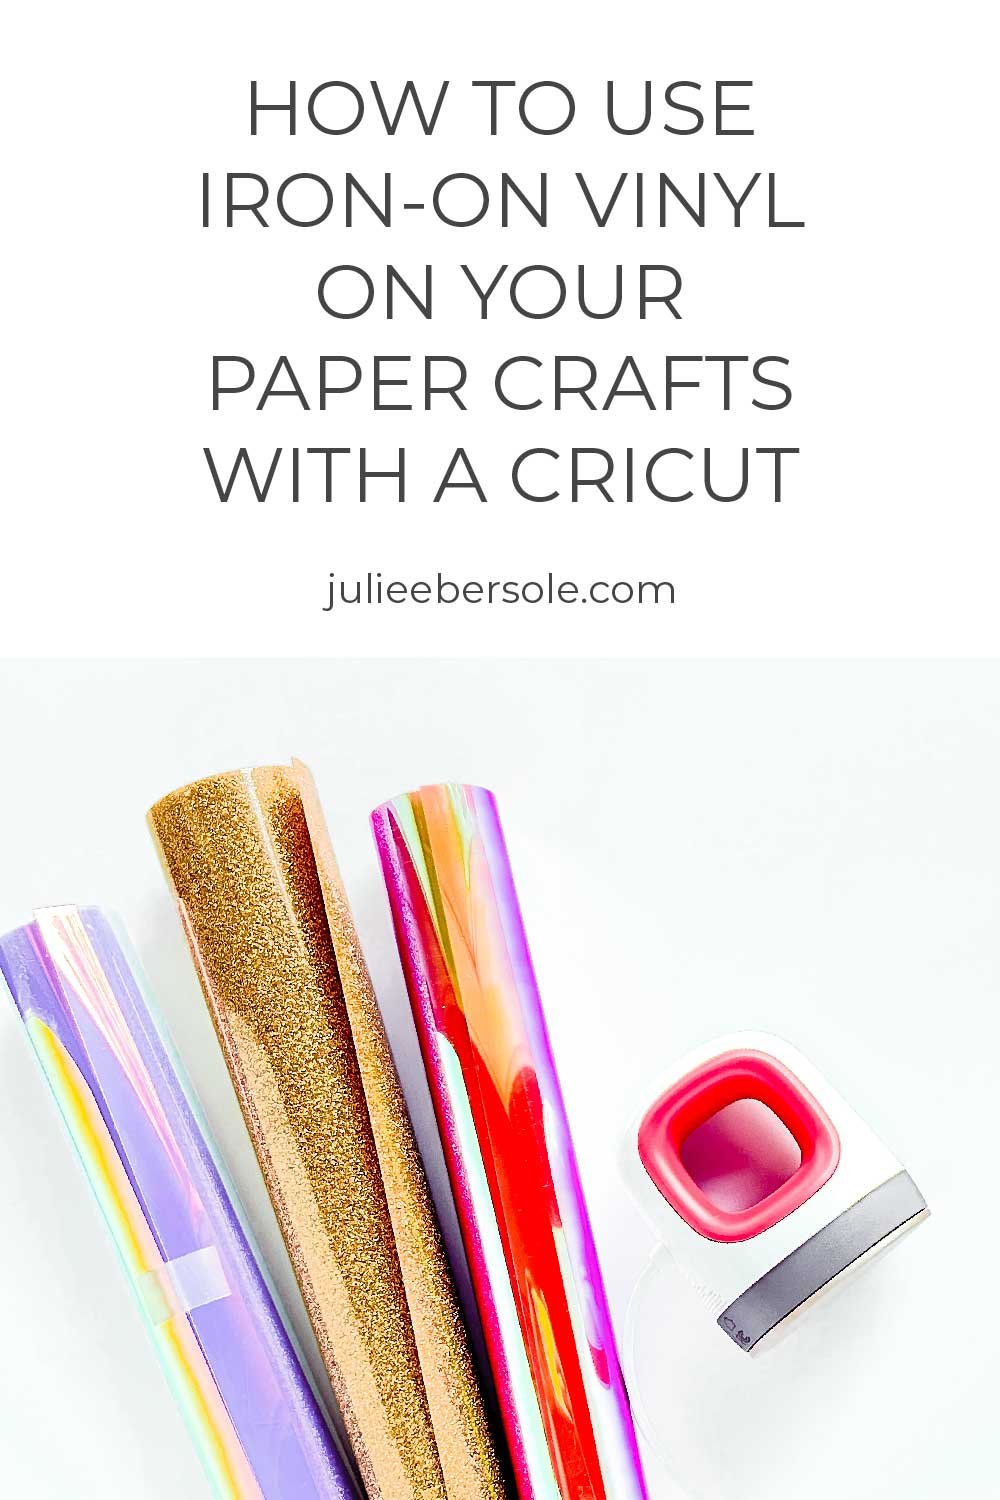
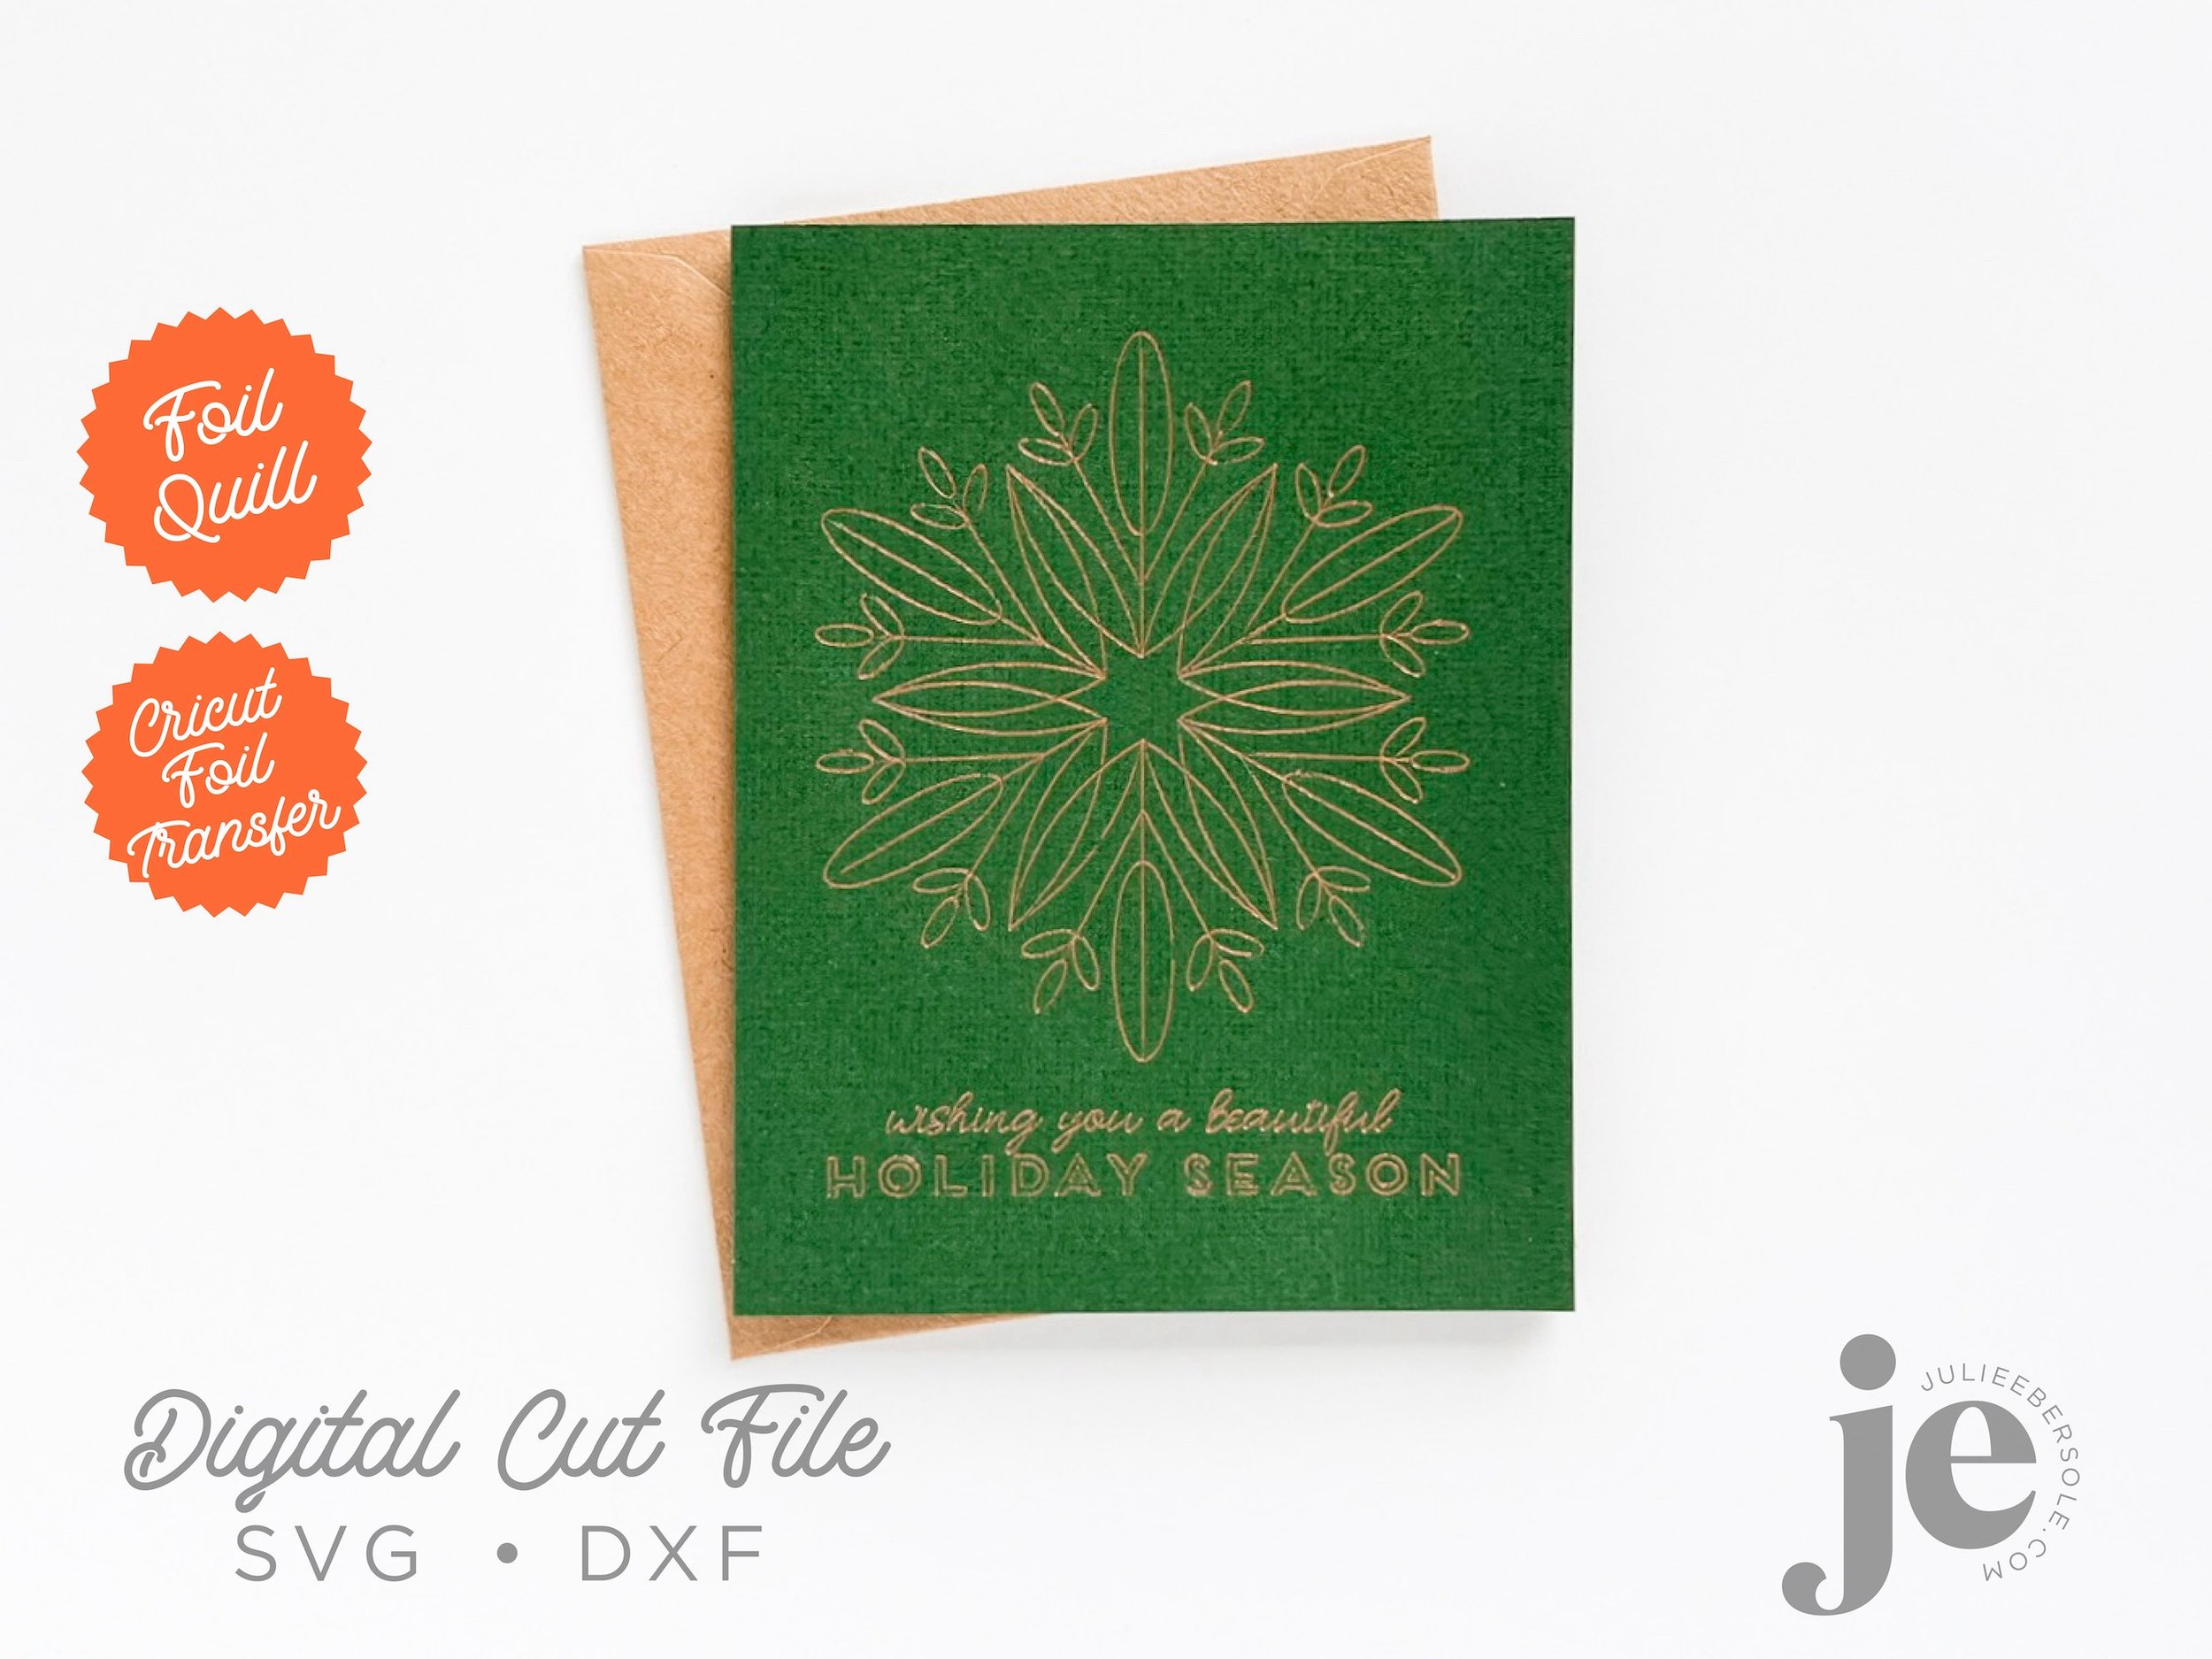
Join me at the CRICUT CARD SUMMIT and learn how to foil using the Foil Quill + the Cricut!

I am not what you'd call a “techie”, BUT, I believe digital cutters, like the Cricut, not only make certain aspects of card-making easier, they expand our creative options!  And, I think it's pretty cool that we live in an era where it's becoming increasingly possible to create and craft more things at home, that not too long ago, would have required pro-grade equipment or a factory setting!  •fist bump•


THE BENEFITS OF USING A CRICUT/DIGITAL CUTTER

Just a few things that immediately come to mind for me:

  1. Sometimes, you need something last minute—a pre-designed card can be made faster than you can hop into the car and head to the nearest card shop! And, you still made it yourself!

  2. The Cricut is a multi-purpose craft tool: It can not only cut, it can draw, foil, engrave, score and deboss! That’s a lot of capability in a tool!

  3. Cut, draw/foil, engrave designs can be resized as needed (they’re not “fixed” to a specific size)

  4. Need multiples? The Cricut can render the same design on repeat as much as you like!


If you want to learn how to maximize all the different card-making techniques you can do with this machine, the Cricut Card Summit is the perfect introduction:

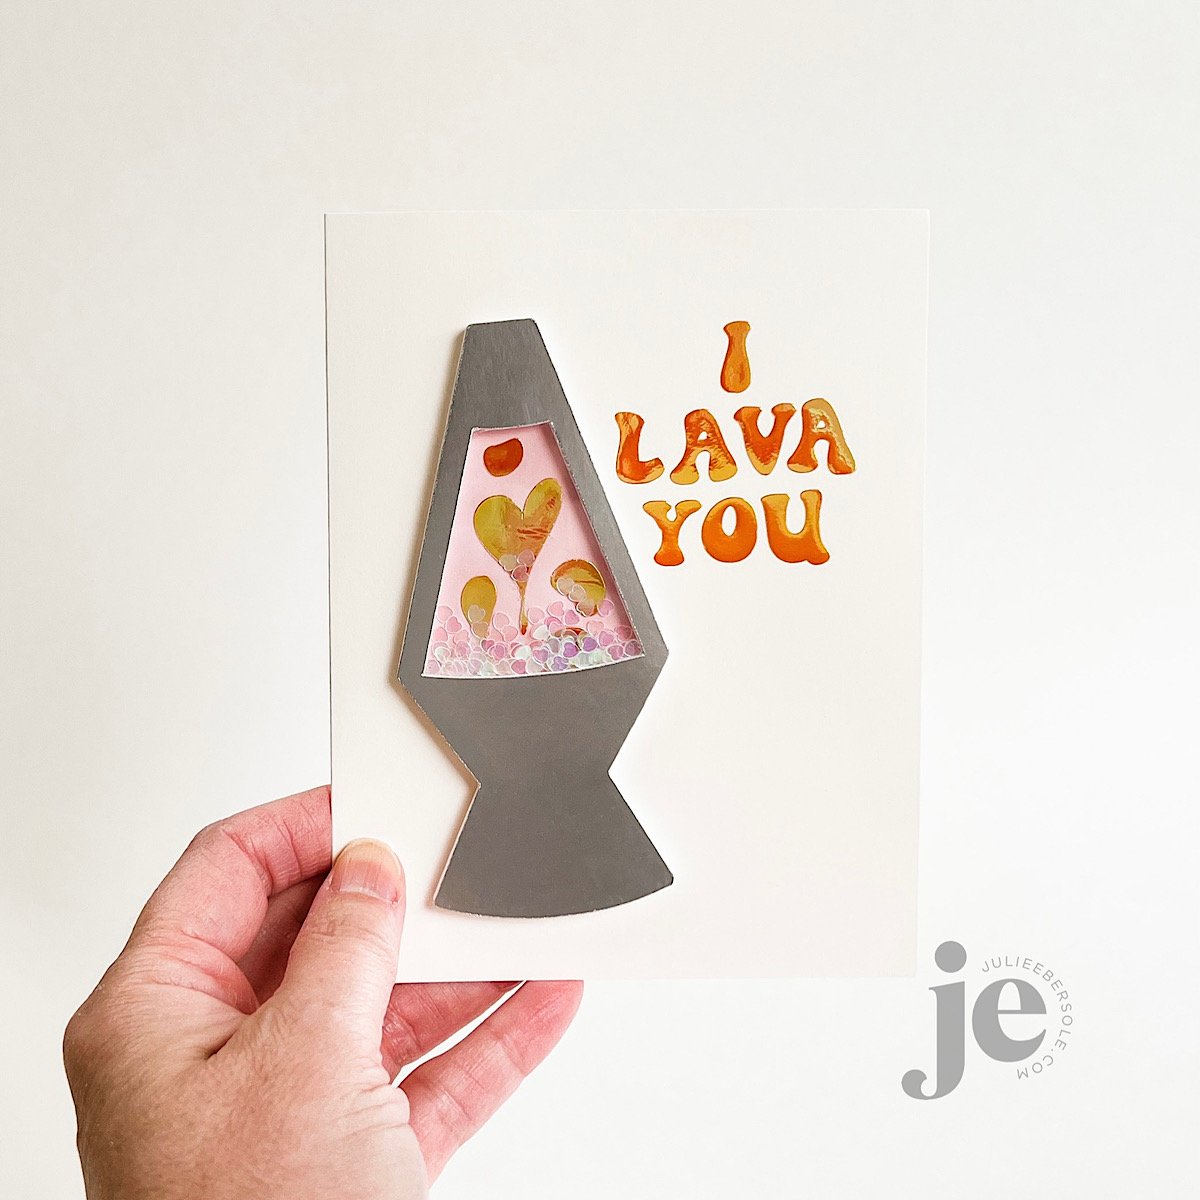
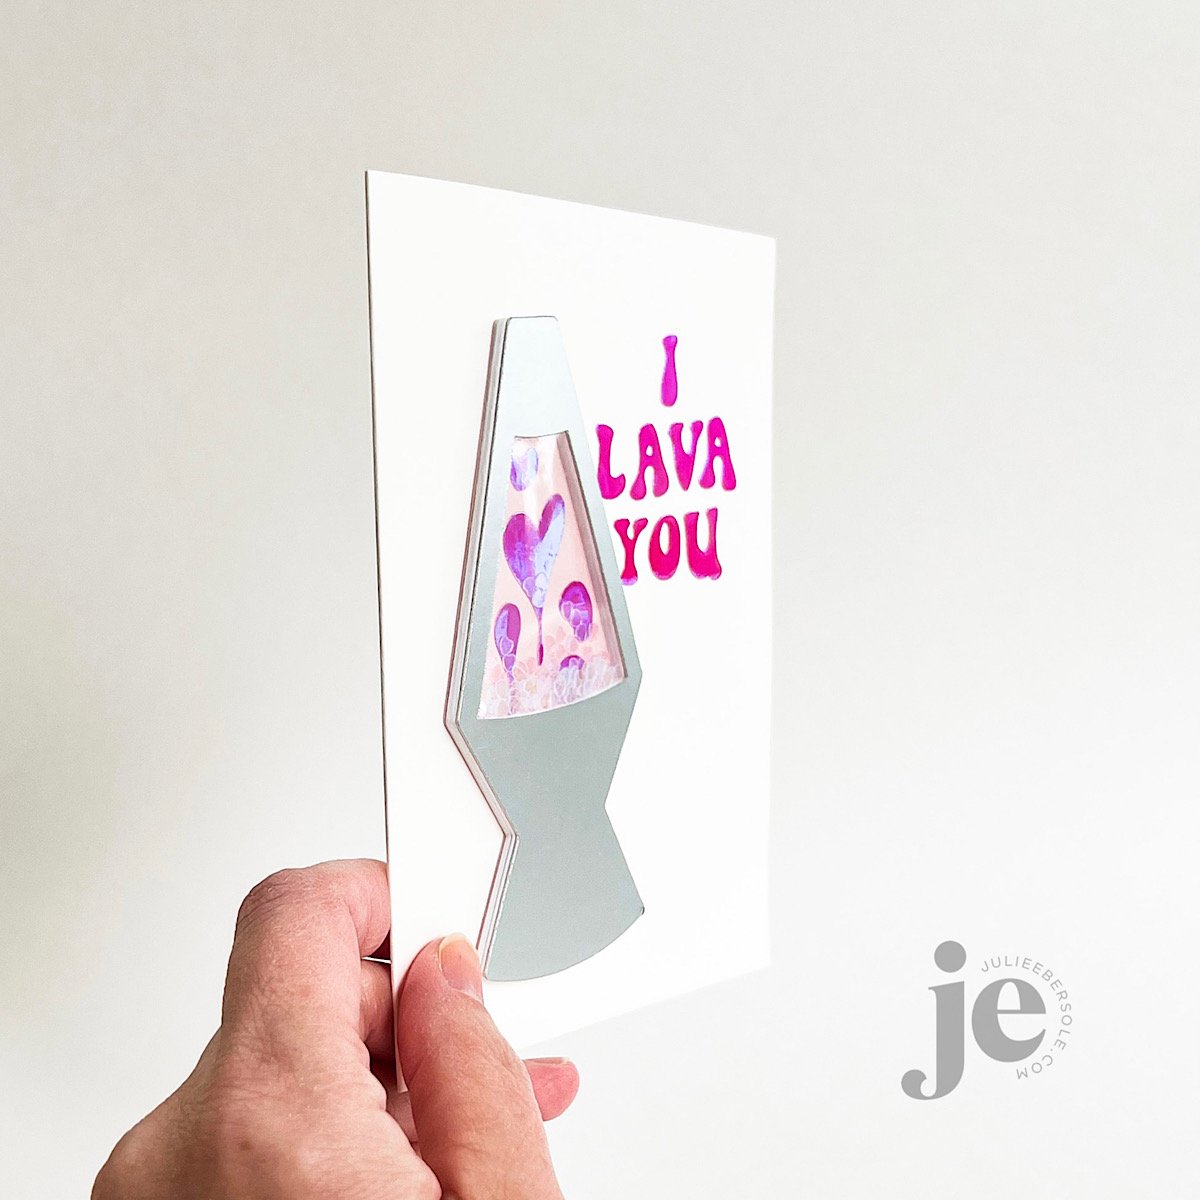
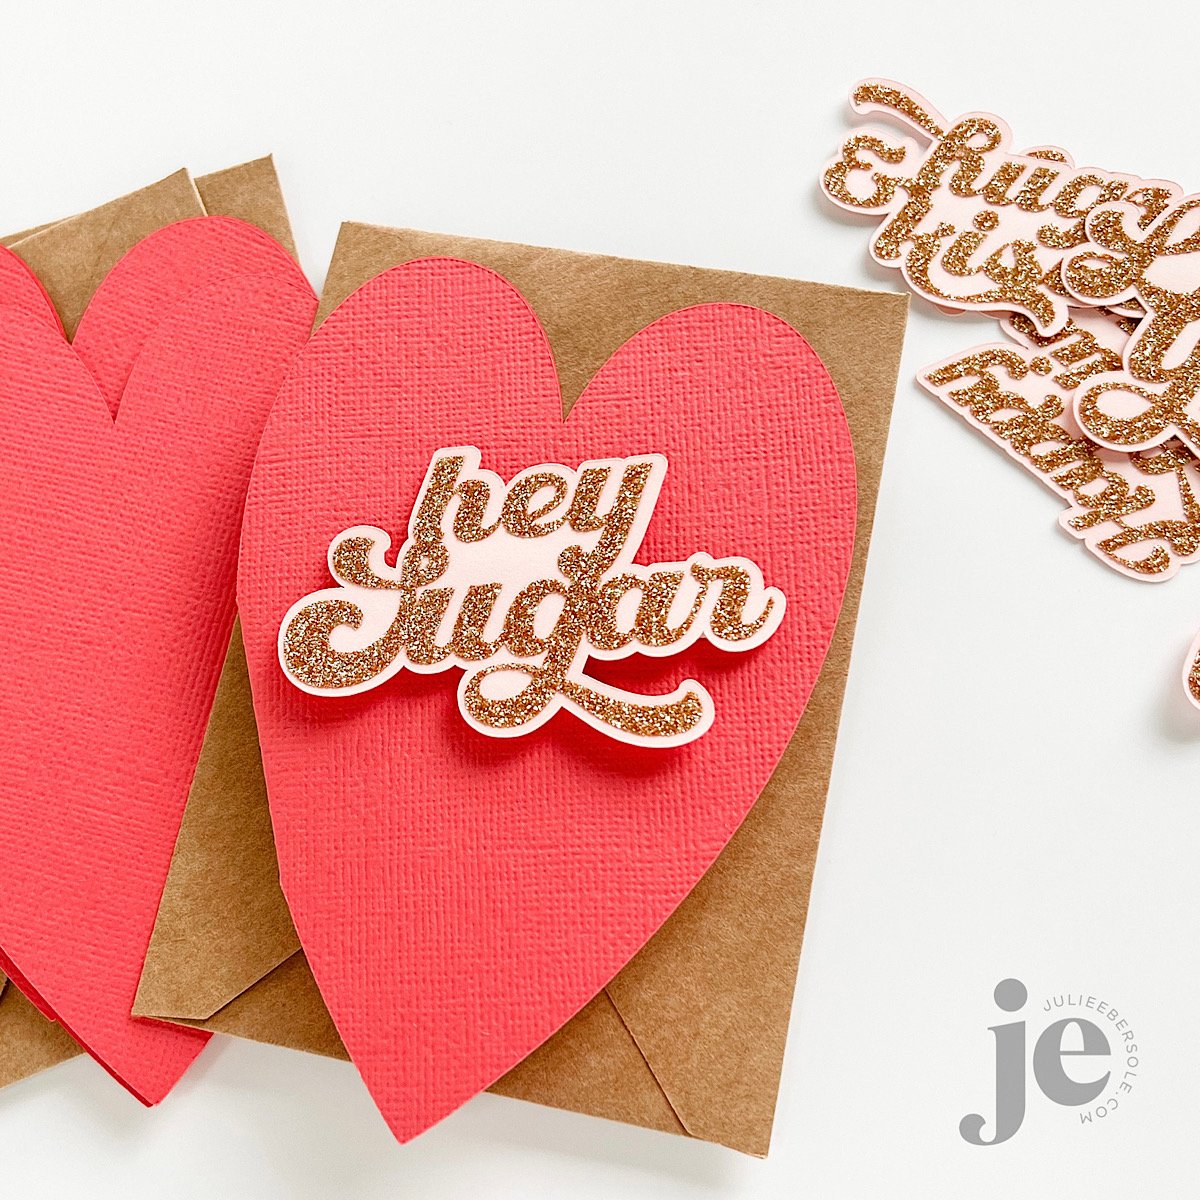
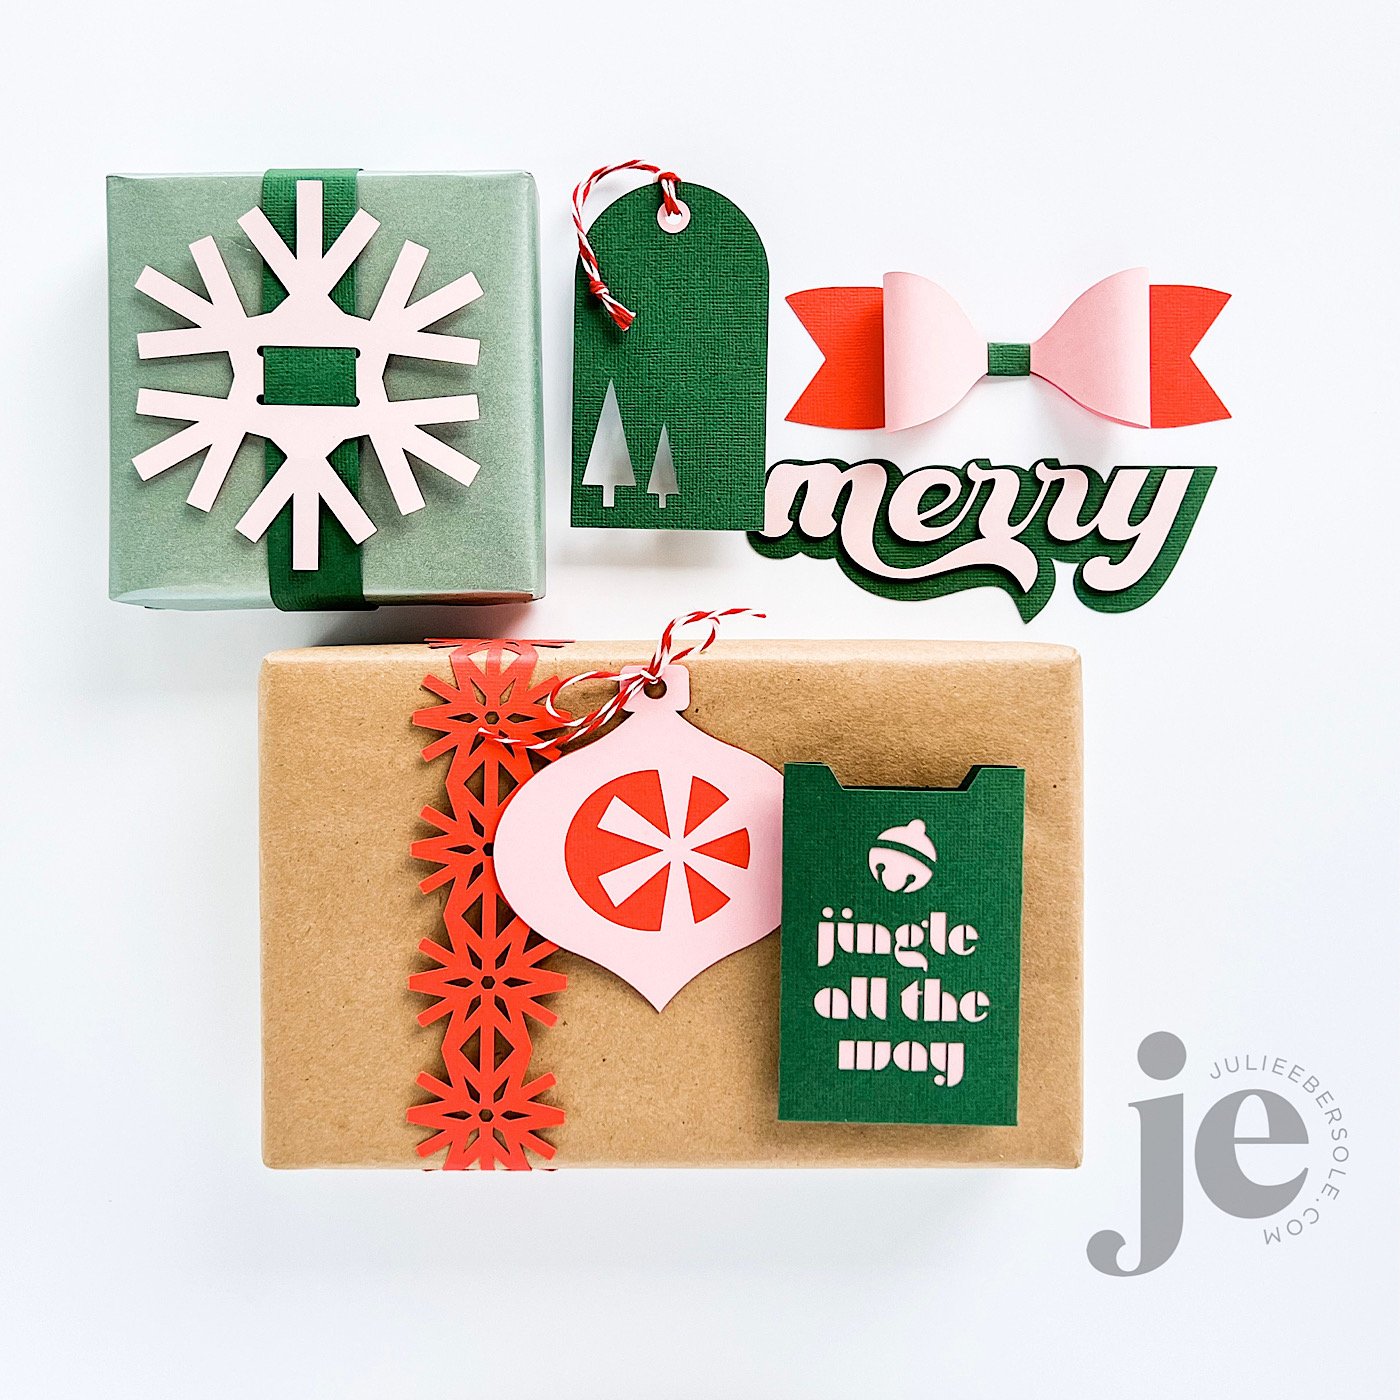
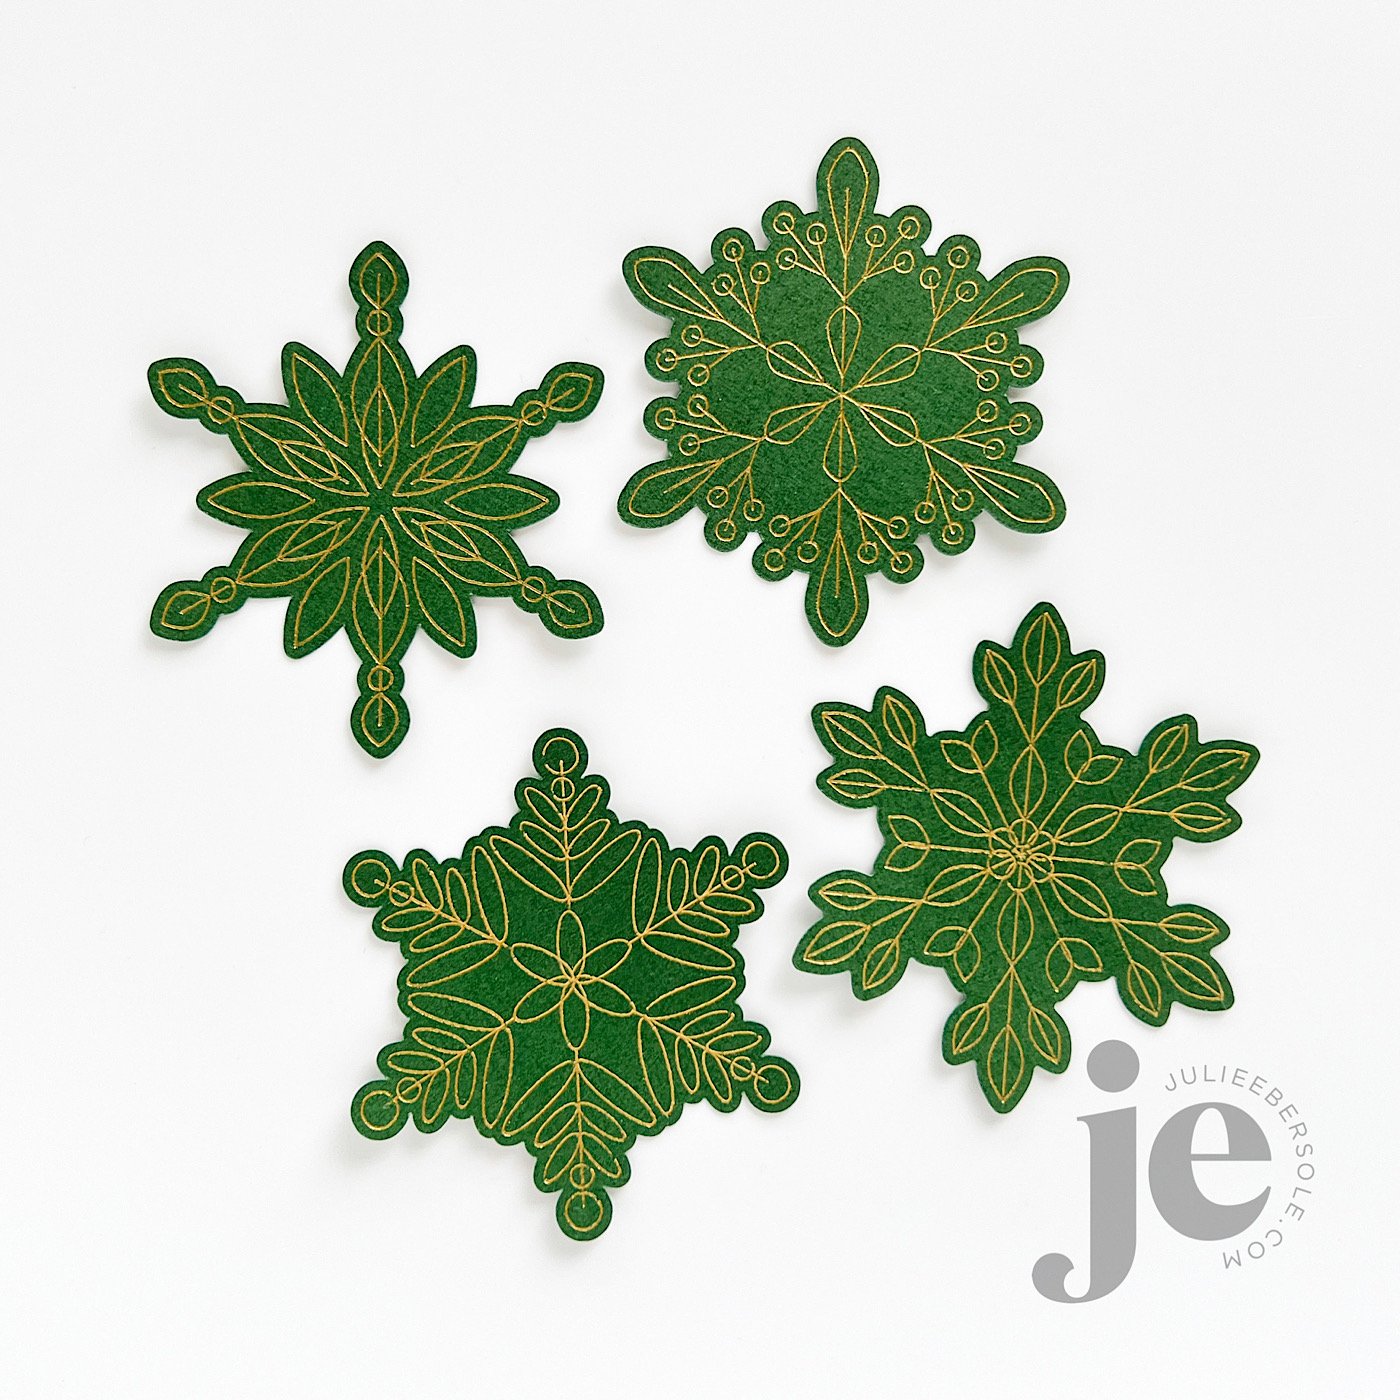
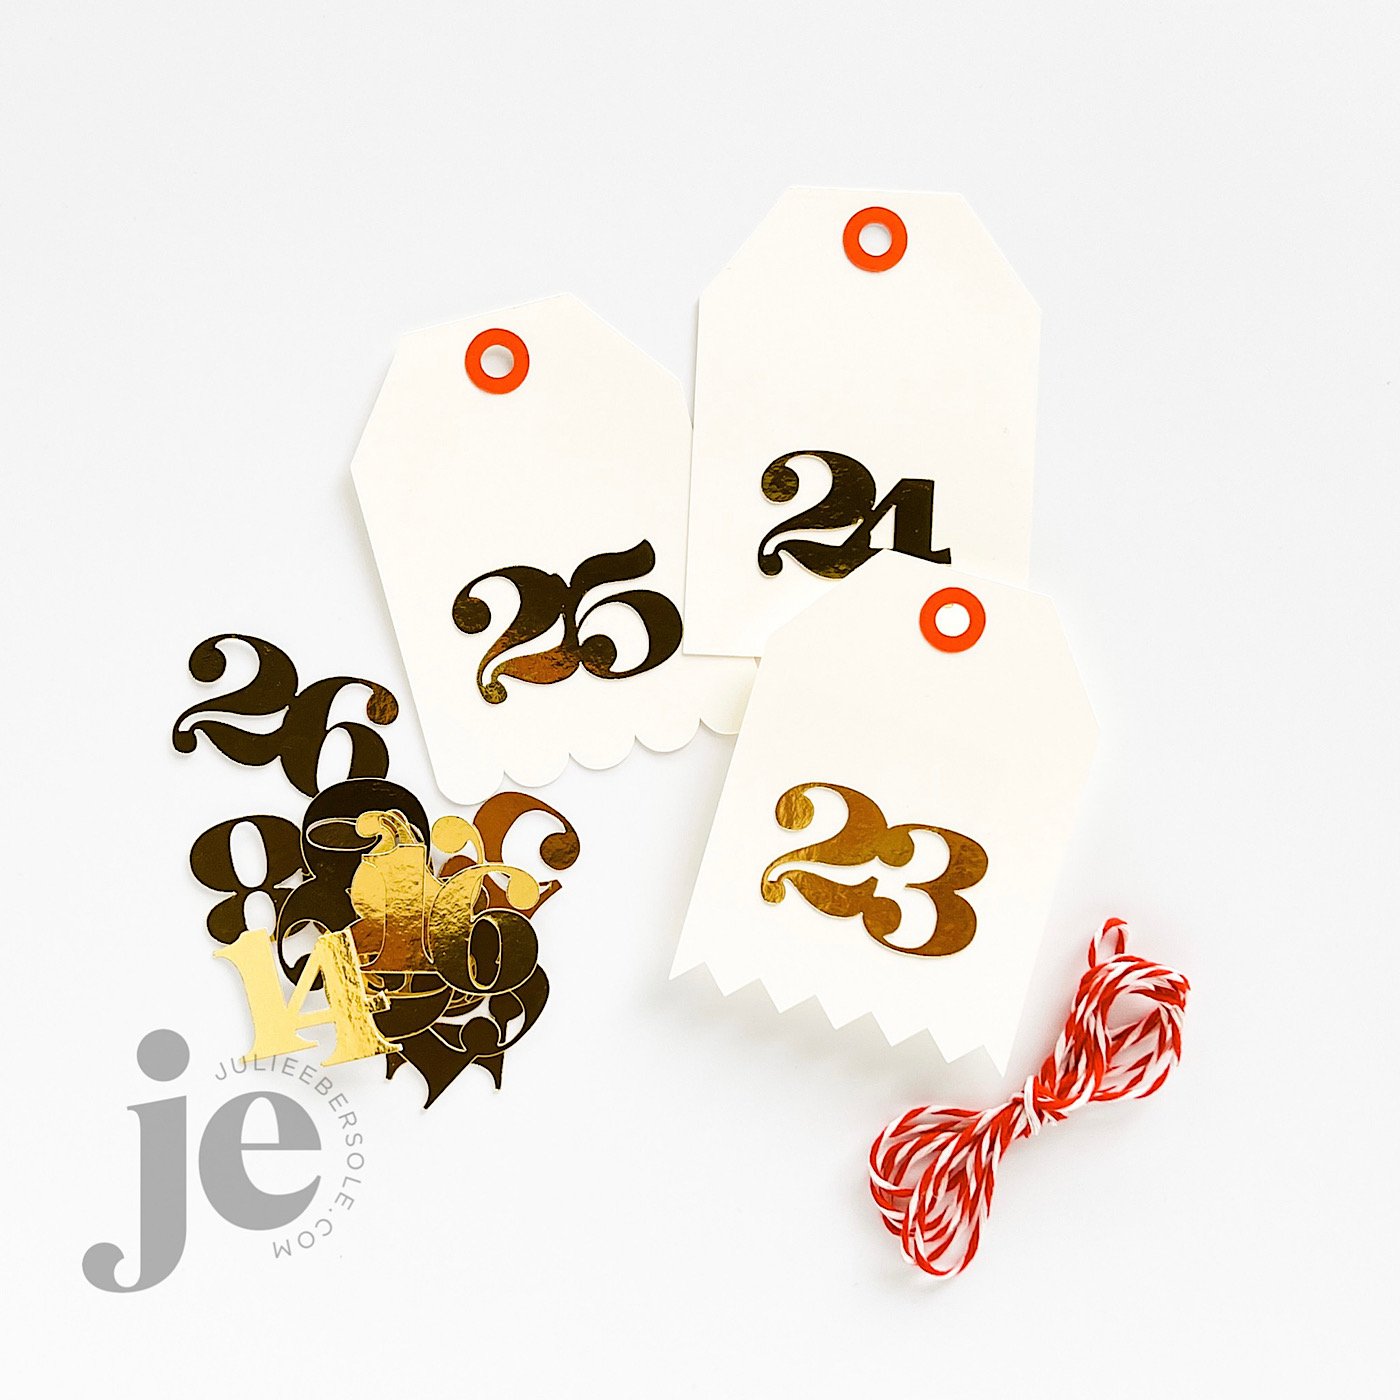
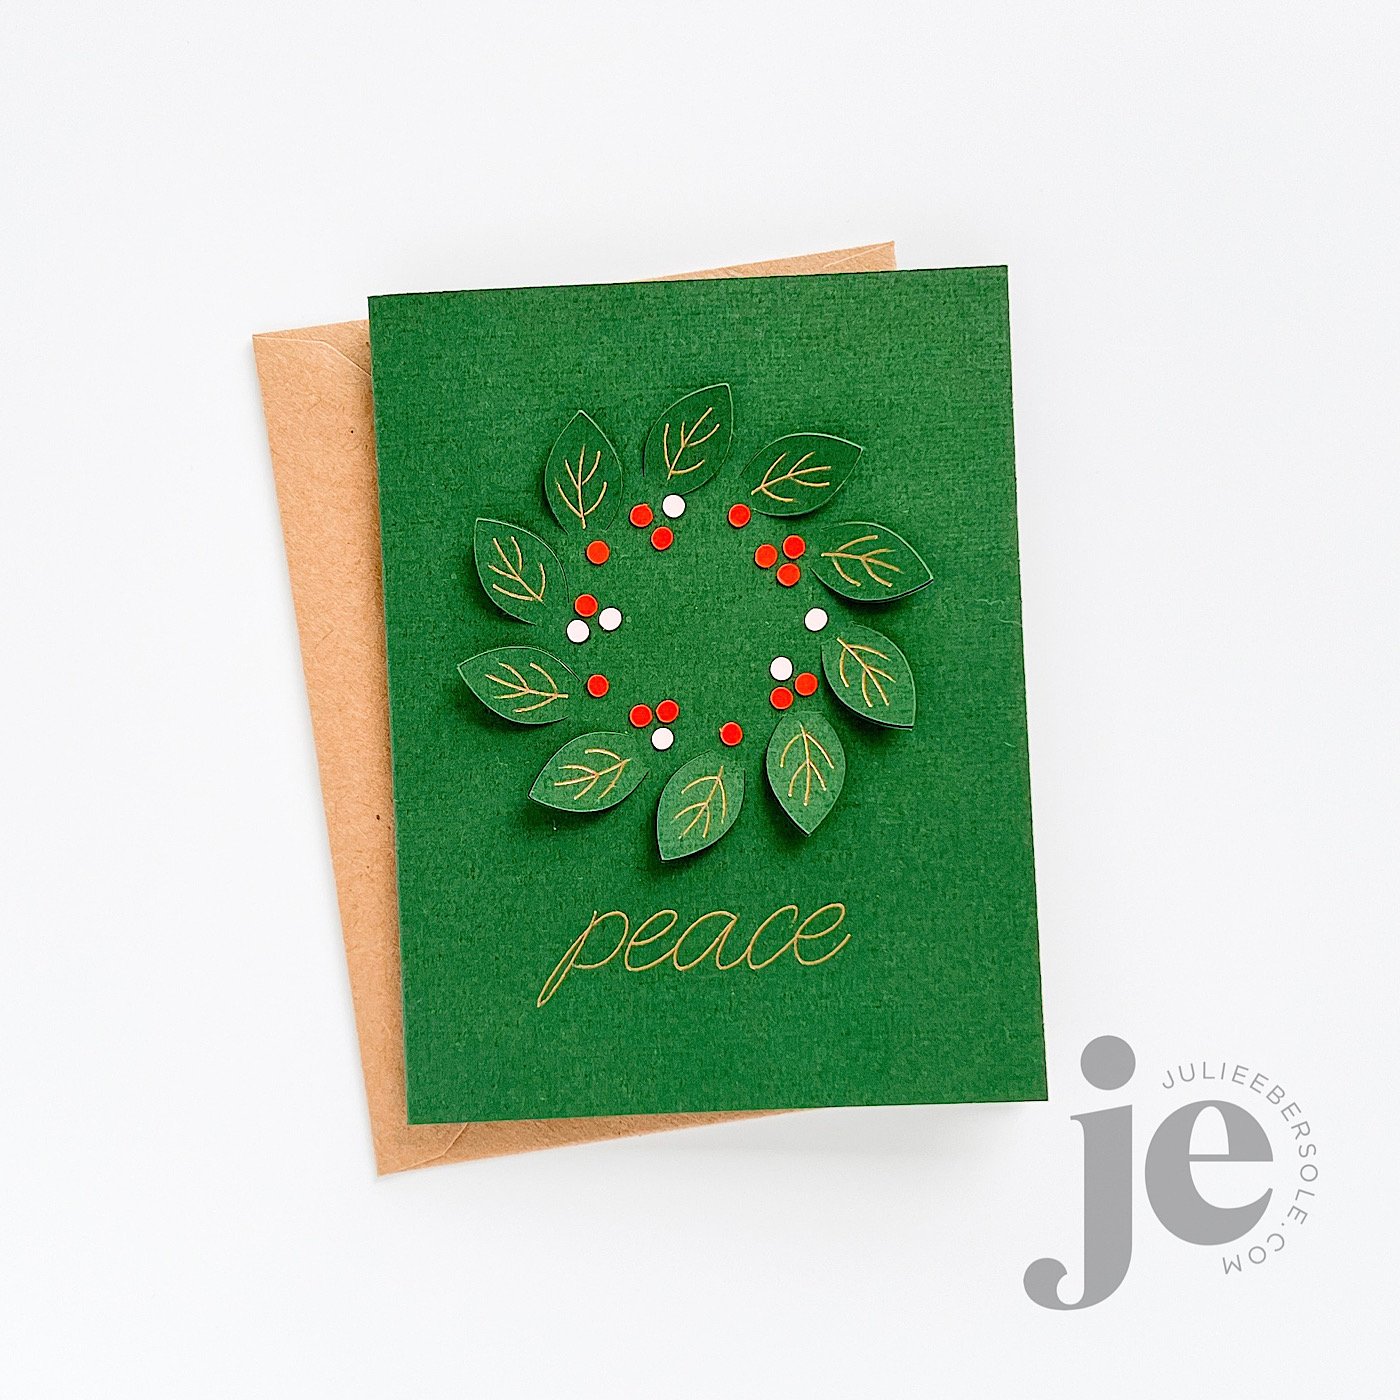
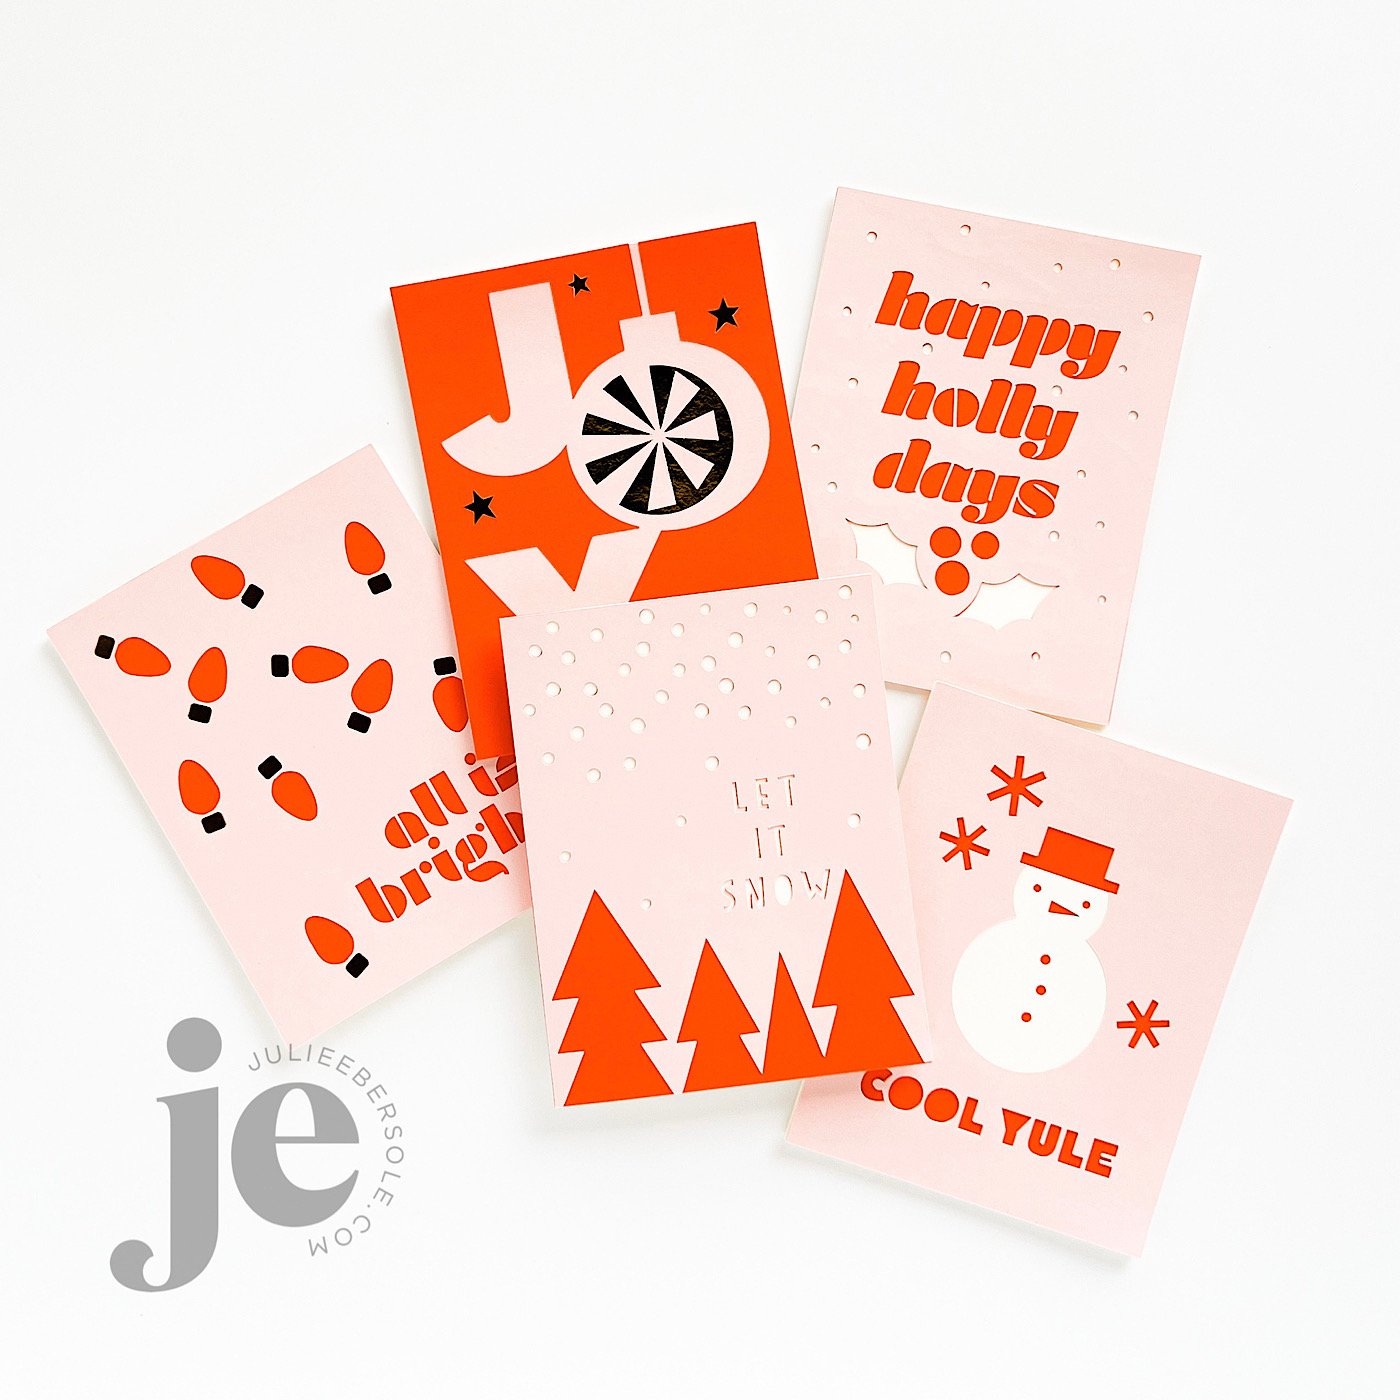
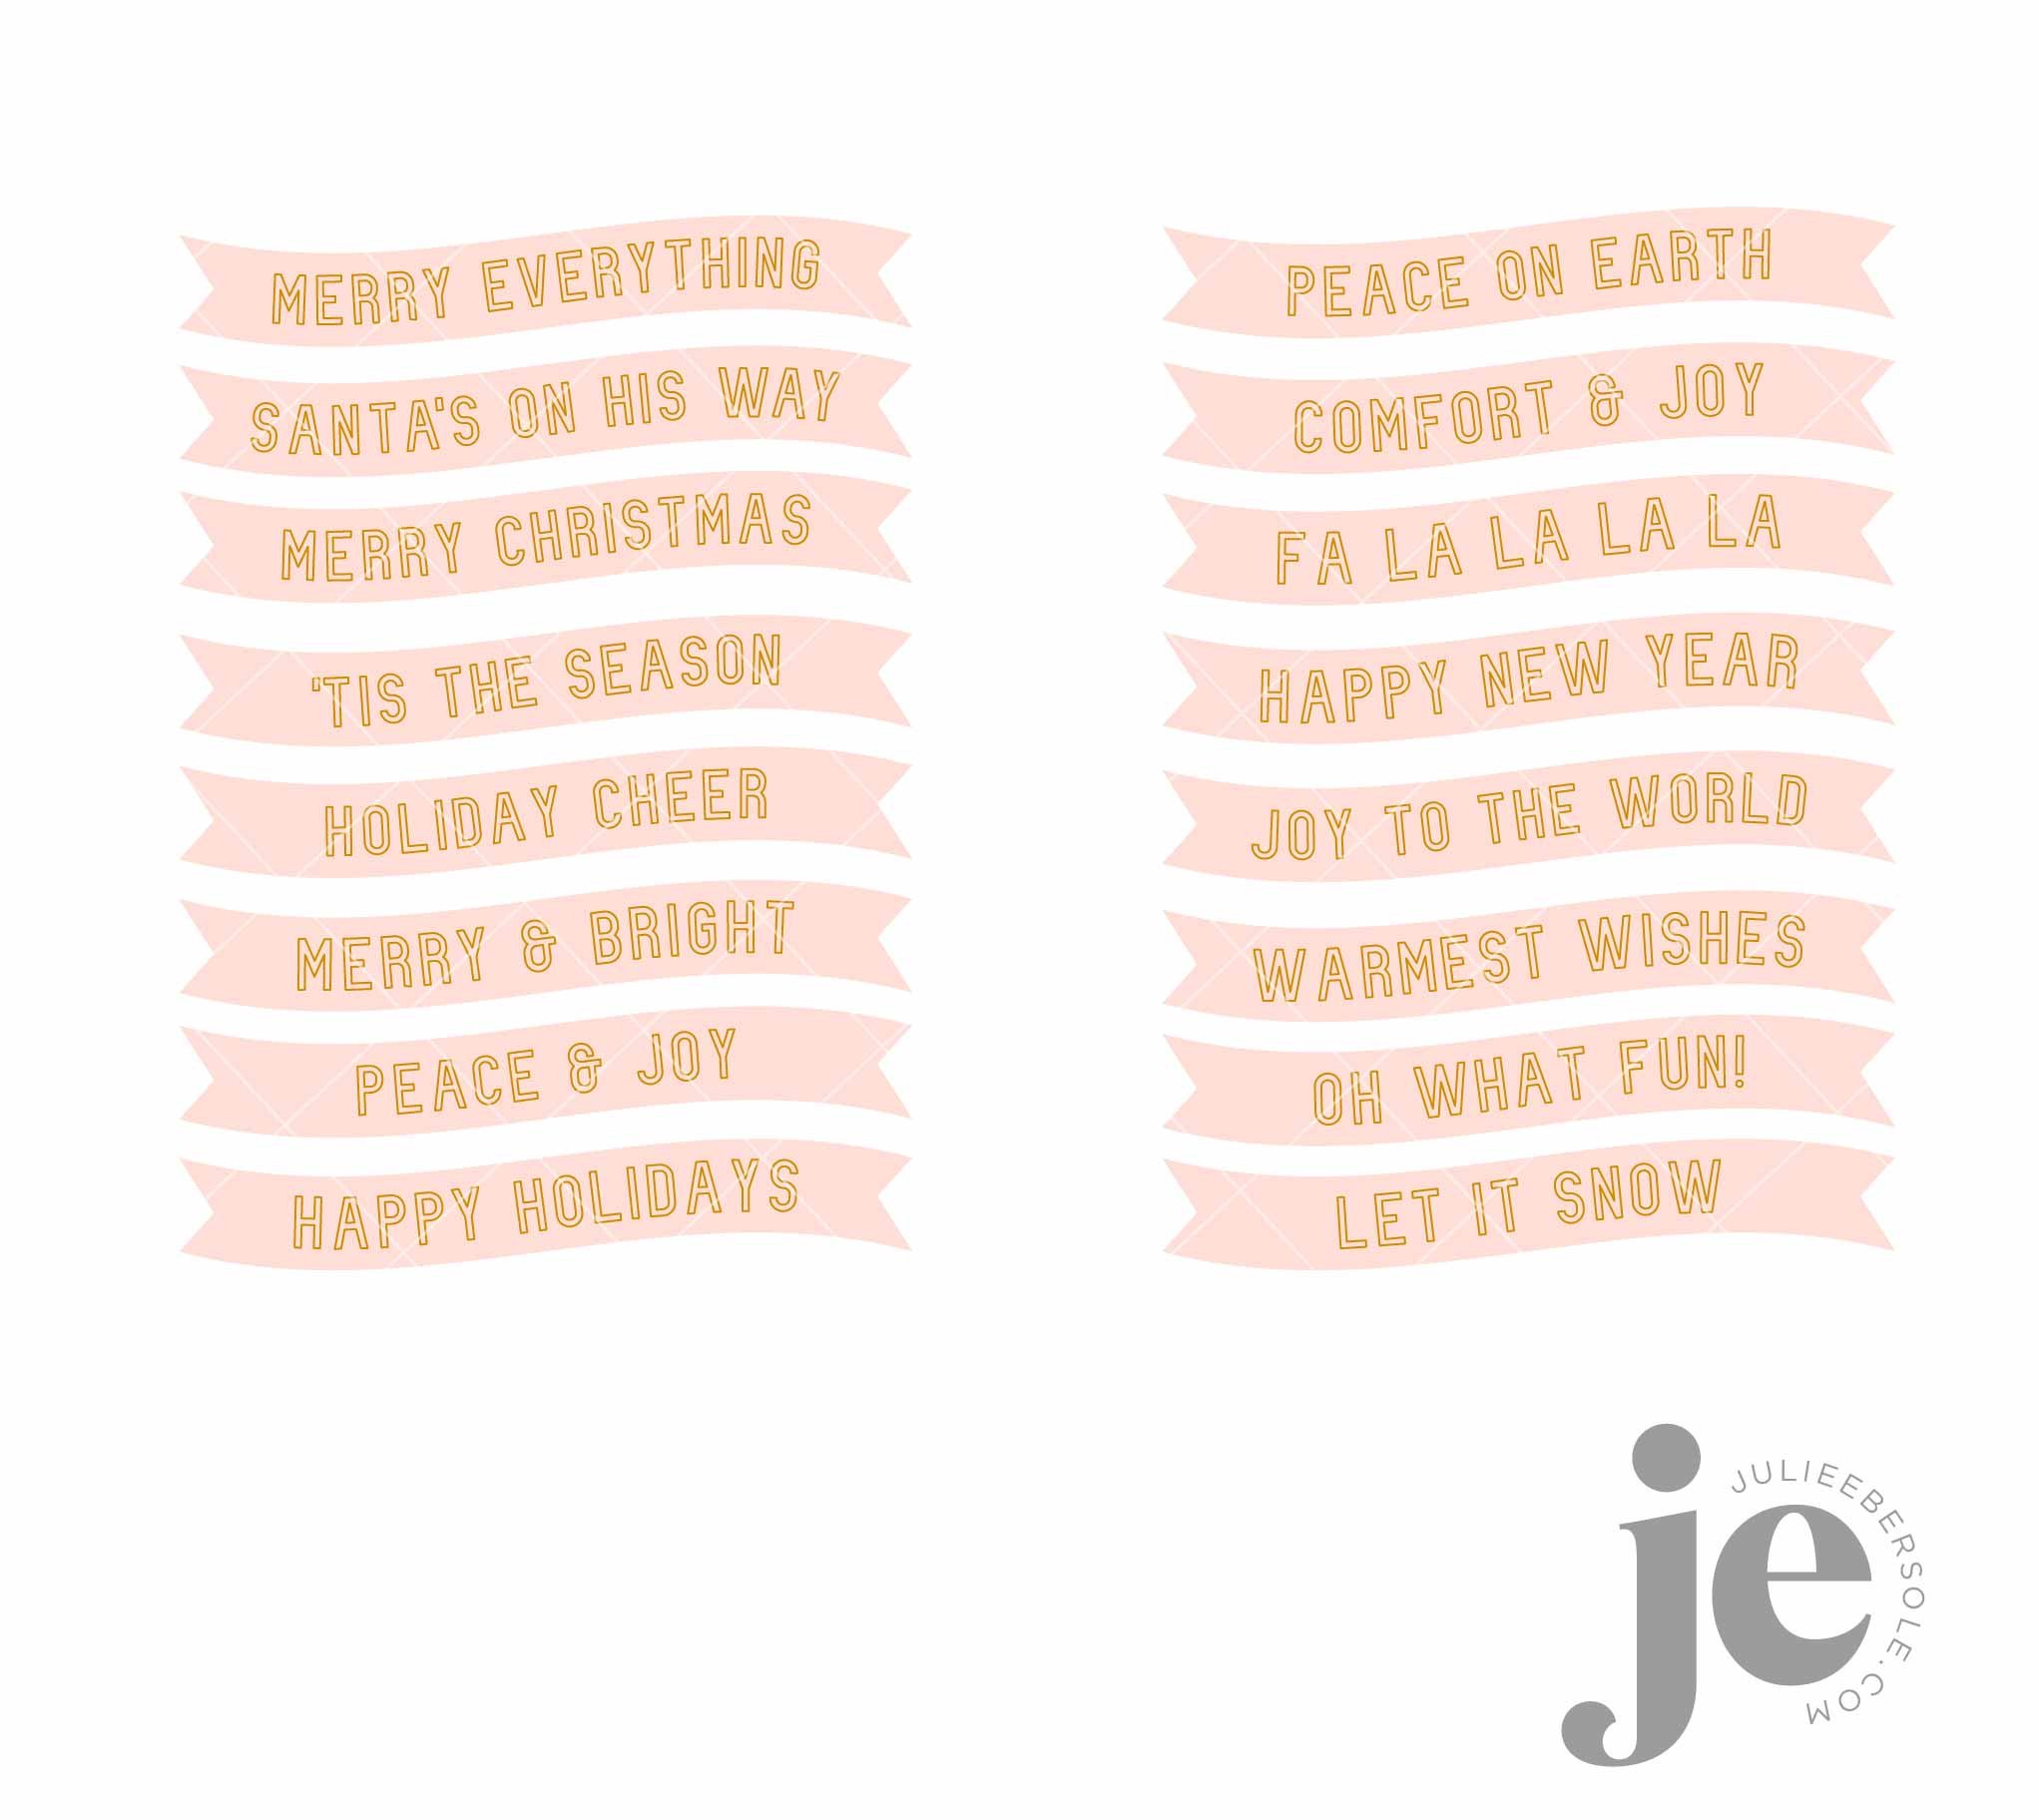
PRESENTATION SAMPLES

Registration is totally free, with the presentations lasting 24 hours from the time they go live. Please note that if you want early and on-going access, and all the VIP bonus materials, make sure to snag the All Access Pass (affil).

ALL ACCESS PASS BONUS MATERIALS

It’s going to be a fun event, with some great giveaways, too!

Hope you can join us!


Disclosure: I include affiliate links to the products used in my projects and make a small commission when you purchase via those links, at no extra dimes to you. 🙂 Your support is appreciated more than I can say!

HOW TO USE IRON ON VINYL OR HTV ON PAPER

How to use iron-on vinyl or HTV with a Cricut machine for paper crafts.

When I found out HTV (a.k.a. Iron-On Vinyl) could be used on PAPER, I was over the moon! Cutting smaller or more intricate pieces with my Cricut Maker from card stock can sometimes be a lesson in futility, despite having a clean, sticky mat, a brand new blade, and all the right settings. Enter Heat Transfer Vinyl. I bought some to use with my Cricut to make cute Tees for my grand-littles and loved how easy it was to work with, so I wanted to try it out on paper for myself.

I’m stoked to share that it is fun, easy and WOW! So far, I’ve only tried holographic and glitter HTVs—specifically Cricut Iron-On brand. Because I had it on hand. I made a few mistakes, and learned some tips I share in the video tutorial below. But, for your future reference, keep the following in mind:

  • Anything you plan to cut from Iron-on Vinyl/HTV needs to be “mirrored” in Design Space; you’re cutting through the vinyl from the BACK side and if you don’t mirror, words and such will not read correctly when you flip it over.

  • Select the proper settings, or as close as you can get, in Design Space to the material you’re using; I was cutting through Holographic Iron-On Vinyl for my Lava Lamp Shaker and mistakenly chose just “iron-on” vinyl. It didn’t “kiss cut” properly and I wasn’t able to properly weed the design and had to try again. We all make mistakes and sometimes waste supplies when we are learning something for the first time; it’s OK. Even pros occasionally forget.

  • Always place iron-on/HTV type materials FACE down onto the cutting mat; I think of it as “pretty” side down, ugly side lookin’ up at ya’.

  • If the vinyl is curling up on the mat or the mat doesn’t have enough stick-um to hold it down in place (critical), blue painter’s tape will really help! Apply some along all the outer edges to anchor the vinyl into place. It’s important the material does not shift/move during the cutting process.

  • When working with GLITTER HTV a weeding box will be your best friend! I go over this in the video and you’ll understand when you watch why it’s a great thing! After cutting, you can place the vinyl onto a light table/pad to better see where the cut lines are when weeding; alternatively, if you don’t have a light table/pad, you can tape it to a window where the natural light will help you see those cut lines better. You can also reference the original design visually to help guide you what parts need to be weeded and which should be left on the carrier sheet.

  • Whatever brand of iron-on vinyl/HTV you are using, read the manufacturer’s recommended heat settings, length of time for pressing and whether or not it’s a warm, cool or cold peel (to remove the carrier sheet). Every product line is different and all that info will vary from one to the next (including the various types of HTV made by each company).

  • If using a household iron, avoid steam by making sure you’ve emptied the water chamber completely before using. Also avoid the steam vents; they can leave an unwanted impression in some vinyl products.

Enjoy the video—I hope you find it helpful! Still shots of the projects I used HTV on are below the video. I didn’t film using the Glitter HTV, but the process is exactly the same—just remember to select “Glitter Iron-On Vinyl” in your materials setting, instead of Holographic; it makes a difference. 😉

Learn how you can incorporate iron-on vinyl/HTV with your paper craft projects using a Cricut.


I seriously had a ton of fun using this stuff—I had been on a quest for no-shed glitter card stock because most that I own, shed glitter like crazy, which makes me NUTS! Love the look, hate the mess. So, when I saw someone using HTV, I literally started monkey-clapping!

Thanks for stopping by and have a great weekend!


Disclosure: I include affiliate links to the products used in my posts and make a small commission when you purchase via those links, at no extra dimes to you. 🙂 Your support is appreciated more than I can say!

SUPPLIES MENTIONED:

Tools & supplies I use regularly in my Cricut Crafting:

NEW HOLIDAY 2022 SVGS IN THE SHOP

I’ve had my head down working on a new release of SVGs for my shop—I know I’m late, but, if you have a digital cutter, these files can really save you time—especially if you find yourself scrambling at the 11th hour to pull something pretty together (Hello, me every year, LOL!). I love this first of my collections so much! #allthehearteyes

Anyway, the beauty of owning a plotter, means if you need to make make gift card sleeves, goody boxes or package toppers, and more, at the last minute, quick and easy SVGs such as these can be a true lifesaver!

Clicking on the photos will take you to those specific files in the shop.

HEADS’ UP! You can save 10% off all SVG files in the Seasonal Category today through December 31st with this coupon code: NICKOFTIME

SVG FREEBIE: FOIL SNOWFLAKE CARD

I also have a FREE file for you to download in the shop! Click on the photo above for a short cut to the file. It’s my very first foil/draw design and I thought it turned out so pretty! I used the Cricut Foil Tool and Foil (affil. link) on the smoother side of textured Park Lane 80# textured card stock (affil. link). You can also use the We R Memory Keepers Foil Quill (affil. link) and that brand foil sheets.

While I was testing my foiling designs and working with different papers, I discovered something! I’m hoping to do a video soon so you can see what I was surprised to find! I was SO SO happy: Crafter’s Companion Gemini FoilPress MULTI-SURFACE Foils (EH affil link / Amz affil link) worked with the Cricut Foil Tips on heavier papers like my favorite Bristol Paper (EH affil link / Amz affil link) and Canson XL Watercolor Paper (EH affil link / Amz affil link). And it performed very consistently/beautifully!

Whaaaat???!!! GET OUT!!! You seriously coulda’ knocked me over with a feather. Totally was not anticipating such great results. But I was going through a lot of testing on different papers I had and burning through a LOTTA foil.

All that to say, if you are on the hunt for foil sheets that will offer more consistent results with the Cricut Foil Tool on other papers, I’d definitely give the Gemini Multi-Surface Foils a try!

Thanks for stopping by and I hope you are enjoying fun times with family and friends this Holiday Season—I just made hot cocoa bombs with my granddaughters! I now fully understand why just one well-made, handmade hot cocoa bomb can be quite spendy! But, the experience with the littles was PRICELESS!!!

Peace!


Disclosure: I include affiliate links to the products used in my projects and make a small commission when you purchase via those links, at no extra dimes to you. 🙂 Your support is appreciated more than I can say!

OTHER SUPPLIES MENTIONED:

NEW TO THE SHOP - HALLOWEEN TREAT HOLDER SVGs

Just a heads' up if you loooooove Halloween like my house does!

I've added some new digital cut files to the shop for making Halloween Treat Holders/boxes--I call ‘em holders because they aren’t “lidded”. They're available individually, in case you have a favorite, or you can get all 5 designs in a bundle, for extra savings!

↑ click the photo to visit the link

They're so stinkin' cute and make me smile! Originally, I was just going to make a ghost, 👻 and then the creative juices took over, after some excited pleading by my daughter (age 33) for more, which included her batting her eyelashes at me, LOL! Anyhoo, I know my youngest granddaughter will be thrilled with the ghost, and my oldest will be giddy over the witch. Hah!

Individual designs linked below:

You are probably already so experienced you don't need it, but I did upload a quick “How to assemble” video HERE--the bases all assemble the same and you can easily follow how to layer the pieces by looking at the photo of the finished design.

I love adding those crinkle paper shreds to these things--I even found some in black at a big box craft store (rare excursion off the island)--fist pump! But what else would I stuff these goody boxes with? Well, here's a handy starter list of ideas:

For the li'l boos:

  • Snack size candies or mini/fun size candy bars--individually wrapped RICE KRISPY TREATS!

  • Fruit Gummies/Snacks

  • Cookies

  • Stickers

  • Fun shaped erasers and/or pencils with fun Halloween toppers

  • Glow sticks or bracelets

  • Mini Play Dough or “slime”

  • Halloween Pez Dispensers (with refills, of course, LOL!)

For growed up ghouls:

  • Gift card (I don't know anybody that wouldn't love finding a gift card for a fancy coffee inside one of these)

  • Lip Balm (did you know Burt's Bees makes a limited edition “Burt's Boos” set of 3 flavors??? Their standard peppermint + Chai Tea and Pumpkin Spice!!!)

  • Pocket hand-sanitizer or lotion

  • Tazo Pumpkin Spice Chai Tea Bag + honey sticks

  • White chocolate covered pretzels (sweet & salty is always a big hit)

  • Snack size peanuts or smokehouse almonds

You get the idea--thankfully, snack and mini size treats abound even at your grocery store, making it easy and fun for you to treat the tricksters in your life!

Have a creative day!

IS A CRICUT RIGHT FOR YOU?

This post and photos may contain Amazon and/or other affiliate links. If you purchase something through any of these links, I may receive a small kick-back at no extra charge to you. I have purchased all supplies/tools/machines mentioned out of my own pocket.


Truth: I absolutely LOVE my Cricut Maker. Waaaaay back when the original Cricut digital die cutter was introduced, I will admit my reaction was luke warm. Because cartridges. 🙁 I had (still have) an aversion to spending $50-70+ (?) on a collection of 100 or 200 designs, and then discovering I really only like, and will actually use, maybe 10 of them. 🙅🏻‍♀️

Fast forward to 2020. On the one hand, I regret waiting so long, and on the other, waiting through the advancements in technology with these machines has led to VAST improvements! After owning a number of other digital die cutting machines (and, yes, I admit I was also influenced by a friend who raved about hers!), I decided it was time to try the Maker out.

Shortcuts to the content in this article:

My current storage system for the machine, accessories and vinyl.

WHAT IS A CRICUT? (Pronounced “cricket”, not “cry-cut”)

A Cricut is a digital cutting machine, also known as a “plotter”. It is available in various models from the Maker (the big sister), the Explore/Explore Air 2 (middle child) and the Joy (baby/uber portable).

WHAT CAN IT CUT?

  • The Joy can cut over 50 different materials, that include precut/scored cards, 80# card stock, sticker paper, vinyl, etc. Designed for smaller projects and lighter weight materials, its small, compact form and weight make it perfect for crafting on the go/while traveling. It can also draw and foil with accessory pens/markers and tips designed specifically for the little power-house.

  • The Explore Air 2/Explore 3 is capable of cutting over 100 lightweight materials, like card stock, poster board, vinyl and craft foam sheets, etc. It can also draw/write with accessory pens/markers, apply foil, score paper as well as cut bonded fabric.

  • The Maker/Maker 3 can cut everything the Explore Air 2/Explore 3 does, PLUS it can also cut balsa wood, leather, matboard—over 300 different materials.

    The key difference between the Maker and the Explore models being that the Maker has the most horse power, and with its unique Adaptive System, makes use of a variety of rotary style blades for certain applications and Quick-swap housings for even greater convenience and capabilities.

To compare the most recent models in extensive detail, click HERE.

Sidebar: Since I bought my machine, Cricut has released the next generation versions, the Maker 3 and the Explore 3; these are designed to work with Smart Materials and when using them, can cut at accelerated speeds.

WHAT SOFTWARE DOES IT USE?

Cricut machines come with their own FREE software; Design Space is their full-featured, cloud-based desktop software, available for Mac and Windows. Also available for free are the Cricut Joy app, and Design Space Apps for both iOS devices and Android.

Using the software, you can upload SVGs (Scalable Vector Graphics), also known as cutting files, and use them to cut various types of designs from greeting cards, gift boxes and 3D type items. In conjunction with your home printer, you can also print PNG (Portable Network Graphic) designs and then cut them out with your Cricut machine, a feature known as “Print Then Cut”; yes—as in you can make your own die cut stickers!!! I’m hoping to do an article in the future on that, once I’ve tested some sticker materials out, but if you want to learn right away, there are TONS of tutorials on YouTube for making DIY stickers with your Cricut.

IS THE SOFTWARE HARD TO LEARN?

There’s always a bit of a learning curve with anything new, no matter what it is! That said, the Design Space software is actually very easy to use; below I have a video showing the basics of uploading an SVG file and preparing it for cutting:

WHERE CAN I GET DESIGNS OR CUTTING FILES?

Cricut offers a subscription to their design library, called Cricut Access. The monthly fee is about $10USD for access to thousands of designs. Additional fees are charged, on top of the monthly Access subscription, to use licensed items, i.e. Disney. Access designs cannot be downloaded to your computer. Basically, it’s like a rental system; if you discontinue your Access subscription, you will no longer be able to use those particular designs. You can also choose to purchase individual files as you go, without a subscription to Access, but you will not be able to download them permanently onto your computer or a separate drive; they will simply be permanently available in your Cricut Library.

You can also purchase designs and SVG cut files from a wide variety of places, such as Etsy, Silhouette’s Design Store, and independent digital design shops, such as mine. My shop is new and my inventory small at this point, but I plan to grow it.

When you purchase a digital design or receive it as a “freebie”, you do not own the artwork itself; you are granted a license with terms of use, which you should always read and keep somewhere for reference later on. Some licenses allow personal use only, and others allow commercial use under certain situations or with stipulations. Any legitimate designer will include a license that explains their terms of use for their files and these will vary from one designer to the next.

When you sign up for my shop mailing list, you will receive a coupon to get the Good Vibes Only Card SVG file shown in the video for FREE.

WHO IS A CRICUT FOR?

A Cricut machine is not a cheap investment so I cannot recommend one for the occasional/rare crafter.

However, if crafting is your hobby, something you enjoy on a regular and steady basis, OR you run a small handmade business, I think it’s an excellent investment! These machines are amazing and will enable you to make all kinds of things from greeting cards to personalized garments/wearables, party and home decor!

WHERE CAN I GET A CRICUT AND WHERE ARE THE BEST DEALS?

You can buy one on Cricut’s website, HERE. And, when they are running a sale, it’s often a really good one. As of this writing, they are currently running a limited time sale this week through 09/24/2022, as well as offering FREE shipping & handling on orders of $99 with code SEPSHIP , making it a great time to dive in for yourself, or as a gift for a crafty loved one! When I purchased the Maker, I also purchased an Explore Air 2 for my daughter and my son’s girlfriend as gifts for Christmas; neither are really into stamping, but both enjoy paper crafting and are very creative.

You can also check out my Tools & Supplies page, for deals on accessories, etc. I’ve found on Amazon.

WHAT OTHER BRANDS OF DIGITAL CUTTERS ARE THERE?

Silhouette makes the Portrait, suitable for 8.5 x 11” materials and the Cameo, which is available in 12, 15 and 24” feeds, the Brother Scan N Cut features a 12” feed.

These are all highly capable machines! I’ve owned a Portrait, a Sizzix Eclips (long since discontinued), and a Brother Scan N Cut. There is no “best”; there is only what works best for YOU. I have just come to love working the most with the Cricut Maker and any info I share here will pertain to that machine specifically.

Will I upgrade to the Maker 3 or invest in an Explore 3? I suppose I would if I wanted to work with Smart Materials and the faster speeds associated with that. But, I’m pretty happy with what I have and don’t feel a desire for either of those features.

Questions? Leave them in the comments below!

Hope this article has been helpful!