
Click on the graphic above to go straight to the release page.
Have you determined what you wanna make for your holiday cards this year? Cuz you’re in luck today! The Ellen Hutson Holiday 2021 Release just dropped! We’ve got snowflakes, stockings, festive holiday botanicals, bold typography and some lighthearted snark for the insides of your greetings (HINT: take a close look at Sending Holiday Cheer on that release page; just sayin’ . . . ) that will elicit some laughs from the recipients of your creations!
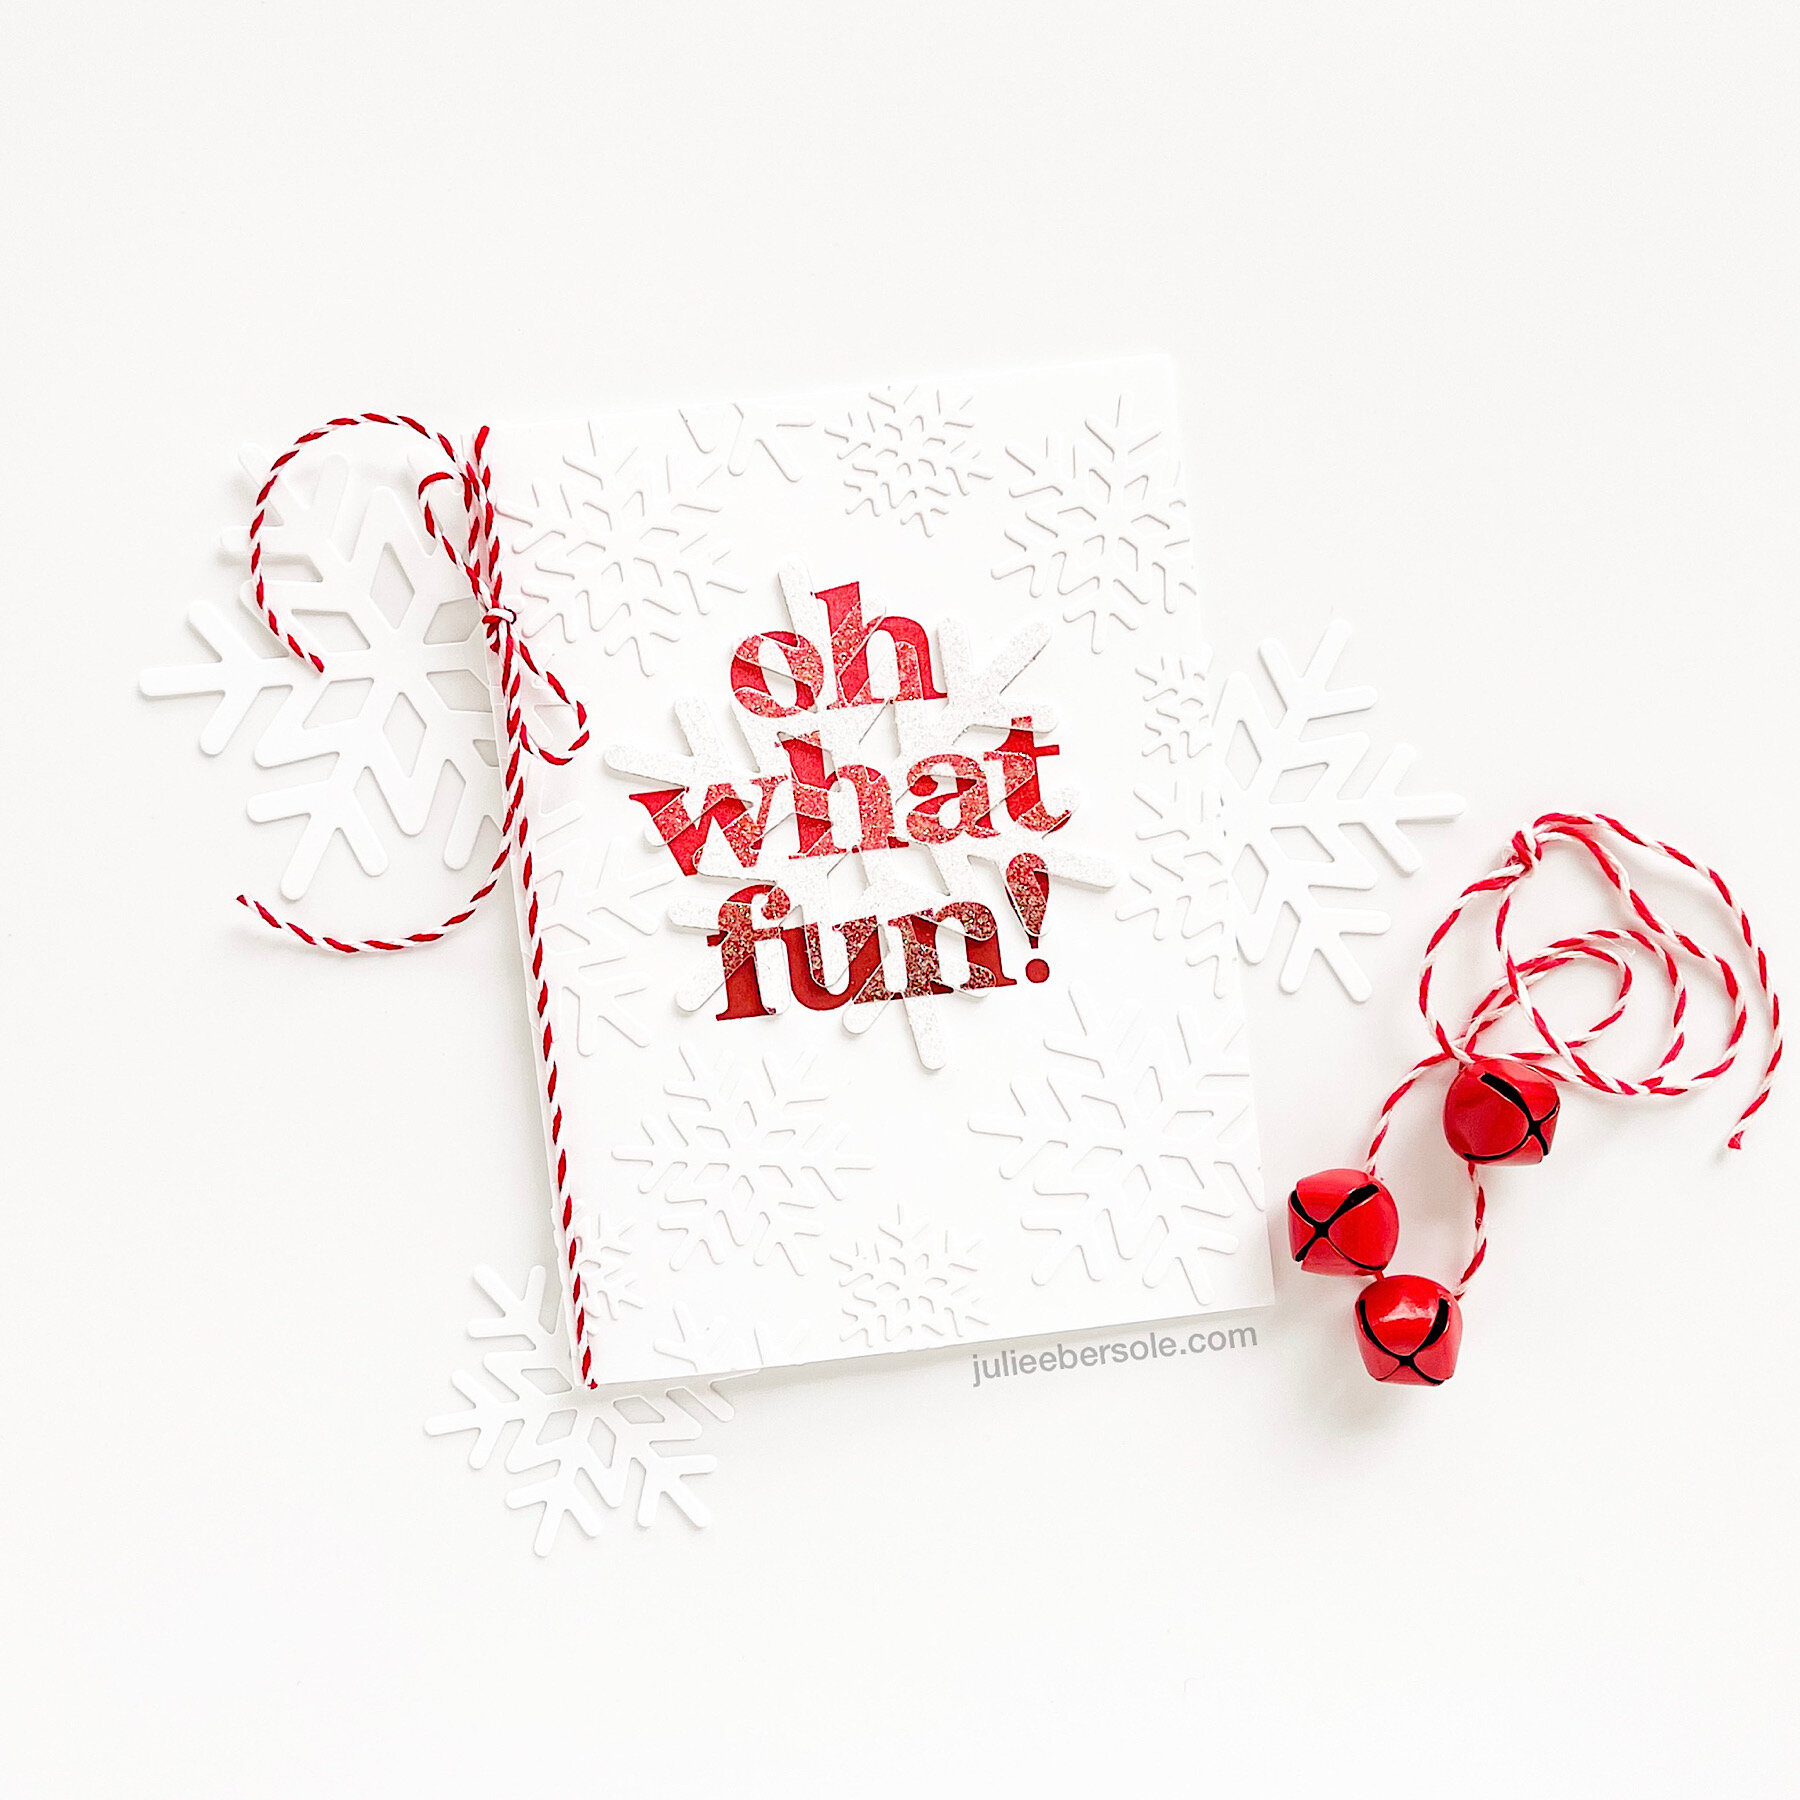
feat. Essentials Snowflakes Die Set / Oh What Fun Stamp Set (Gift with $75 purchase)
Today I wanted to highlight the Gift With Purchase Set “Oh What Fun”—I adore the modern lettering and how nicely it plays with this “eclipse” technique, using the new Essentials Sowflakes set (the largest of the set was used to create the eclipse, and the other sizes were layered all over to create a faux embossing folder effect!
“On What Fun” will be included with any orders of $75 at ellenhutson.com Oct 15-17 (while supplies last; please see the website for details).

The ombré inking effect on the sentiment was achieved by inking and stamping first with Rockin’ Red (a stamp positioning tool, like the MISTI, is key to creating this effect with precision), then inking the lower half of the sentiment with Peppermint Scrub, blending the edge with a smooth blending sponge, to avoid a hard line, and stamping again directly over the first impression. The end result will be a beautifully smooth transition from the red to the deeper almost wine hue. I’m a sucker for ombré . . .
If you’re not familiar with the “eclipse” technique, you can see me demonstrate it during a LIVE with Ellen that we did for Summer of Stamping. It’s definitely one of my all-time favorite techniques. Because easy.
As for the faux embossing folder effect? I have a tip for ya’:
Apply Stick-It Sheet adhesive to the back of your card stock BEFORE die cutting the snowflakes; then you can just peel and stick ‘em wherever you want on your card front all quick-like. When you trim off snowflakes that end up hanging off the edge of your card front, many of them can be positioned elsewhere you feel there are any gaps (along the outer straight edges). •fist pump•
I’ll be sharing more samples in the coming days—thanks so much for reading!
SUPPLIES:
Oh What Fun (Gift With Purchase) Stamp Set
Essentials Snowflakes Die Set, from the 2021 Holiday Release
Solar White Heavyweight 110 lb - 25 pk, Neenah Classic Crest Cardstock
New & Improved Mini MISTI Laser Etched Stamping Tool (6-1/8 X 7), My Sweet Petunia
Platinum 6 Die Cutting And Embossing Machine, Spellbinders Tools
Disclosure: Yup, those are affiliate links to the products used in my projects and I make a small commission when you purchase via those links, at no extra cost to you. Thank you for buying all the things!
